


About
Because I can't get enough Kenshin!
I like woodburning. So I found this wooden bracelet blank, and decided to do this project. Though I didn't know what to do at first. So I had it for... several months... and then I made up my mind, so here is my project!
Open to tons of ideas!
-
 redwolf54 added Woodburned Bracelet to craftyness
08 Nov 22:33
redwolf54 added Woodburned Bracelet to craftyness
08 Nov 22:33
-
 Tyler T. favorited Woodburned Bracelet
14 Oct 05:23
Tyler T. favorited Woodburned Bracelet
14 Oct 05:23
-
 Francine M. favorited Woodburned Bracelet
29 Jan 05:50
Francine M. favorited Woodburned Bracelet
29 Jan 05:50
-
 Bevvii D. added Woodburned Bracelet to 3Y3 <3
22 Nov 02:51
Bevvii D. added Woodburned Bracelet to 3Y3 <3
22 Nov 02:51
-
Amanda S. favorited Woodburned Bracelet
04 Nov 02:16
-
 zoegirl221 added Woodburned Bracelet to Jewelry
15 Sep 20:21
zoegirl221 added Woodburned Bracelet to Jewelry
15 Sep 20:21
-
 Veronica B. favorited Woodburned Bracelet
30 Aug 16:25
Veronica B. favorited Woodburned Bracelet
30 Aug 16:25
-
 kathy.w.medders favorited Woodburned Bracelet
07 Aug 04:28
kathy.w.medders favorited Woodburned Bracelet
07 Aug 04:28
-
 Bayou Jenn added Woodburned Bracelet to Jewelry
15 Jun 23:32
Bayou Jenn added Woodburned Bracelet to Jewelry
15 Jun 23:32
-
Debbie S. favorited Woodburned Bracelet
30 Mar 23:32
-
 Step 1
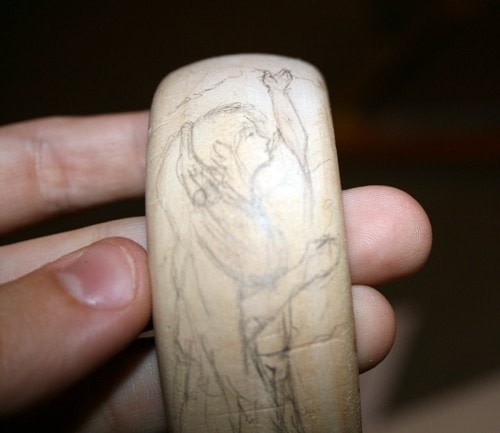
Start with your wooden blank and an idea. Sketch out everything so there are no suprises.
Measure the circumfrence and width to make sure everything works out. (I didn't follow this step, but it would make it much easier.)
-
 Step 2
Transfer your image to the braclet. You can use carbon paper, or whatever, or you can sight it. I just used a pencil. Soft pencil works well because you can erase well. Ink erasers and sandpaper work wonderfully for really, really big mistakes (like keeping it in your purse and getting ink splotches all over it)
-
 Step 3
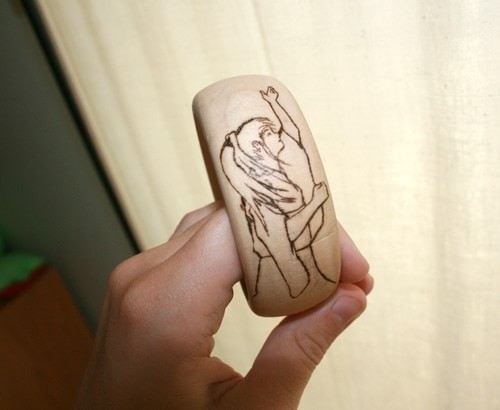
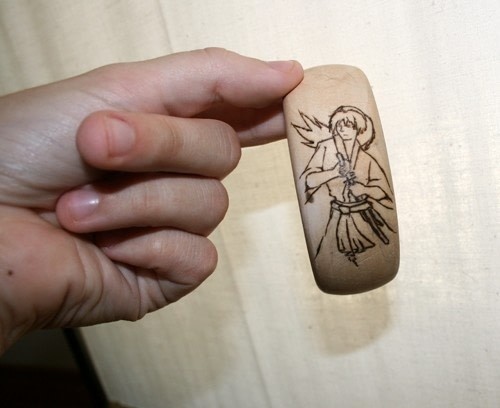
Don't forget the other side!
-
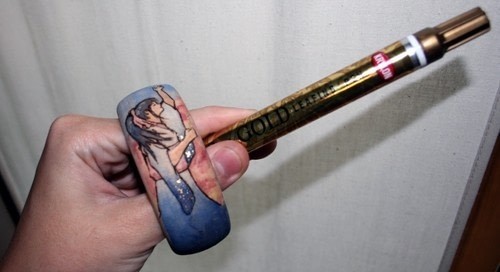
 Step 4
Woodburn!
I used a thin point and a thin flat caligraphy point, but the wedge point that comes with most pyrography tools would work just as well with a delicate touch. Erase the pencil after you've gotten all the lines down. If you make a mistake, sandpaper is your friend.
-
 Step 5
Don't forget the other side.
-
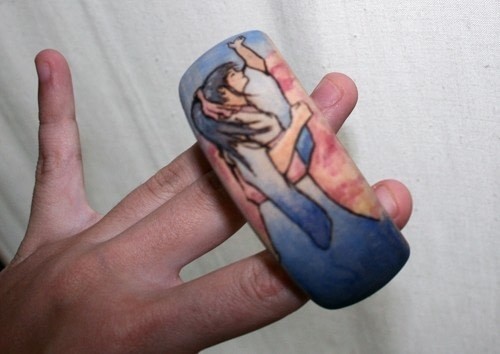
 Step 6
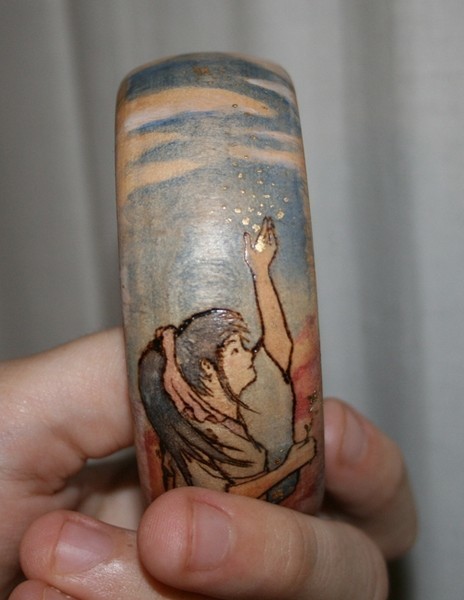
Watercolor!
Thin, thin layers of watercolor, let the woodgrain shine through so it's almost like a stain. Except for white areas (not shown) and the very, very dark (bottom of kimono).
(I forgot the other side.)
-
 Step 7
I took a krylon gold leaf pen that I found at wal-mart and using a thumb tac did some really tiny designs in gold. There are little butterflies and dots all over!
-
 Step 8
Stars! (And the watercolored side I forgot)
-
 Step 9
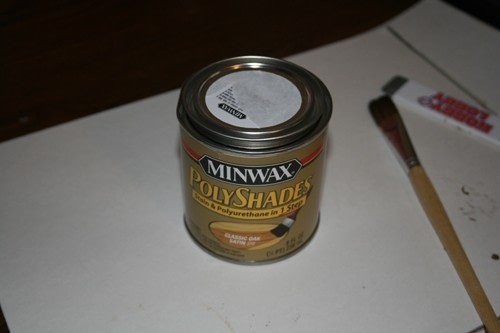
Next, stain!
Then, polyurethane.
Or, I found this fun stuff called Polyshades. Stain and polyurethane in one easy step. I chose satin finish, but it also comes in high gloss.
Put on one coat, let dry.
One more coat..
Let dry, and it's done! It takes FOREVER for this stuff to dry *sigh*Adds a kind of antique feel, and tones down the color, but the high metalic krylon gold still shines!


You did a wonderful job , I do hope you continue in this venue I can see you going far ! !
CO + K User
That is so gorgeous. You did a wonderful job. :]