

About
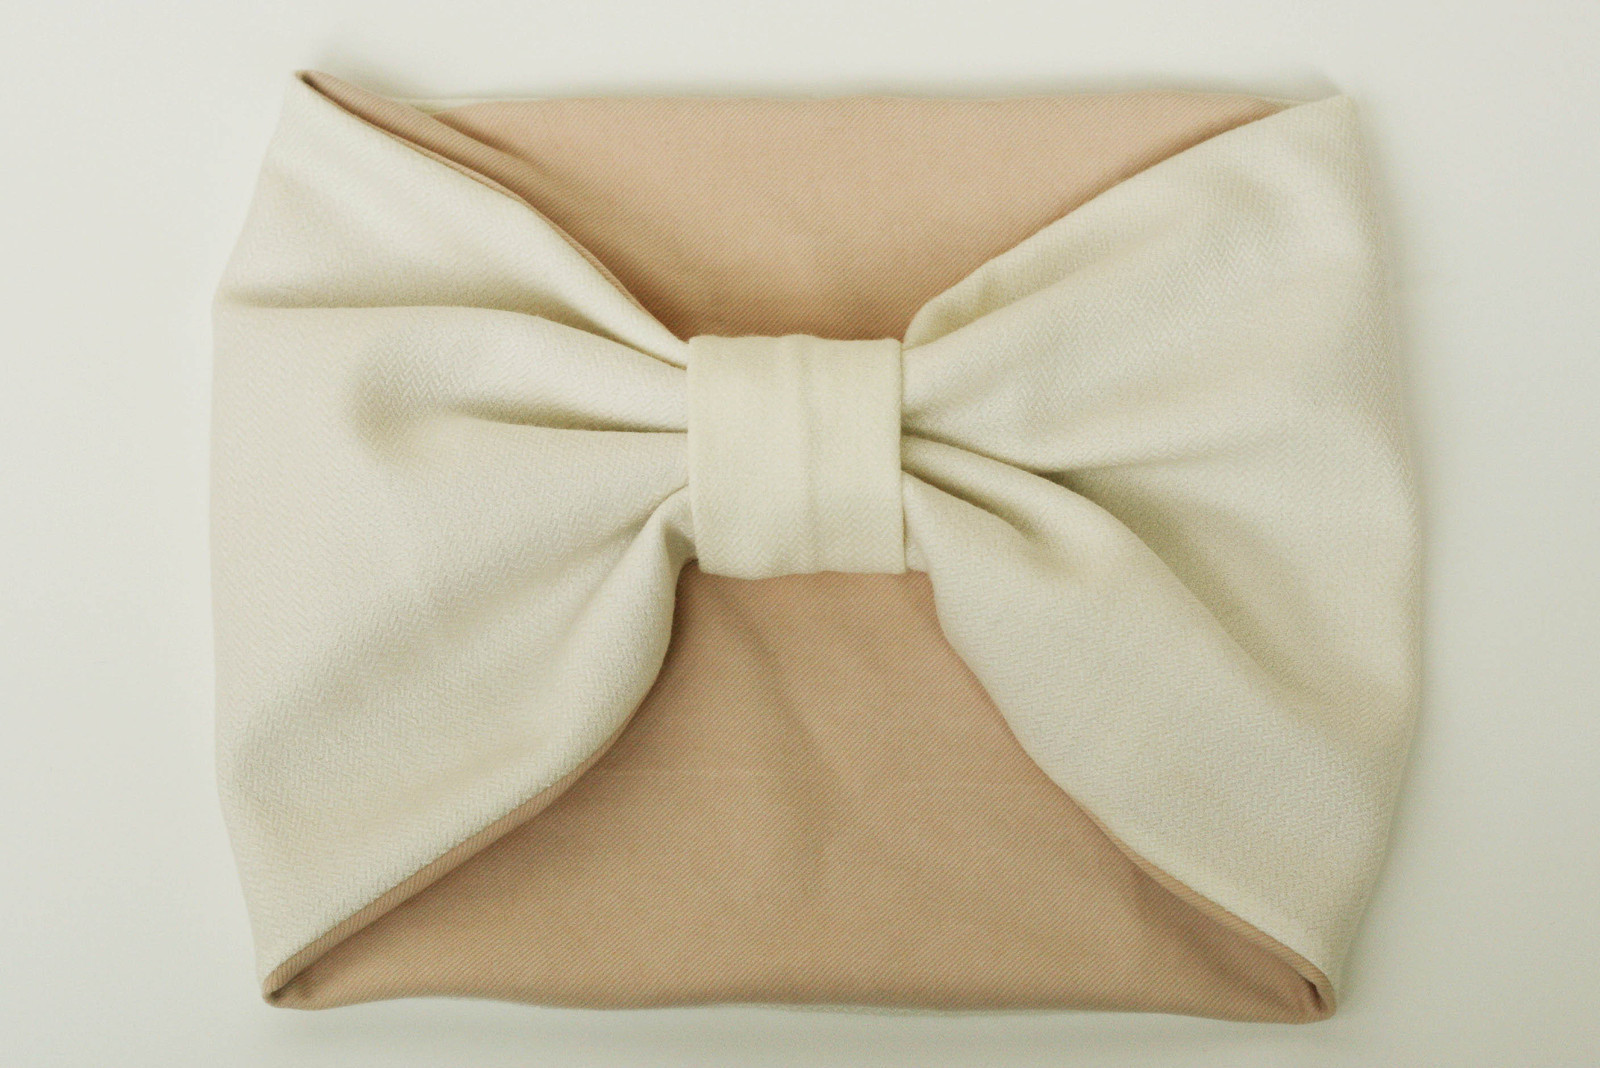
Sew a cosy winter warmer cowl.
This is a fun cowl scarf to keep you warm and stylish during the winter. The cinched part makes the cowl look like a fun, oversized bow. Because this is a tube there’s a slightly tricky part when sewing up the short ends. Be sure to read through the instructions carefully before and while sewing. Take your time and you’ll be sure to get it!
-
 Emma J. commented on Winter Warmer Cowl
22 Jan 11:40
Emma J. commented on Winter Warmer Cowl
22 Jan 11:40
-
 Sophie G. commented on Winter Warmer Cowl
12 Dec 06:11
Sophie G. commented on Winter Warmer Cowl
12 Dec 06:11
-
 Stesnyashka16 added Winter Warmer Cowl to Sewing
27 Mar 12:41
Stesnyashka16 added Winter Warmer Cowl to Sewing
27 Mar 12:41
-
 Kaelen H. favorited Winter Warmer Cowl
26 Nov 01:48
Kaelen H. favorited Winter Warmer Cowl
26 Nov 01:48
-
 Bolaa L. favorited Winter Warmer Cowl
16 May 17:58
Bolaa L. favorited Winter Warmer Cowl
16 May 17:58
-
 AwkwardFlea added Winter Warmer Cowl to Ideas
21 Mar 22:38
AwkwardFlea added Winter Warmer Cowl to Ideas
21 Mar 22:38
-
 x_niccadee added Winter Warmer Cowl to make this
21 Mar 03:55
x_niccadee added Winter Warmer Cowl to make this
21 Mar 03:55
-
 Anastasia favorited Winter Warmer Cowl
23 Dec 00:08
Anastasia favorited Winter Warmer Cowl
23 Dec 00:08
-
 zoegirl221 added Winter Warmer Cowl to accesories
16 Sep 00:10
zoegirl221 added Winter Warmer Cowl to accesories
16 Sep 00:10
-
J F. added Winter Warmer Cowl to Head / Neck
14 Sep 16:56
You Will Need
-
 Step 1
You need:
37″ x 15 1/2″ main fabric for scarf
37″ x 15 1/2″ contrast fabric for scarf
10″ x 7 1/2″ main or contrast fabric for the bandCut out the fabric for the scarf body and the band.
-
 Step 2
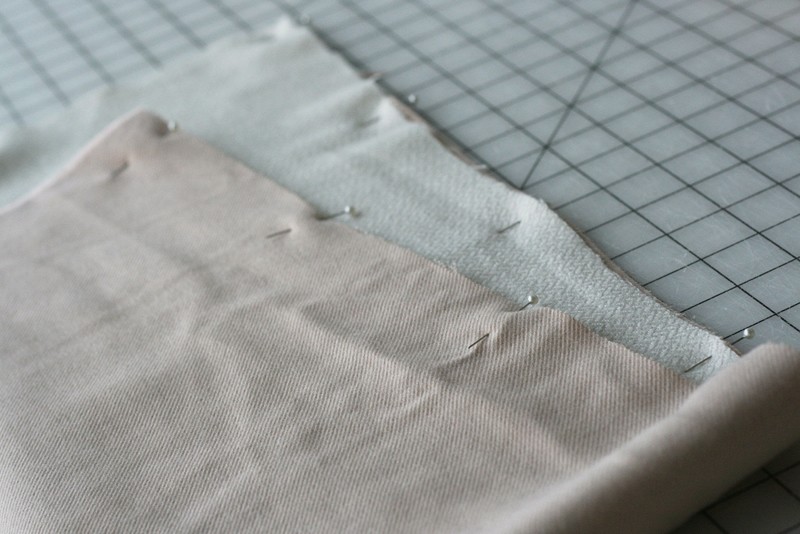
Right sides facing, pin the long sides together, leaving the ends open.
-
 Step 3
Using a 5/8″ seam allowance, sew both long sides of the scarf. Press the seam. Now you have a long tube.
-
 Step 4
Finish your seams using your method of choice. Here we used an overlock stitch on the sewing machine. You can try a zigzag stitch, serging the edges or simply cutting the edges with pinking shears.
-
 Step 5
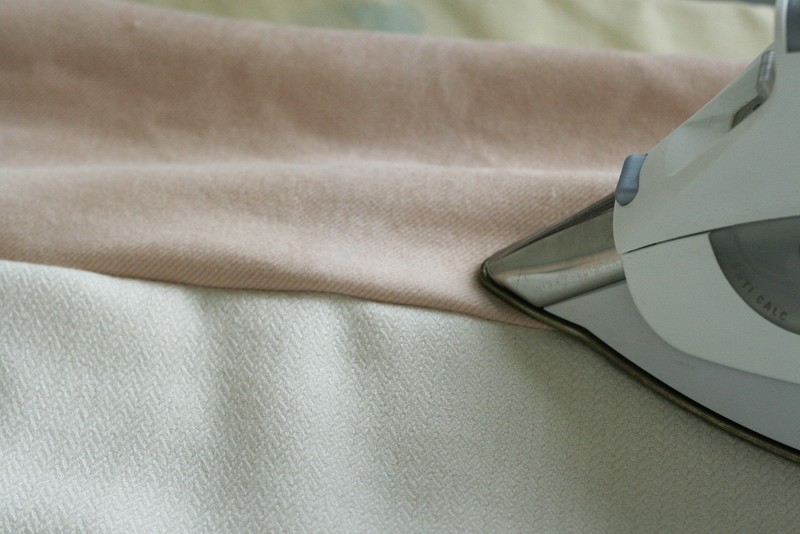
Turn to the right side. Press the seams again.
-
 Step 6
Fold the scarf in half so that the ends are on top of each other. Pin the seams together through two layers, leaving the out the contrast fabric.
-
 Step 7
Pin along the contrast fabric.
-
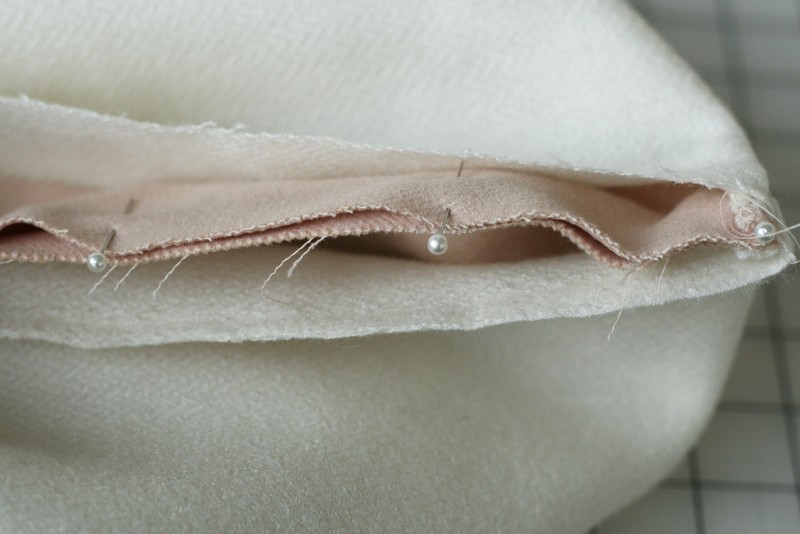
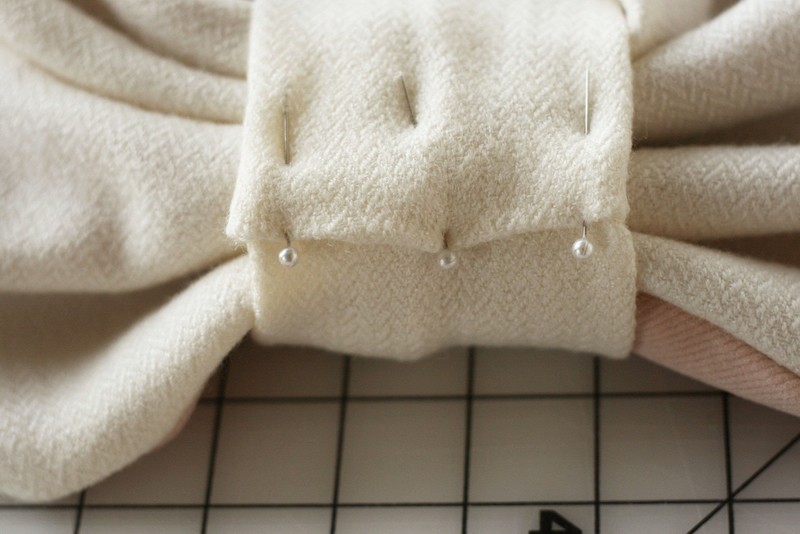
 Step 8
You are pinning along the inside of the tube. In order to sew this, you'll need to leave about a gap. Place a pin 3" from the seam line in the contrast fabric (shown in white). Do this at the bottom seam line as well. You'll have a small gap in your contrast fabric.
-
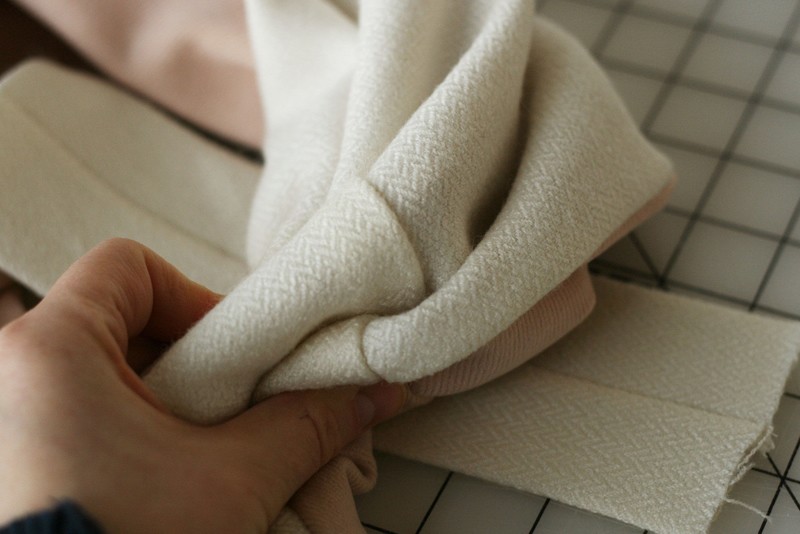
 Step 9
Because of the unpinned gap, you're able to pull out the pinned section. It looks like a seashell.
-
 Step 10
Start sewing at the first pin on the main fabric. Back tack. Continue sewing onto the contrast fabric and back onto the main fabric. If you are able to push the fabric through a little further, do so. Be careful not to stitch through more than two layers of fabric. Back tack when you finish the seam.
-
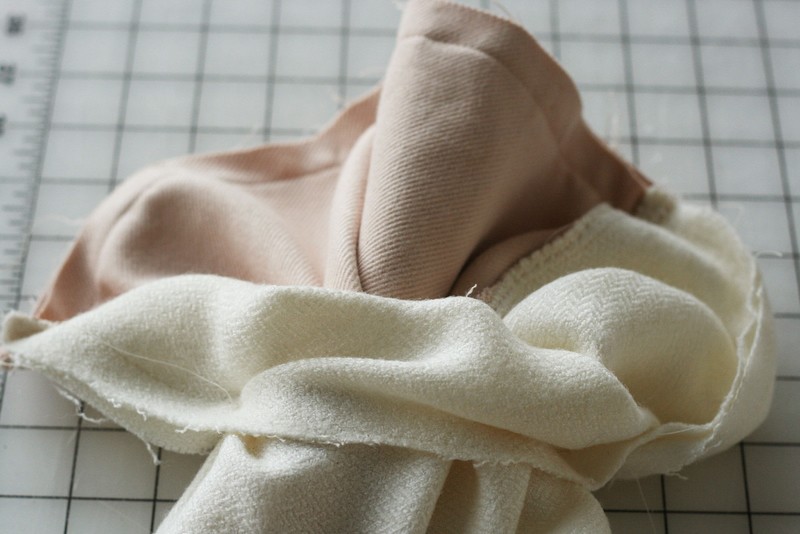
 Step 11
Now you still have a seashell, except it’s been sewn. See how the body of the scarf is coming out of that small opening? That’s exactly what you want.
-
 Step 12
Snip the threads. Begin to push the seam you just sewed into the scarf, pulling the main fabric around it.
-
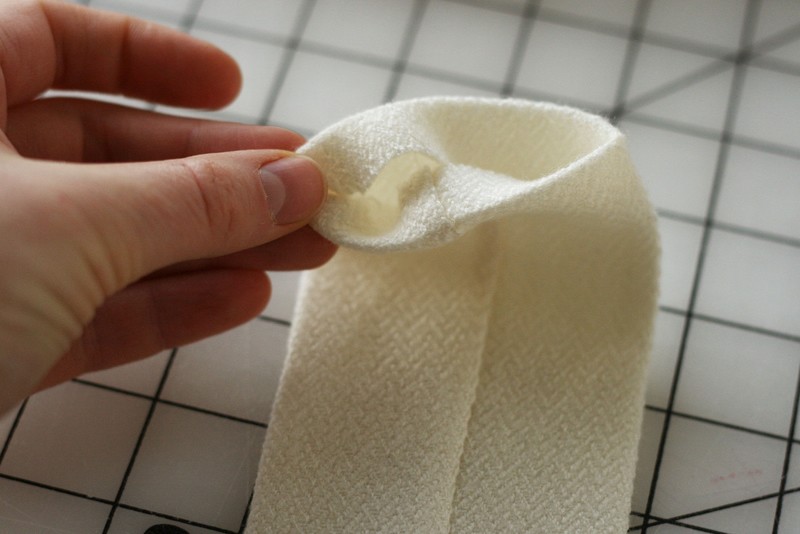
 Step 13
There will be a hole a few inches long on the side of the main fabric.
-
 Step 14
Match seam allowances on the inside and pin in place. Hand sew across using a slip stitch.
-
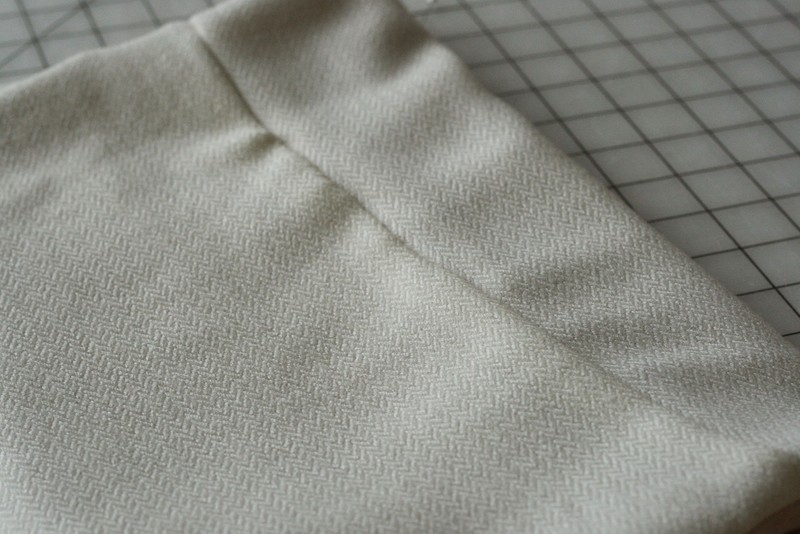
 Step 15
The seam is closed all the way around the cowl now. If there’s any puckering, don’t worry because it will be concealed by the band.
-
 Step 16
Time to make the small band! Pin the sides of the band together, right sides facing each other.
-
 Step 17
Sew up the sides. Pull the fabric through to the right side. Press the seam into the middle of the band.
-
 Step 18
At one end of the band, push the fabric in about 5/8″, forming a crisp edge. Iron it flat.
-
 Step 19
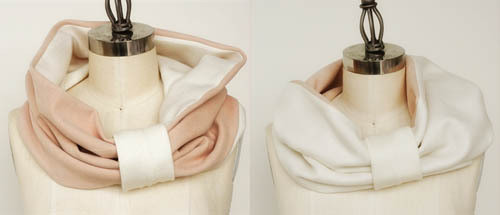
Place the band beneath the scarf, centering it over the seam. Pinch the scarf as you pull the band around it.
-
 Step 20
Push the unfinished edge of the band into the finished end about 5/8″, so one is encasing the other. Pin in place.
-
 Step 21
Here you can either slip stitch both sides or stitch through all layers. Here we used the slip stitch on both sides. Slip stitching all around produces a clean finish. Tack the band to the scarf.


https://www.mauvetree.com/
www.instylejackets.com