


About
a tisket a tasket, a weaved corkboard?! oh my!!!!
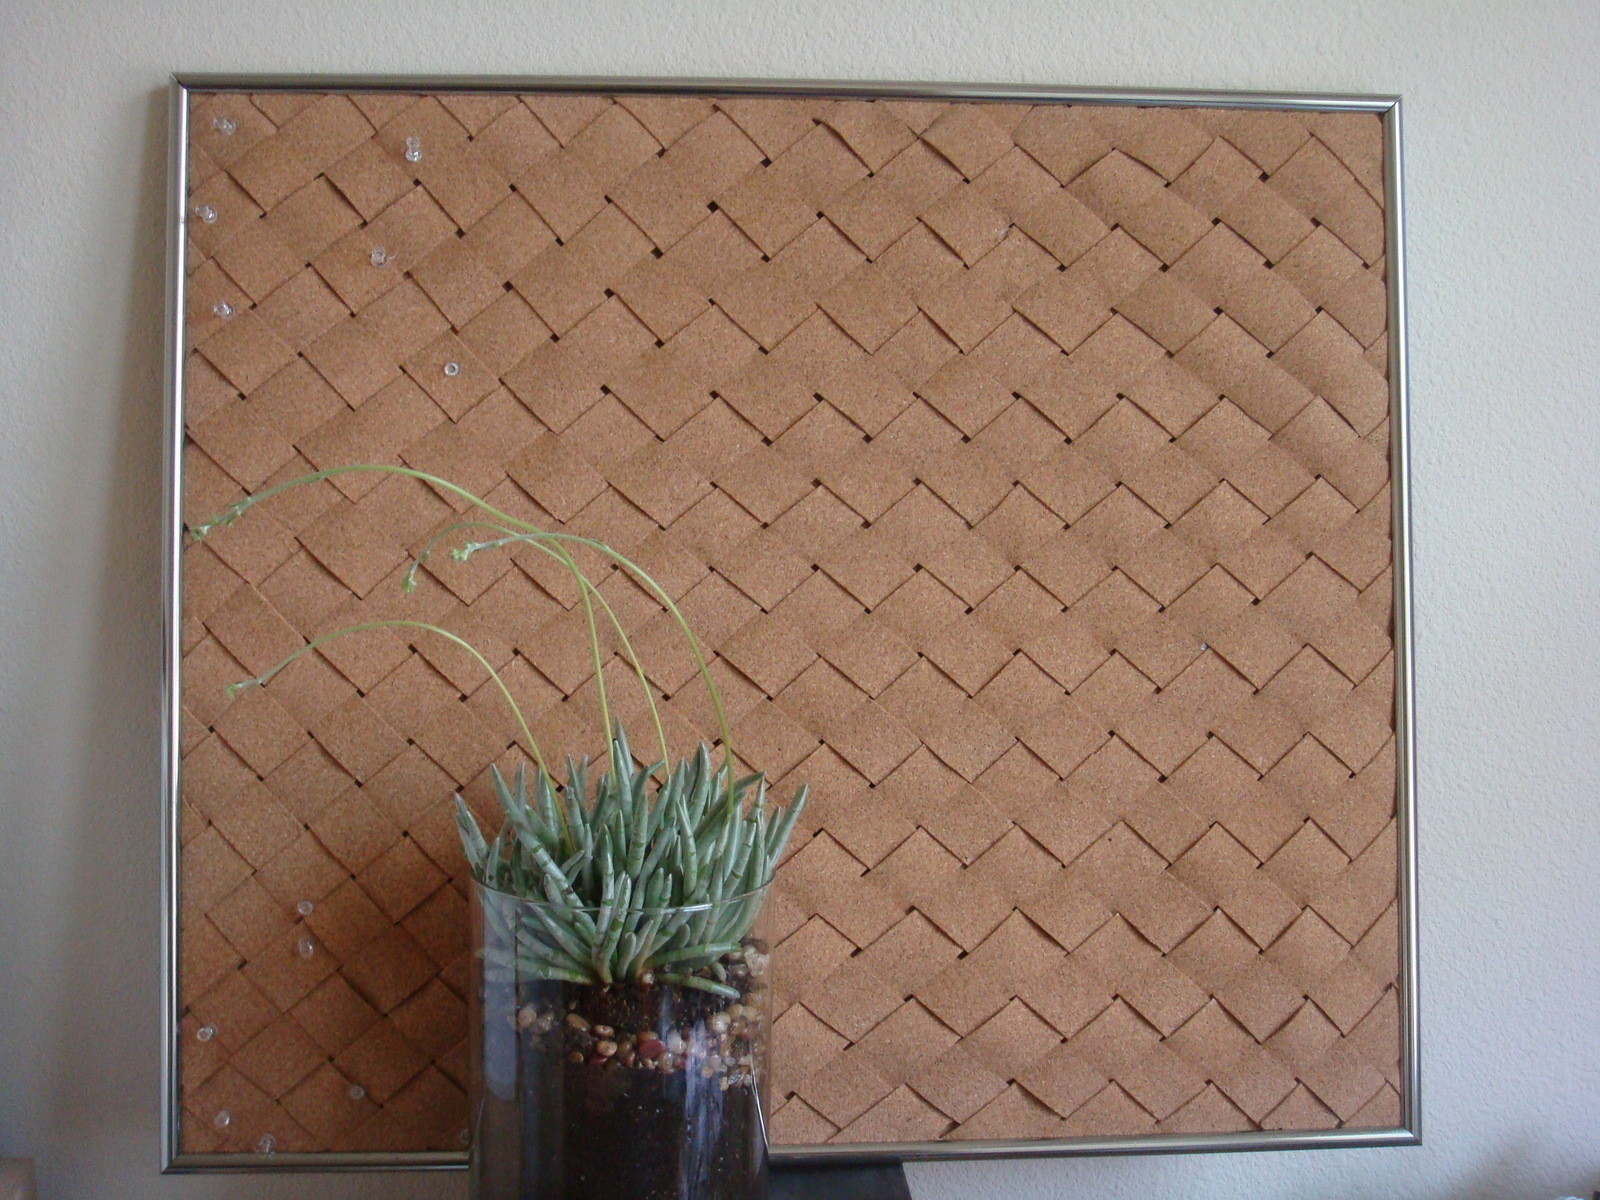
I am slowly but surely redesigning and decorating my art studio, after hours and hours of searching for the perfect idea for a much needed cork board in any craft area.... painting.... reframing, just didn't cut it for me. I ran across a beautiful pic on flickr from someone who had taken a picture of their weaved cork board in a hotel they were staying... I thought... I HAVE to had one! I love the look & color of natural cork, and the weaved version just gives my wall a different texture from the norm.
Let me know if you have any questions...
-
 Cheryl H. favorited Weaved Cork Board
25 Feb 09:14
Cheryl H. favorited Weaved Cork Board
25 Feb 09:14
-
 Kimya J. favorited Weaved Cork Board
13 Dec 02:49
Kimya J. favorited Weaved Cork Board
13 Dec 02:49
-
 amanda.shillito favorited Weaved Cork Board
12 Jun 20:04
amanda.shillito favorited Weaved Cork Board
12 Jun 20:04
-
 HylianWriter534 favorited Weaved Cork Board
17 Sep 21:37
HylianWriter534 favorited Weaved Cork Board
17 Sep 21:37
-
 diana.douglas.940 favorited Weaved Cork Board
11 Jun 03:31
diana.douglas.940 favorited Weaved Cork Board
11 Jun 03:31
-
 Mary B. added Weaved Cork Board to DIY Decor
15 Mar 07:56
Mary B. added Weaved Cork Board to DIY Decor
15 Mar 07:56
-
Mary B. favorited Weaved Cork Board
15 Mar 07:56
-
 Ichigo M. favorited Weaved Cork Board
08 Aug 18:55
Ichigo M. favorited Weaved Cork Board
08 Aug 18:55
-
 Beatriz L. favorited Weaved Cork Board
23 Jun 23:35
Beatriz L. favorited Weaved Cork Board
23 Jun 23:35
-
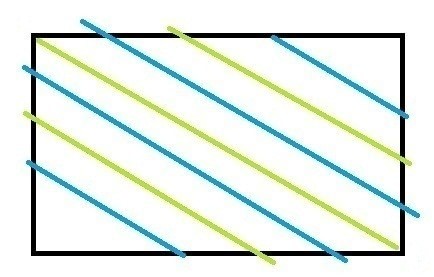
 Step 1
Determine how you want your cork board to look. I wanted mine to have a diagonal look & not the typical "checkered" horizontal design, so I knew that I would need to start with long strips. I measured my board from one corner to another like so...
Then I cut the strips about 1 1/4" wide. Depending on how thick or thin you cut your strips you'll achieve your own unique look.
-
 Step 2
Now with your strips of cork start by lining them up side to side in one direction...
then begin to weave more strips, over & under, going the opposite direction...
-
 Step 3
Tips: Start from the middle of your project and make your weave as tight as possible. Leave at least an inch extra , you'll cut your weave later to the size of your board/ backing.
Finish weaving your board until you have a surface a little larger than the backing.
-
Step 4
Glue. You have a choice of using craft glue or spray adhesive. I used both. Cover your backing evenly, and very carefully place your weaved surface onto the glue. It might go a little easier if you enlist someone to help you with this placement process. When everything is in place, use the heavy books to hold it down. Let the glue dry overnight.
-
 Step 5
With the glue is dry, your weaved surface should be securely attached to your backing. Cut sides evenly.
In this pic, I was still waiting for glue to dry. I held it down with thumbtacks while I was cutting.
With my edges trimmed, I very carefully started to place my frame securely around my weaved cork board...


But 'weaved' = woven