


About
No spitting required!
I threw a Pampered Chef party on the weekend and when I was shopping at the dollar store for loot bag ideas (ended up tying bags of fruit themed candies to a wooden spoon with pretty ribbon! cute!), I found these hilariously tacky pink rubber gloves so I got those to use as a prize. Then on the day of the party when I realized I was ready way ahead of schedule, I decided to try my hand at making my first apron. If it turned out, the plan was to add it with the rubber gloves for a nice door prize. The result is what follows...and it was very well received! I already have orders from those not lucky enough to win it!
-
 Whitney I. favorited Watermelon Apron
12 Aug 07:22
Whitney I. favorited Watermelon Apron
12 Aug 07:22
-
 Natalie W. favorited Watermelon Apron
17 Oct 04:59
Natalie W. favorited Watermelon Apron
17 Oct 04:59
-
 Crafterella added Watermelon Apron to 2 Broke Girls
07 Jun 13:37
Crafterella added Watermelon Apron to 2 Broke Girls
07 Jun 13:37
-
 Taina W. favorited Watermelon Apron
09 May 06:21
Taina W. favorited Watermelon Apron
09 May 06:21
-
 Afilover47 favorited Watermelon Apron
21 Dec 06:14
Afilover47 favorited Watermelon Apron
21 Dec 06:14
-
 Amy B. entered their project Watermelon Apron to Cath Kidston's Sew! Contest
16 Nov 18:15
Amy B. entered their project Watermelon Apron to Cath Kidston's Sew! Contest
16 Nov 18:15
-
Step 1
First step is getting your fabric and deciding how long you want it. I was lucky enough to have purchased a half yard of this once upon a time when it was on sale and found it in my bin and a lighbulb went off!
When I unfolded the piece it was about 1 yard by .5 yards in size. Is that enough for you? -
 Step 2
With a pair of scissors or pinking shears, cut off the corners of the ends to make a very looong half-circle.
-
 Step 3
If you want your apron to be a bit girly, add some pleats! I started in the middle and worked my way out, pinning as I went.
-
 Step 4
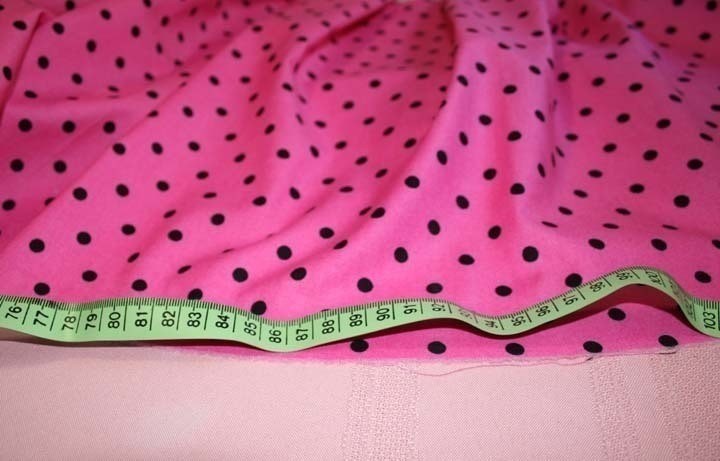
Starting at one end, use your measuring tape to see how long your hem is.
-
 Step 5
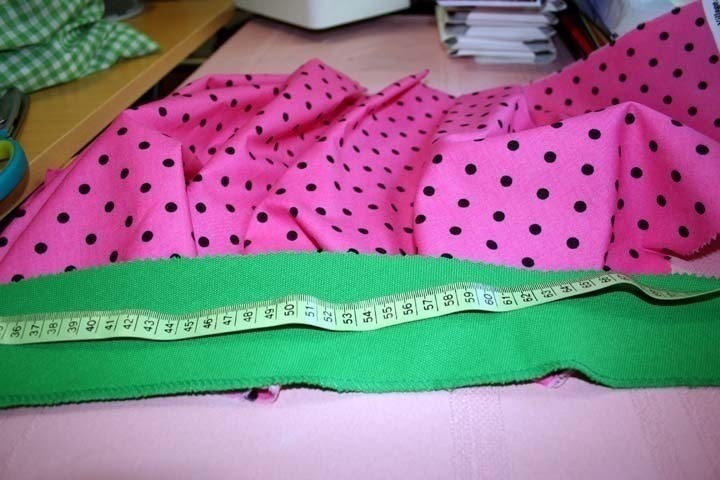
Cut out that much green bias tape. Or, if like me you don't have any green bias tape hanging around, make your own! Cut out a long strip of green fabric. I cut mine about 3 inches wide.
-
 Step 6
If you had green tape, skip the next two steps.
Take your long green strip and fold it in half lengthwise and press the fold.
-
 Step 7
Next, fold the two edges into the centre as shown. When the edges are all folded int the middle, press again. There! You just made your own bias tape! It won't be quite as good as the real thing, but it works just fine in a pinch if you want to put an edge on something in a hurry.
-
 Step 8
Now press the pleats so they lay nice and flat for you. I just pressed the tops of the pleats so the bottom would be still loose.
-
 Step 9
Now using some delicious pink thread, sew the pleats down to make your life less pinny.
-
 Step 10
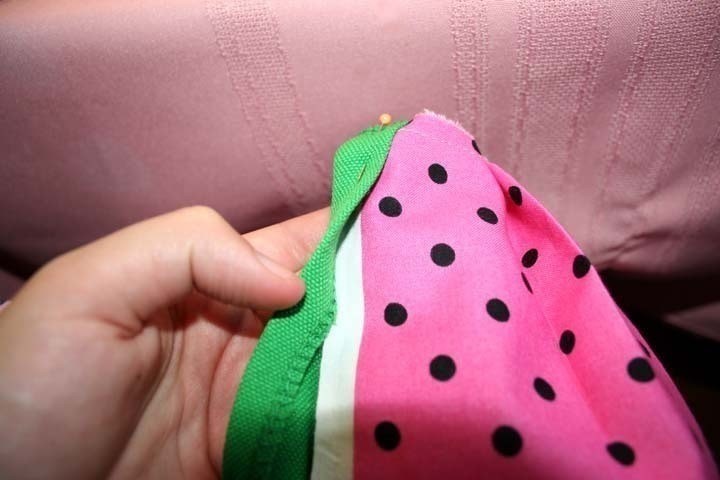
Ugh, the most time consuming an annoying of the steps - pinning on the green edge. I didn't bother hemming the edge of the pink fabric since I didn't want to lose any length, so I just inserted the raw edges right into the homemade green bias tape and pinned my life away.
-
 Step 11
Using some lucious green thread, sew on the green edge removing the pins as you go. The curves may cause you some headaches if you don't have real bias tape so just go slow and don't worry - no one will care about a pucker when it's covered in cookie dough.
-
 Step 12
Cut a piece of pink bias tape or ribbon or fabric would work too that is long enough to go around your waist and tie a bow. Fold the raw edge down to the back of the apron a little bit to give it a bit of extra strength and start pinning the pink bias tape to it. I found it was good to start in the middle.
-
 Step 13
Sew it in place!
I found it was easy to start at one end of the watermelon slice and go all the way to the very end of that length of bias tape (to seal it). -
 Step 14
Like this!
Tuck the ends of the bias tape into itself and then sew it shut so it doesn't fray. Then go back to where you started and go the other way down the other end of the tie. -
 Step 15
Voila!
It's girly and fruity!
Makes me want to get girly drink drunk whilst cooking cupcakes!The receipient loved it and modeled the finished product complete with the silly rubber gloves.


thank you!
CO + K User
CO + K User