About
Paint your own watermelon picnic blanket using a drop cloth from your local hardware store.
When planning a picnic for a nice evening out, enjoying the local food trucks, or simply heading to the park for some fresh air, you need a blanket to give yourself a nice place to sit! Here's a tutorial for you to make your own blanket with a watermelon design that will have others wanting to join you! With just a few supplies and 30 minutes of your time, you will have a new picnic blanket!
Tags
-
 Becky favorited Watermelon Picnic Blanket
15 May 11:23
Becky favorited Watermelon Picnic Blanket
15 May 11:23
-
 Summer O. favorited Watermelon Picnic Blanket
17 May 06:56
Summer O. favorited Watermelon Picnic Blanket
17 May 06:56
-
 amyistheparty added Watermelon Picnic Blanket to Backyard Picnic Summer Soiree
18 Apr 20:52
amyistheparty added Watermelon Picnic Blanket to Backyard Picnic Summer Soiree
18 Apr 20:52
-
 SilverSnake S. favorited Watermelon Picnic Blanket
30 Jan 02:17
SilverSnake S. favorited Watermelon Picnic Blanket
30 Jan 02:17
-
 Mia added Watermelon Picnic Blanket to Ideas
18 Jan 07:46
Mia added Watermelon Picnic Blanket to Ideas
18 Jan 07:46
-
amyistheparty favorited Watermelon Picnic Blanket
19 Nov 18:22
-
 Emma H. favorited Watermelon Picnic Blanket
06 Nov 21:40
Emma H. favorited Watermelon Picnic Blanket
06 Nov 21:40
-
Elizabeth R. published her project Watermelon Picnic Blanket
02 Nov 06:00
-
 Step 1
Gather all of your supplies.
-
 Step 2
Using your all-purpose sponge, you will trace a triangle (that looks like a watermelon wedge) and a curved rind for the green part of your watermelon design.
-
 Step 3
Cut out the two pieces you just traced on your all-purpose sponge. You may also cut out two rinds if you want to use two different shades of green for the rinds. Once you have cut out your pieces, trim the edges for a smooth finish.
-
 Step 4
Prepare your paint. You can see here how I used two different greens to alternate between a dark green and light green for the rinds.
-
 Step 5
Using your paper plates, pour a decent amount of each color into separate plates. You will then add the fabric medium to each plate and mix until combined. You are to add 1 part fabric medium to 2 parts paint. Fabric medium mixed into the paint will help the paint adhere to the fabric and soften the paint once it is dry.
-
 Step 6
Practice making a watermelon using your sponges on a piece of paper for a test run. This will ensure that you have the perfect watermelon cut out for your blanket.
-
 Step 7
Using your triangle sponge, dip it in the coral paint and start painting your watermelon wedges throughout the blanket. Press down firmly and use enough paint to make sure the design is fully applied to the blanket. It's okay if you have to stamp over a wedge more than once.
-
 Step 8
Using the rind sponge and green paint, apply your rinds! I alternated between the dark green and light green paint (using two different sponges) when adding the rinds to the watermelon wedges.
-
 Step 9
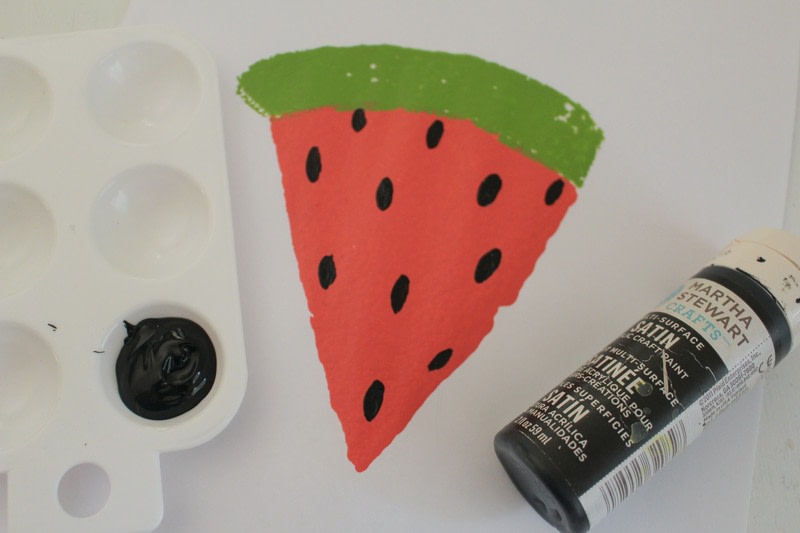
Once the paint has dried after waiting 15-20 minutes, use the small paint brush and black paint to create seeds on each watermelon.
-
 Step 10
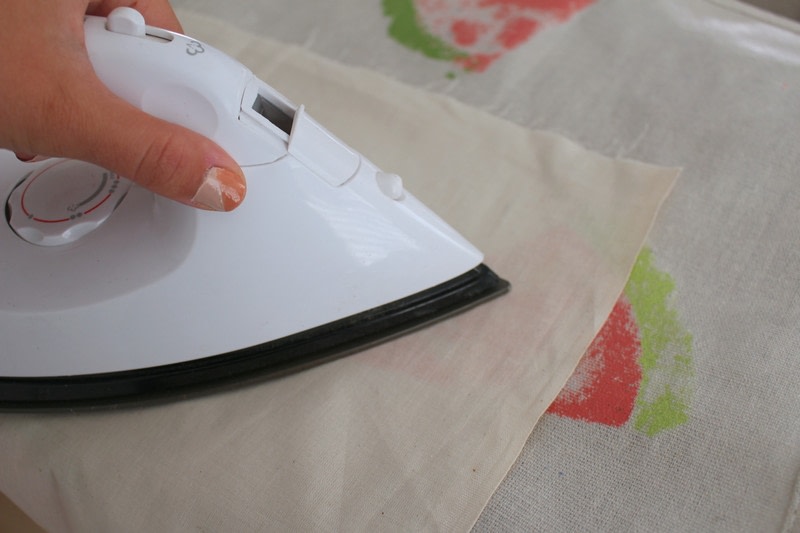
Here is where you will have to be patient! The paint needs to dry for 12 hours or overnight. Once this is done, flip your drop cloth over with the watermelons facing down. Place the extra piece of fabric over each watermelon as you iron over each watermelon for at least 10 seconds to help seal the paint.
-
 Step 11
You are now done and can enjoy your new blanket for your next outdoor even!