


About
Perfect for those hot summer days!
I was at the beach with my friends, and they were eating slices of watermelon (which, ironically, I hate). So I thought, what else could I better do with my time than paint my nails? And there you have the birth of the watermelon nails. If you already have hundreds of bottles of nail polish, like myself, then this won't cost you anything. I'm not very artistic or steady with my hands, so this will turn out better if you don't shake around as much as me. Trust me ;)
The full list of things you'll need is not showing up for some reason when I preview this, so I've provided it just in case in Step 1.
I'm not exactly sure of the time, but it did take me a while to do this. It'd be faster if my hand didn't shake, and plus the time for taking pics. You could prolly do it in 15 if you were not bad?
Also, sorry in advance for the awful quality pictures- my camera was being a pain in the bum that day.
-
 Doodlebert added Watermelon Nails to painted pretty
21 Dec 07:01
Doodlebert added Watermelon Nails to painted pretty
21 Dec 07:01
-
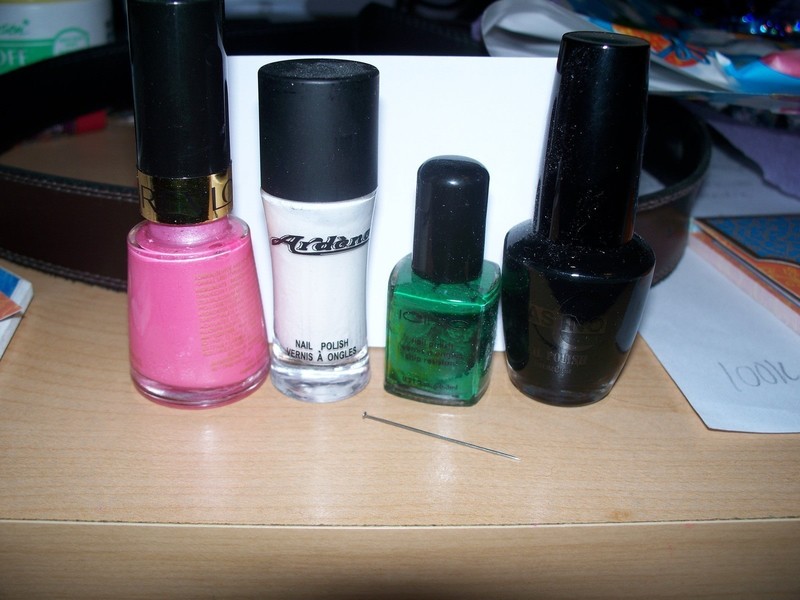
 Step 1
These are the items you'll need for your fantastic fruity nails.
You'll need:
-Pink nail polish(you may want to go a tad darker than mine, as it turned out much lighter than expected)
-White nail polish
-Dark Green nail polish
-Black nail polish
-A small piece of paper
-A needle (the ones you use for pinning)
-*A top coat
-*A Q-Tip or two
-*Nail polish remover
*Not pictured -
 Step 2
First of all, paint your whole nail pink. We're going to do the watermelon in layers. If you chose a lighter pink like me, use 2-3 coats. I wanted mine darker on the bottom, but ultimately ended up with this. Oh, yeah, you should probably shape your nails first, but I was too lazy, so I ended up with odd shaped watermelons. You can do it however you want :)
-
 Step 3
Sorry for the bad quality, but the main idea is to use your needle and make a strip of white across the tip of your nail, about a quarter or less of the way down. To do this, take your paper and your white nail polish, and drop a few drips (haha) onto the paper. Press the needle into the puddle, and voila- there you have it. You could also use a toothpick for this. Try to make it curve slightly (you may have guessed that didn't work out very well for me ;) ) Clear the excess paint off the needle with some nail polish remover, as you'll need it again. I found that the Sally Hansen Kwik Off Jar made this really easy, and mine actually does smell like lemon if you doubt the advertising! Shocking, I know. It's made my mum quite happy not to smell yucky nail polish remover all the time!
-
 Step 4
Now we just fill in the rest of the tip with the white nail polish. Incredibly easy, I know. Unfortunately, I think I needed, without exaggeration (ok a little), 10 coats of white. They kept showing pink underneath, and it took forever between coats to dry. I eventually gave up and left it as it was.
-
 Step 5
Once again an awful picture, but what you're doing is using the needle, and the same method from step 3, to paint a dark green line at the very tip of your nail. The one pictured is thin, but I decided later on to make it thicker. It's basically however you want to do it. Clean off the needle again.
-
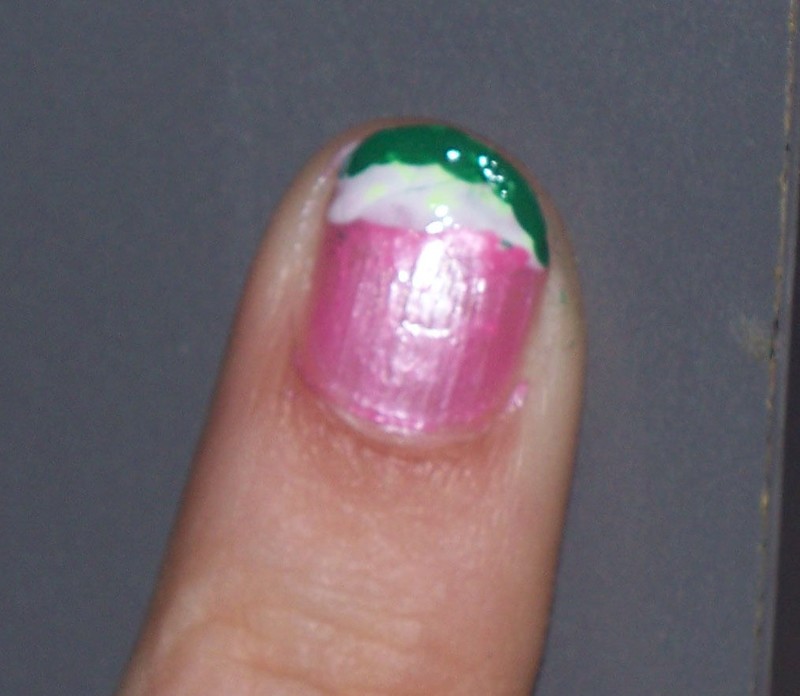
 Step 6
This is what your nail should basically look like at this point. I took the opportunity to clean up the white and pink lines as best I could, and the green is now much thicker.
To be completely honest, I was going to keep it thinner when it accidentally smudged. Whoops... Instead of re-doing the whole nail, I just made the green bigger. There is a lesson to be learned in this, ladies:
When painting nails, especially in weird designs, do NOT use facebook at the same time!
:P -
 Step 7
Finally, the last step!
Using the same idea as steps 3 and 5, dab your needle into the black nail polish blob you've put on the paper. Now, I used the kind of circle end of my needle, not the pointy one, as it made better circles, or "seeds". Using the needle end for one or two makes them look different, so I did one seed with that end.
Wait for the nail to dry completely, and use your top coat. I don't know about anyone else, but I've found that no matter how long I leave the nail to dry (and trust me, it's always dry-not tacky- to my touch), my top coat *always* smudges the original underneath, which is a slight issue when you're drawing on your nails like this. So what I do is dab on the top coat, rather than paint it on like normal. It seems to not smudge it- I don't know if you have the same problem, but I hope that helps. When that's finished drying, use a Q-Tip and some nail polish remover to clean up the cuticles and such.
And there you have a watermelon nail. I usually only paint one of my nails on each hand watermelon, as it takes a while to do.
Thanks for reading this, and please comment if you feel like it. This is my first How-To, so any advice or criticism is welcomed.
Good luck with your nail painting!


looks just like watermelon..great job..
pj