


About
Great and warm scarf for a fashionable guy
Hi there!
How great of you to check out this warm and fashionable scarf! I hope you like it!
Why?
I made this scarf for my brothers boyfriend. He's quite a fashionable guy, but not interested in a lot of colours. I wanted to do the herringbone stitch for a while now. I thought it would look great for a men's scarf.
What?
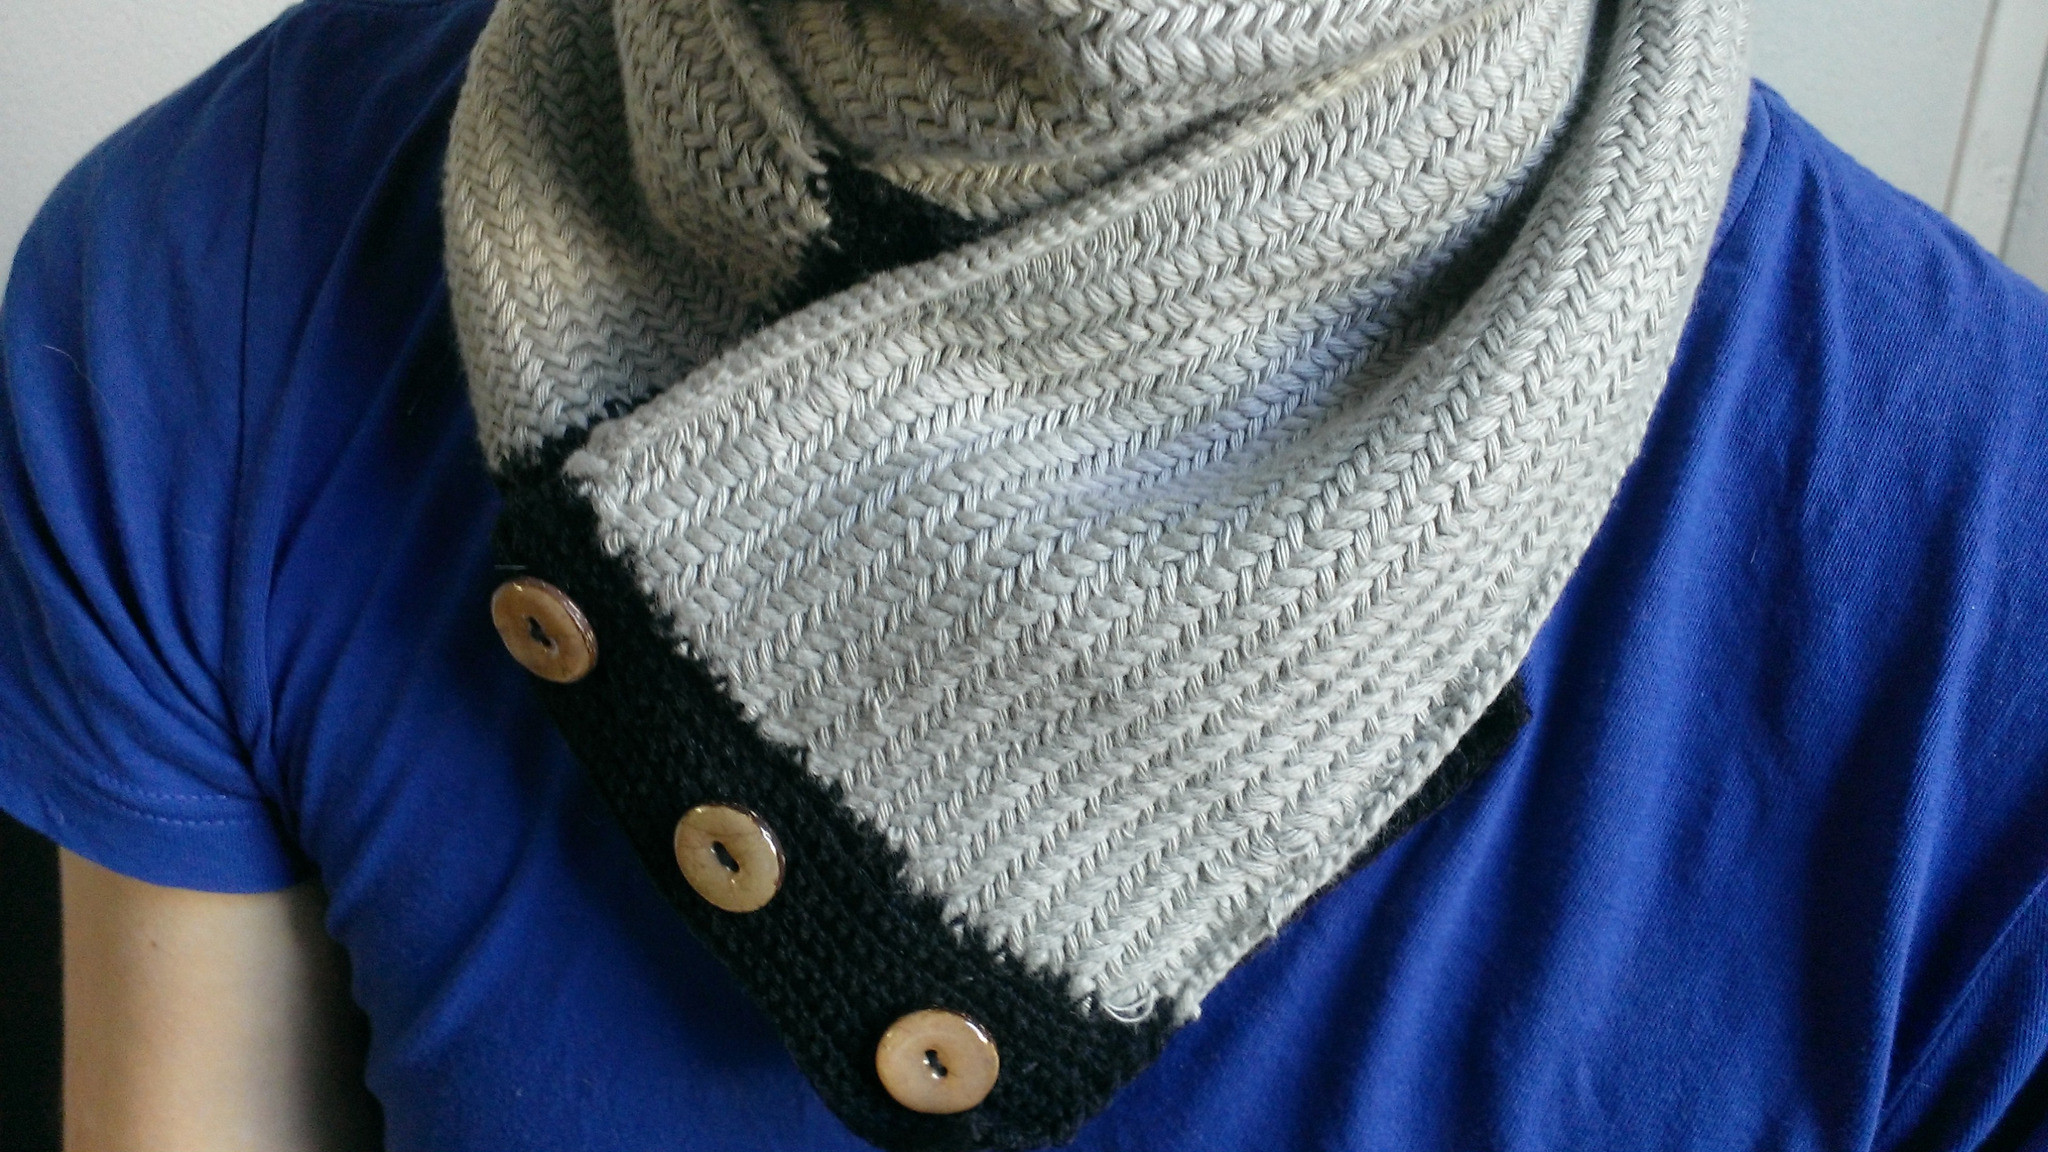
This scarf is made with a herringbone stitch with gray yarn (see links for explanation on how to do it below). The ends of the scarf are crocheted with black yarn. The 2cm buttons on the end finish the look of this scarf. You can wrap the scarf around 2 times and attach the ends with the buttons, as you can see in the picture.
How?
This is a How-to so look at the steps below if you'd like to make a similar scarf.
Just let me know if something is unclear in the instructions or if you´d like to have more info.
Enjoy your knitting ;)
Xxx,
Cindy
Tags
-
 Sue W. favorited Warm Button Fastened Scarf with Herringbone Stitch
09 Mar 17:09
Sue W. favorited Warm Button Fastened Scarf with Herringbone Stitch
09 Mar 17:09
-
 Natalie W. favorited Warm Button Fastened Scarf with Herringbone Stitch
13 Oct 05:46
Natalie W. favorited Warm Button Fastened Scarf with Herringbone Stitch
13 Oct 05:46
-
 nina.b added Warm Button Fastened Scarf with Herringbone Stitch to Will try
15 Sep 11:48
nina.b added Warm Button Fastened Scarf with Herringbone Stitch to Will try
15 Sep 11:48
-
 Ella Light added Warm Button Fastened Scarf with Herringbone Stitch to Crochet
10 Aug 17:48
Ella Light added Warm Button Fastened Scarf with Herringbone Stitch to Crochet
10 Aug 17:48
-
 zjowies h. favorited Warm Button Fastened Scarf with Herringbone Stitch
05 Apr 11:09
zjowies h. favorited Warm Button Fastened Scarf with Herringbone Stitch
05 Apr 11:09
-
 connie.gilreath favorited Warm Button Fastened Scarf with Herringbone Stitch
28 Feb 23:20
connie.gilreath favorited Warm Button Fastened Scarf with Herringbone Stitch
28 Feb 23:20
-
 MissCindy published her project Warm Button Fastened Scarf with Herringbone Stitch
16 Feb 16:32
MissCindy published her project Warm Button Fastened Scarf with Herringbone Stitch
16 Feb 16:32
-
Step 1
The Herringbone part of the scarf
To get started, you need to get familiar with the Herringbone stitch. I used this video for that: http://newstitchaday.com/horizontal-herringbone-stitch/
This video is made by a guy (how cool is that?! <3) and it helped me out a lot!
Just practice it a couple of times.While I was working on my scarf, I saw the Flamboyant Red Herringbone Scarf made by Sanne E.. Pretty funny that I was working on the same stitch ;)
Here is the link to her scarf: http://www.cutoutandkeep.net/projects/flamboyant-red-herringbone-scarf -
Step 2
First I cast on 250 stitches with my circular needles. That appeared not to be enough, so I had to redo it... ~:( After that I cast on 300 stitches. This was enough.
Now you can make your Herringbone Stitches till the scarf is about 15cm wide (or more, depending on your preferences).
-
 Step 3
The black borders
The one end where the buttons are on is as wide as the scarf itself.
I thought this would look much prettier underneath the other edge.
I did the borders only using Single Crochets.After that I added the brown buttons.
-
 Step 4
The end where the buttons go through, is in total 11 rows wide.
I first crocheted 5 rows with Single Crochets.
For the 6th row I stitched a few stitches with Single Crochets, made a chain the width of the button, made more Single Crochets and did this to fit all 3 buttons.
I finished with 4 more rows of single stitches. -
Step 5
To stop the curling
Because I used Circular Knitting Needles and the width was quite long, the whole Herringbone part started to curl!
To stop this, I made slip stitches along the whole scarf using a crochet hook.
This stopped it a bit.After that I blocked the whole scarf.
I did this by
1. pinning the scarf down the way I wanted.
2. Spraying the scarf wet.
3. Ironing it with a towel above the knitting.
4. Laying it to rest with heavy stuff on the ends.This made the scarf exactly how I wanted it to be, without curling.
-
 Step 6
Now your scarf is finished! I hope you like it! I know I do. You can give it to a fashionable friend to keep him warm in winter :)


