


About
Tutorial:: Waistcoat
I'd like to say this is his first ever waistcoat, but would you believe this is his FOURTH? Yeh, he hardly wears them, but I guess it's because we've been on the move, and I just forget he has them ((or I havn't packed them)). Anywho. I'm going to make a matching pair of pants for this, so he has a cute suit. Maybe a bow tie too. Man he looks so young in that photo.
I will eventually attach a pattern you can download and print out to this, but this tutorial will show you how to draft your own pattern from an existing shirt of your child's!
Let's get going! As always, click on teh pictures to make them larger!
Tags
-
 Rebecca M. favorited Waistcoat
10 Jun 17:33
Rebecca M. favorited Waistcoat
10 Jun 17:33
-
 Summer.n.Maddexs.Mum favorited Waistcoat
22 Mar 04:54
Summer.n.Maddexs.Mum favorited Waistcoat
22 Mar 04:54
-
 Nicole C. favorited Waistcoat
07 Jan 02:56
Nicole C. favorited Waistcoat
07 Jan 02:56
-
 Kathy Gregson added Waistcoat to Baby
17 Sep 13:54
Kathy Gregson added Waistcoat to Baby
17 Sep 13:54
-
notdeadredhead favorited Waistcoat
18 Jul 04:53
-
 Viktoria favorited Waistcoat
24 Feb 17:03
Viktoria favorited Waistcoat
24 Feb 17:03
-
 Alex Poser added Waistcoat to A.o.C
10 Jan 22:57
Alex Poser added Waistcoat to A.o.C
10 Jan 22:57
-
 Tristin C. favorited Waistcoat
20 Dec 22:34
Tristin C. favorited Waistcoat
20 Dec 22:34
You Will Need
-
 Step 1
This is what the paper patterns should look like. The point in the middle of the front hem is optional, you can just make yours go straight across if you wish.
-
 Step 2
Grab a button up shirt or a t-shirt that fits your child well
-
 Step 3
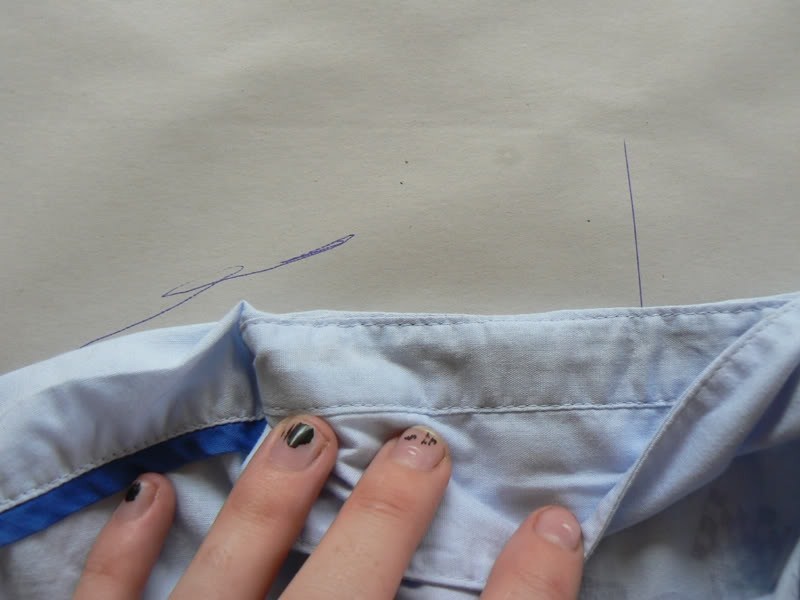
Rule a line vertically down the paper. Match up the centre of the shirt with the line. Trace around the hem from the middle of the shirt and up the side seam to the armpit. Trace across the shoulder seam from the top of the sleeve to the collar.
-
 Step 4
Sleeves are tricky. But if you fold the sleeve over towards you and kind of keep the armhole curve, you should be right. It's ok if it's not perfect.
-
 Step 5
Trace a curved line from the armpit to the stop of the sleeve.
-
 Step 6
Your pattern should now look like this.
-
 Step 7
Line your shirt back up to the pattern you are making and fold the collar forwards. Trace around it, curving up to meet the shoulder line you have.
-
 Step 8
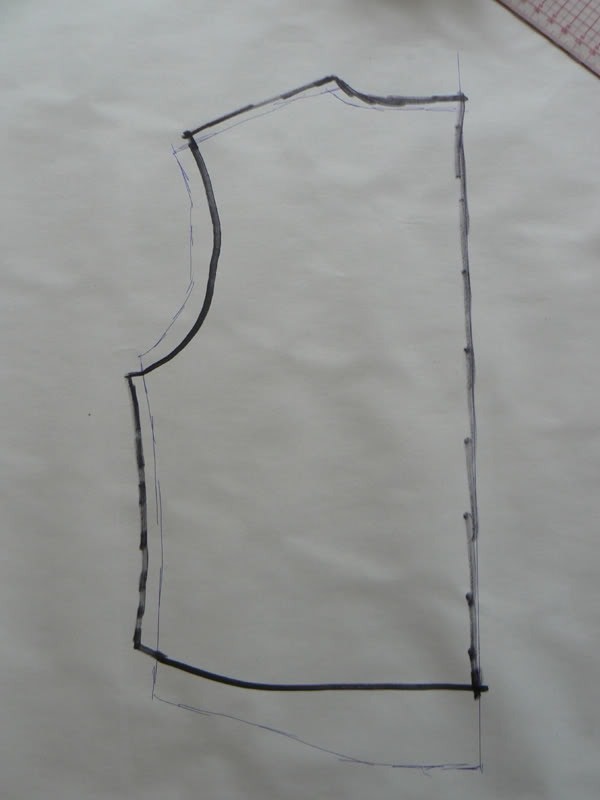
So far what you have is a shirt back. The vertical line down the page is your fold line. You will need to add 1 - 1.5cm seam allowances on the rest of the lines to have an actual pattern. DO NOT ADD SEAM ALLOWANCE TO THE FOLD LINE! Now, you can keep this pattern and save it for later when you want to make a shirt, or you can use it as a guide to make the waistcoat. With a black marker, I have marked the shape of my waistcoat, bearing in mind it has to go over the top of a shirt. So it is higher on the shoulder seam, a bit higher above the back neck. It is exactly the same down the centre back. It's also alot shorter than the shirt, about 2 - 3cm shorter. It's a bit wider on the sides. As you can see the armhole is deeper and longer! You can do all this freehand, it's your design!! ((please note I did not add seam allowances in the diagram above! Make sure you do! If you have already added seam allowances on your shirt, then do not add seam allowances on the waistcoat or it will be far too big)) Now you have a waistcoat back.
-
 Step 9
Cut out the pattern and write on it what it is, what bit is where. You can refer to the first picture on this post for ideas - Waistcoat, back, what sizing it is, where the centre back is and that it is on the fold. You can also add that it is piece 1 of 2 ((so if you pull it out later on down the track you know you need to have two pieces)). Trace around This pattern piece to start making the front. I'm just going to draw in orange marker over it the changes you need to make for the front.
-
Step 10
First, place the shirt on top of the second pattern you are doing. With a pin or your finger, mark on the front where the neckline goes down to. Fold the shirt forward and mark that place on the pattern.
-
Step 11
With vincent's waistcoat, I made the front go a fair way down. It is about level with the middle of the armhole. I marked on the centre front where it would go to, then drew a slightly curved line from there up to the shoulder seam ((don't forget to add a seam allowance to this line)). The rest of the pattern is almost identical, except for the hem. You can do what you like on the hem, but make sure it matches up at the side seam. Also add a seam allowance to the hem. Add 2cm to the centre front for the button extension ((the part you will fold over so the vest can overlap)). Now mark all the necessary instructions to the front and awayy you go!
-
 Step 12
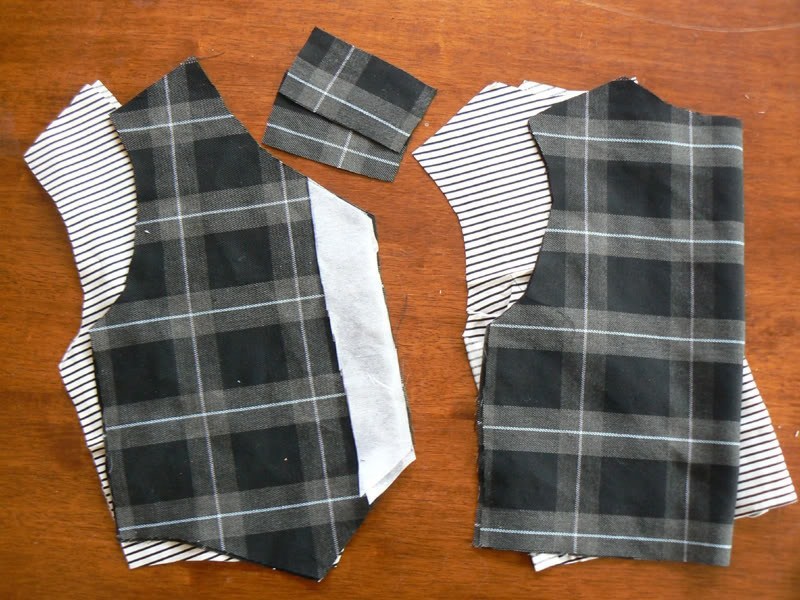
Cut two fronts of the main fabric, two fronts of the lining fabric, one back of the main fabric and one of the lining fabric. Also cut two small rectangles about 15cm by 5cm for the fake welt pockets. You'll need to cut 2 pieces of interfacing to match the front button extension, but I made it about 3cm deep from the front ((just trace the necessary front part onto the interfacing and cut))
-
 Step 13
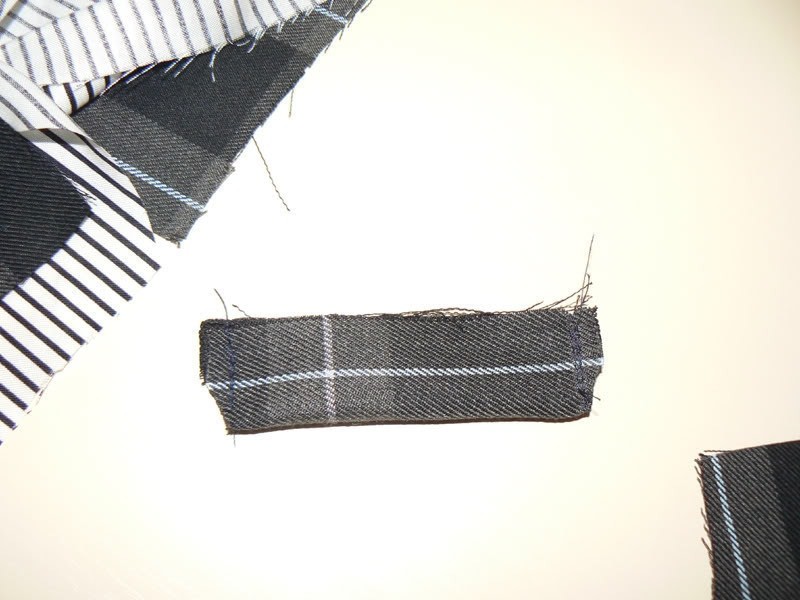
Iron the interfacing to the insides of the waistcoat fronts using a low heat and covering the fabric with an old teatowel. Iron the two small rectangles in half too ((right sides together)). Stitch the ends of each rectangle and mitre the corners. Leave the long raw edge un-stitched and turn righ side out. Press.
-
 Step 14
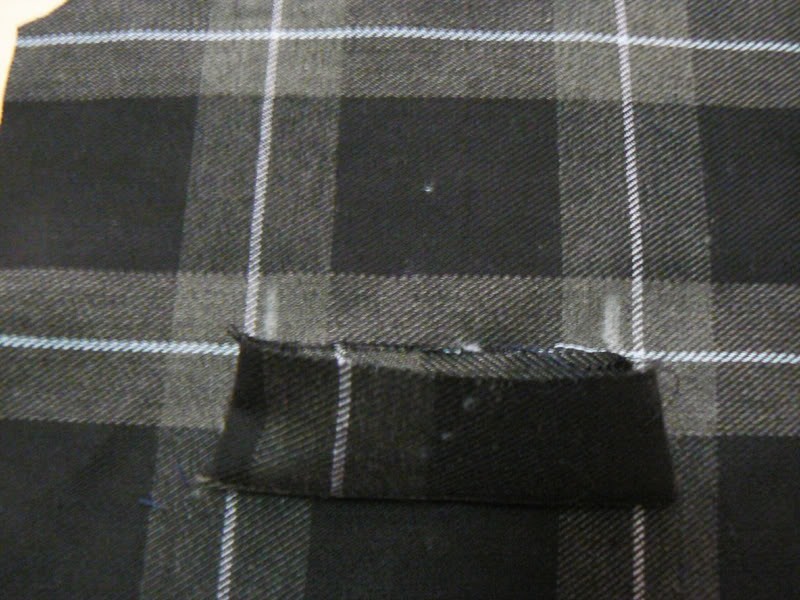
On the inside of the waistcoat fronts, mark the edges of the faux welt pockets. Cut between these lines. ((I marked wrong, the pink lines mark the correct markings and the pink horizontal line shows where you should cut.
-
 Step 15
Snip along this line.
-
 Step 16
With the welt against the snipped line,
-
 Step 17
fold the front over so the raw edge of the welt lines up with the open edges of the snip.
-
 Step 18
Stitch and Overlock.
Please note, there is a MUCH better way of making welt pockets, but I won't go into detail now. Baby's don't need functioning pockets! I will write a tutorial for absolutely perfect ones, the non-lazy way, another day :D
-
 Step 19
It should look like so -
-
 Step 20
Pin each front lining to the front of the waistcoat pieces, right sides together. Stitch the armholes together and overlock.
-
 Step 21
Pin the lining back to the back piece, right sides together. Stitch and overloack the armholes and the back neck.
-
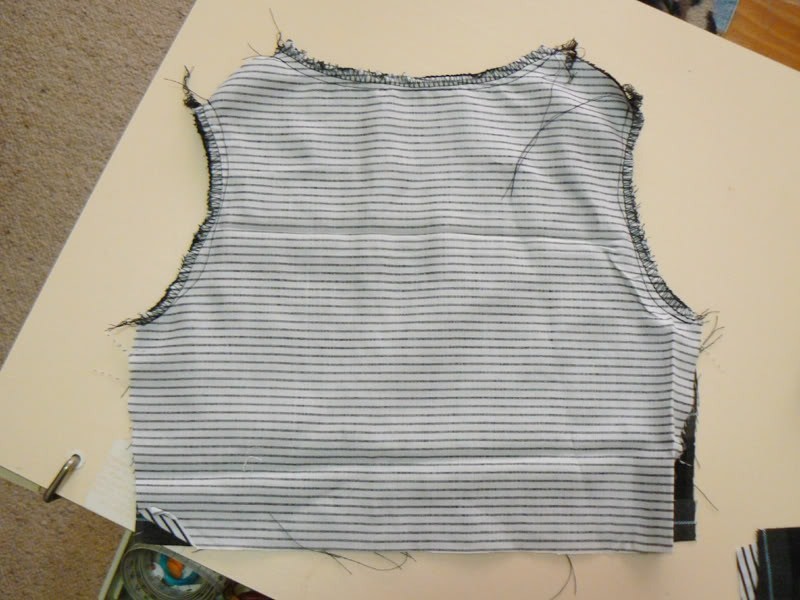
 Step 22
This is what it looks like so far, with the inside of the main fabric ((wrong side)) facing up.
-
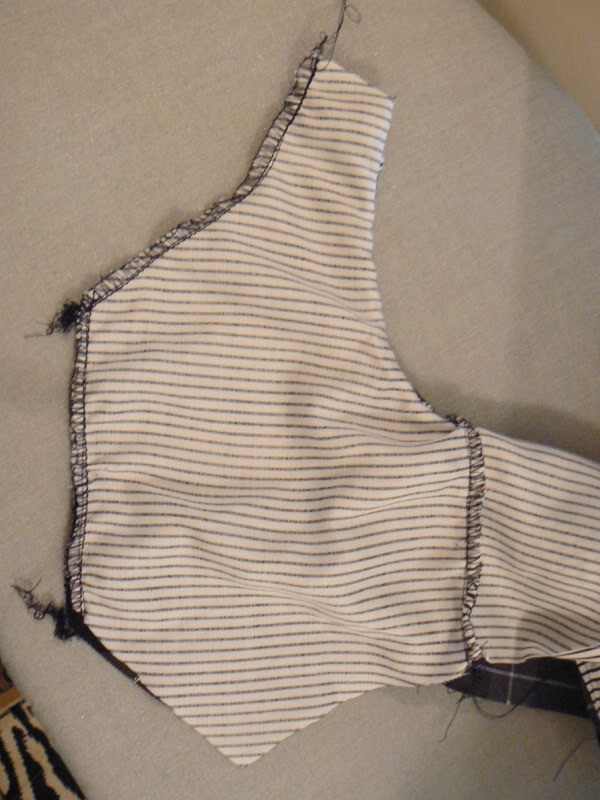
 Step 23
Open up the piece and pin the waistcoat fron to the waistcoat back at the side seams. You will be pinning the main fabric to the main fabric and the lining to the lining. This will make the side seam hidden! Stitch from where thehem will be of the waistcaot on the main fabric all up through to the lining and to where the hem will be on the lining.
-
 Step 24
When you flip it over and give it a quick press it should look like this! Top stitch the armhole seam so that it lays nice and flat.
-
 Step 25
Now turn it back inside out and pin the lining fron to the waistcoat front and stitch the neckline and down the front. Overlock this edge.
-
 Step 26
Flip it over and topstitch!
-
 Step 27
Now on the main fabric, fold the hem under 1cm and iron. With the lining, fold it a little more than 1cm under, so it's a tad shorter than the main fabric but the raw edges are still tucked in. Press. Pin and then stitch along the bottom.
-
 Step 28
Flipping it over, your waistcoat should now look like this!!
-
 Step 29
Stitch and overlock the shoulder seams. They look messy don't they? Again, there is a neater way of doing it, but this is the rock + roll way ((read, lazy)), so i'll show you something cuter.
-
 Step 30
Stitch some bias-binding matching your lining ((or not!)) over that ugly seam. It actually makes it look kinda professional ((in my eyes anyway!))
-
 Step 31
You can do the front up with snaps, buttons or like me, VELCRO! I also stitch some big silver buttons on the outside.
-
 Step 32
Sorry the lighting is a bit strange in those last few photos; it took so long making it and taking photos of every step it was night time by the time I finished it!


CO + K User