


About
Perfectly functional and perfectly pretty.
NOTE: All measurements are in cm
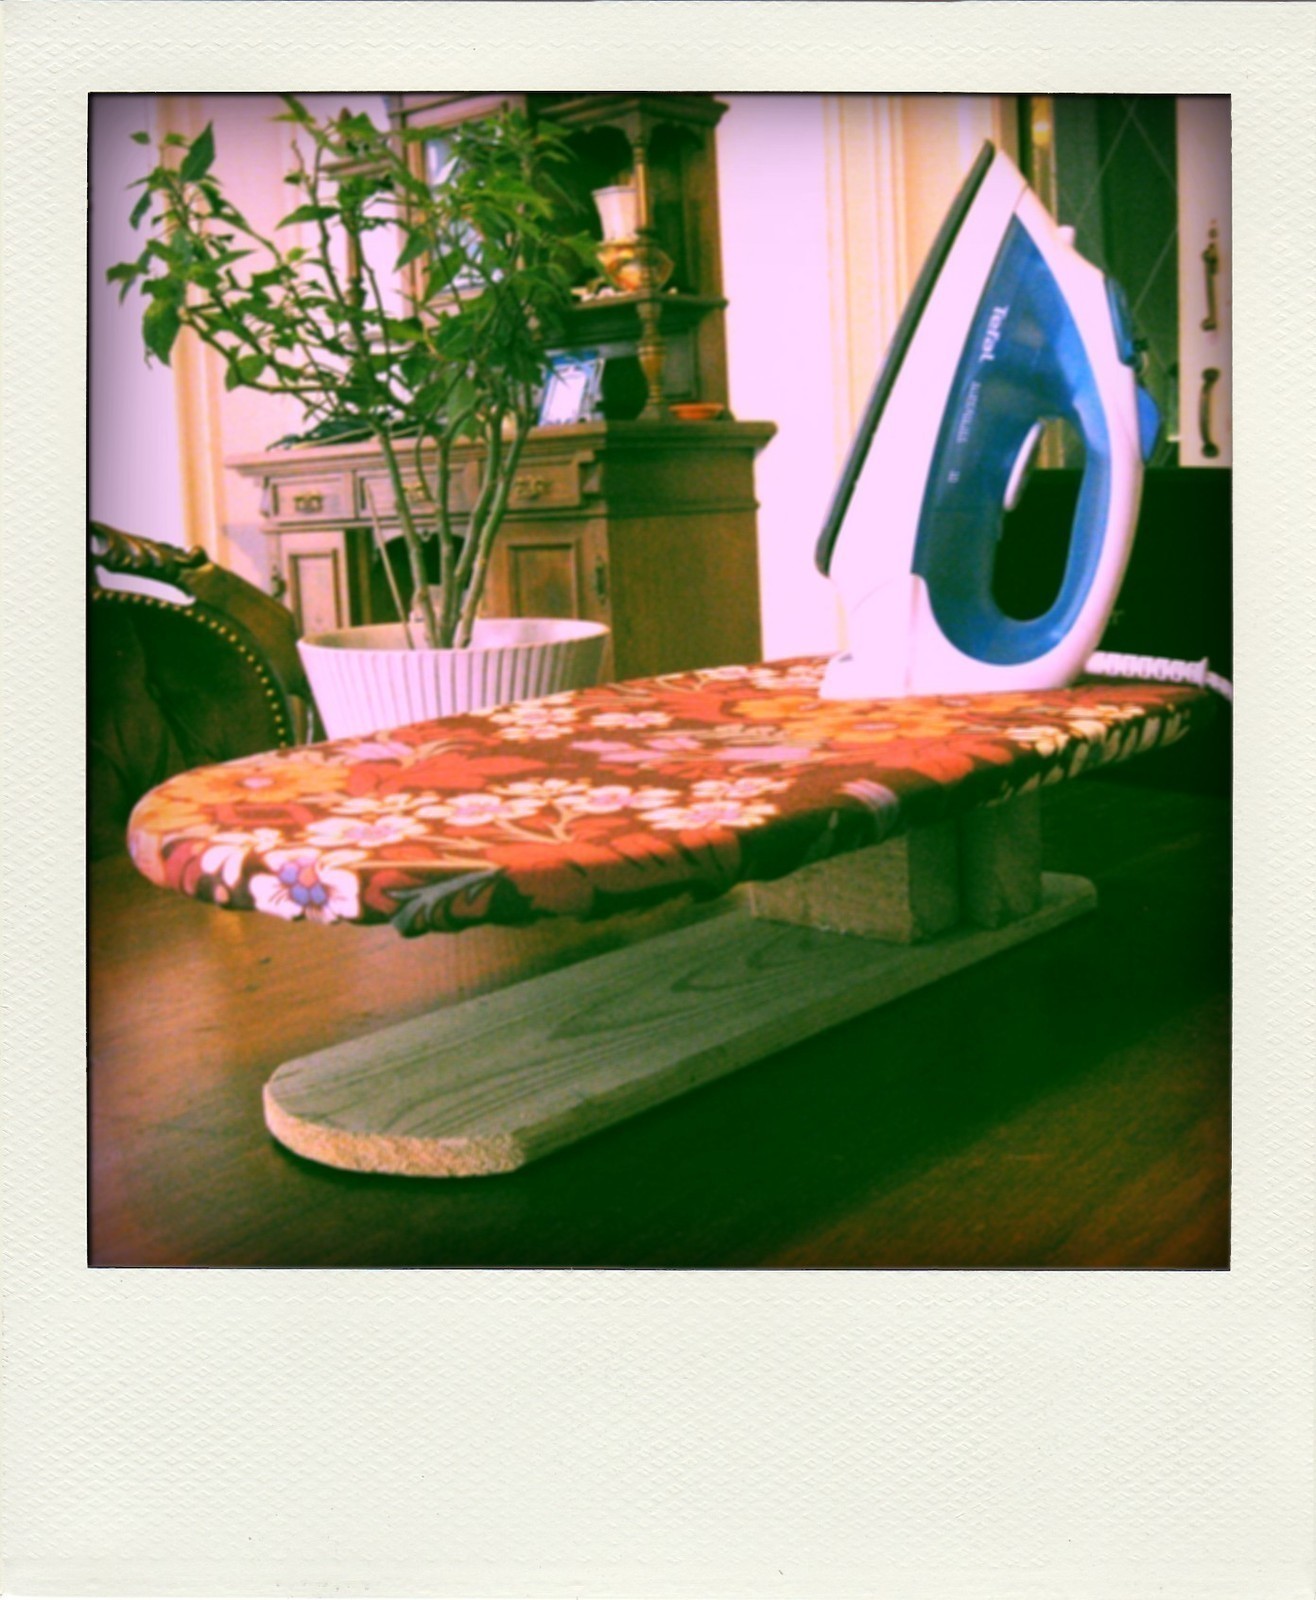
I needed a table top ironing board because it is a practical thing to have in my room... I hate having to walk to the ironing board every time I need to iron a pattern piece. Buying one ment I had to go to thrift shops and have a bit of luck. The store I work at we used to sell them but now we only sell sleeve boards but I think them to small. I decided to make one out of wood but I do have to give my little brother some credit since he helped me put the screws in.
-
 Caron K. added Vintage Table Top Ironing Board to Sewing Room DIY
23 Dec 07:30
Caron K. added Vintage Table Top Ironing Board to Sewing Room DIY
23 Dec 07:30
-
Caron K. favorited Vintage Table Top Ironing Board
23 Dec 07:30
-
Rachel F. favorited Vintage Table Top Ironing Board
29 Mar 03:28
-
 Ella Light added Vintage Table Top Ironing Board to Upcycling Other
04 Apr 13:36
Ella Light added Vintage Table Top Ironing Board to Upcycling Other
04 Apr 13:36
-
 EVEnl entered her project Vintage Table Top Ironing Board to Dremel Multi-Tool Contest
29 Mar 11:45
EVEnl entered her project Vintage Table Top Ironing Board to Dremel Multi-Tool Contest
29 Mar 11:45
-
EVEnl entered her project Vintage Table Top Ironing Board to Hardware Store Decor Contest
17 Sep 08:11
-
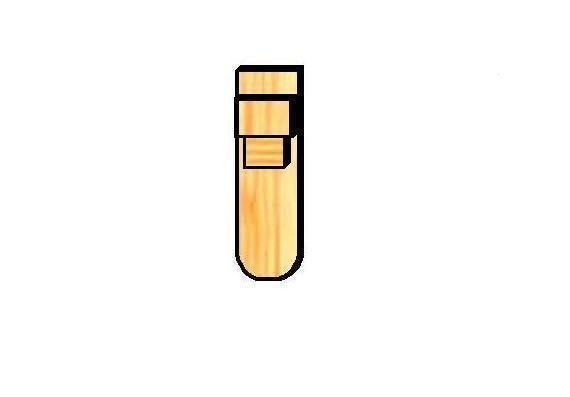
 Step 1
It's easier to have a hand held sawing machine but I did this with a regular hand saw, it does mean you have to sandpaper the edges you have sawn more than you would when you were using a machine.
A: Ironing board top (50x25x2)
B: Ironing board bottom which can be used as a sleeve board. (40x15)
C: Wooden block (leg)(10x5x15)
D: Wooden block (leg)(10x5x7,5) -
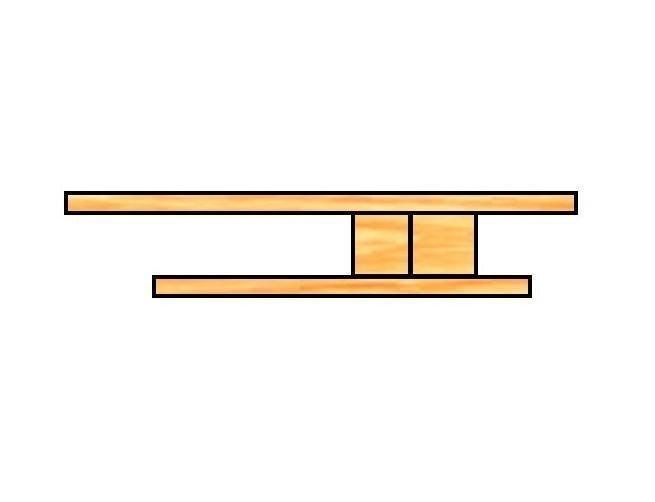
 Step 2
<-- see picture
Glue the legs together and then glue them on the bottom board
-
 Step 3
now screw 4 screws in on the other side to secure the legs to the bottom of the ironing board.
-
 Step 4
Put glue onto the legs and place the top board on top. Screw the other four screws in.
-
 Step 5
<-- It should now look like this.
Paint it or varnish it.
-
 Step 6
COVER
Use felt or molton for padding
Pin your fabric and felt (or molton) together and lay the ironing board on top (top board facing down). measuring 4cm seam allowance trace around and cut out.
-
 Step 7
Sew the felt and your fabric together.
Take your bias tape and sew it onto the edge of your fabric.
Using a safety pin pull some elastic cord through the casing. Put the cover onto the board and adjust the elastic by pulling it a bit around the corners so it will stay in place whilst ironing. Sew ends of the elastic cords together and snip the excess elastic.
Optional: if you want to make a sleeve board and use both top and bottom board for ironing make sure one end of the board is round and a regular sized sleeve fits around it. Repeat the latter and this step to make a cover.


i had seen an other little one but that was more a cushion board.
i like this one because you can slip things over on it.
handy.!!!
beautiful made too.!!! well done very neat.!!
(ik ben hier super blij mee, dank je wel voor het tonen en de goede werkbeschrijving.xxxx)