


About
{Vintage Box Tutorial}
Hallo - pleased to meet you! I'm Amy, purveyor of a little decoupage site I like to call Mod Podge Rocks. I've been chosen to be your entertainment today. I'll try to do a good job. Promise.
When Kari asked me to do this guest post, my first inclination was to do an owl table. With fabric. Leaf painting. Polka dots. Stripes. Then I thought, "This isn't the way to get people to like decoupage." So rather than make you feel like you are falling down a rabbit hole with a complicated Alice in Wonderland style project, I decided to start with something not quite so hard. If you've never done decoupage before, THIS IS A GREAT PROJECT TO START WITH. It's very easy. I like boxes lately, and I like vintage stuff, so let's do a vintage stuff box. We're going to turn this:
into this:
First you'll need to gather these supplies. Remember that, first and foremost, this box should be YOU. Get paint colors, papers and embellishments that you like and fit your personality. I promise it will all come together fine.
All my stuff - besides what was in my stash - purchased from Michaels. They have great $1 bins, BTW.
Tags
-
 Marie M. favorited Vintage Box
03 Jul 20:10
Marie M. favorited Vintage Box
03 Jul 20:10
-
 Libby W. favorited Vintage Box
19 Jun 08:07
Libby W. favorited Vintage Box
19 Jun 08:07
-
 noraknickers added Vintage Box to Room DIY
29 Apr 18:23
noraknickers added Vintage Box to Room DIY
29 Apr 18:23
-
Brenda M. favorited Vintage Box
18 Mar 07:38
-
Nikia N. favorited Vintage Box
20 Jul 20:53
-
 J.N. Cahill added Vintage Box to Home Decor
21 Sep 19:24
J.N. Cahill added Vintage Box to Home Decor
21 Sep 19:24
You Will Need
-
 Step 1
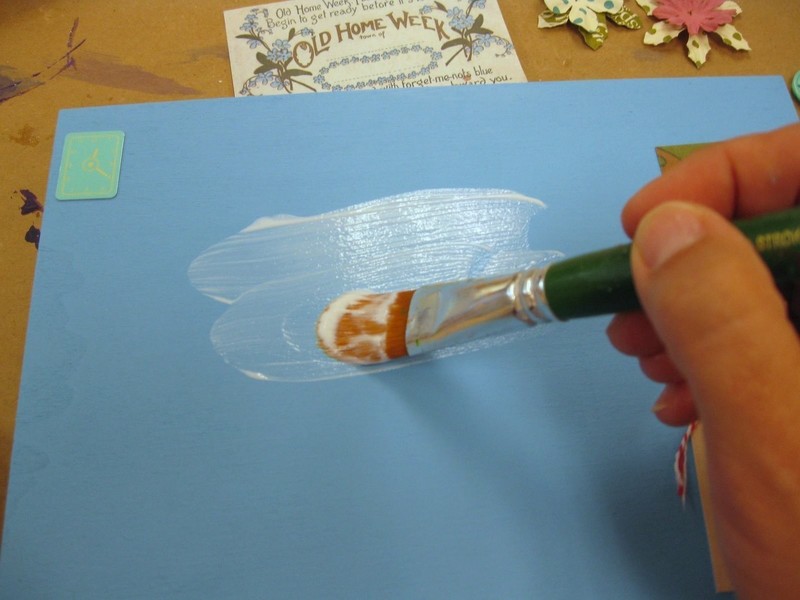
You are first going to remove all hardware with the mini screwdriver and set it aside. I always just jump in and begin painting. As you can see, jumping in with paint for me translates to it being on my fingers within the first 10 seconds. Paint the entire top and bottom of the box with Coastal Blue. Give both parts at least 2 coats - I did 3. Allow to dry.
-
 Step 2
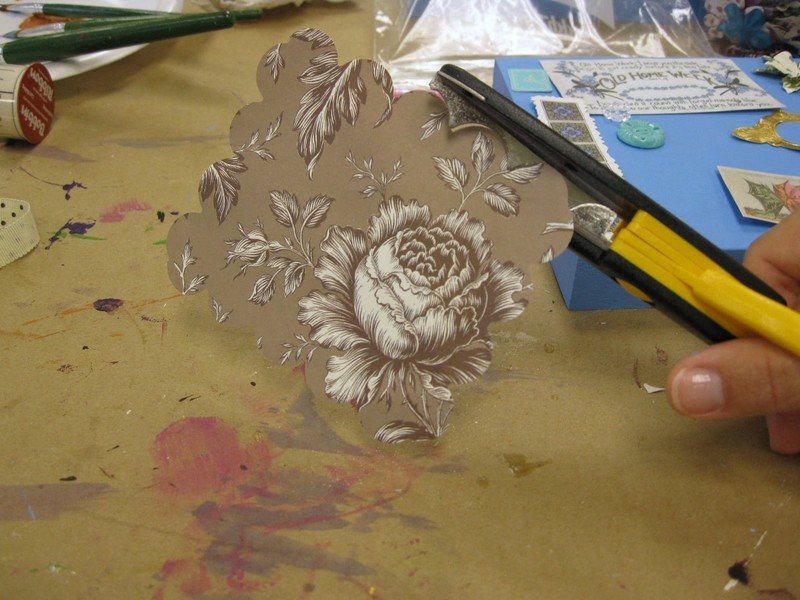
This next step is embarrassingly easy - and I'm thoroughly convinced that you too should use this method for your first decoupage project. Lay out your goodies on the top of your box, and keep playing around until you get it just right. Note: the only thing I cut or altered at all was the Anna Griffin paper, which I trimmed using my scalloped scissors. The rest of it went on the box as is.
-
 Step 3
No, I'm not going to show you all of the iterations. There were about 20 and that would be boring. Keep moving stuff until you are happy, adding and taking away as necessary. TIP: take a picture. How are you going to remember where things are when you decoupage? Take the pic and remove the stuff; set aside.
-
 Step 4
This is my favorite part. The part that makes me squeal with delight! Start using your Mod Podge. Simply dip the paintbrush in and start spreading. I started with the bottom, inside first. Make sure the coats aren't too thick - enough to cover but don't goop the Mod Podge. Cover the entire bottom half of the box, inside and out. Give it at least 2 coats, allowing 15-20 minutes between coats.
-
 Step 5
On the top of the box, I actually started on the top outside first, where all the fun stuff goes. I told you to remove all of the pieces-parts from the top of the box before but I didn't. Bad girl. You are going to start Mod Podging the paper pieces down first (remember your photo for placement). I applied the Mod Podge to the top of the box . . . .
-
 Step 6
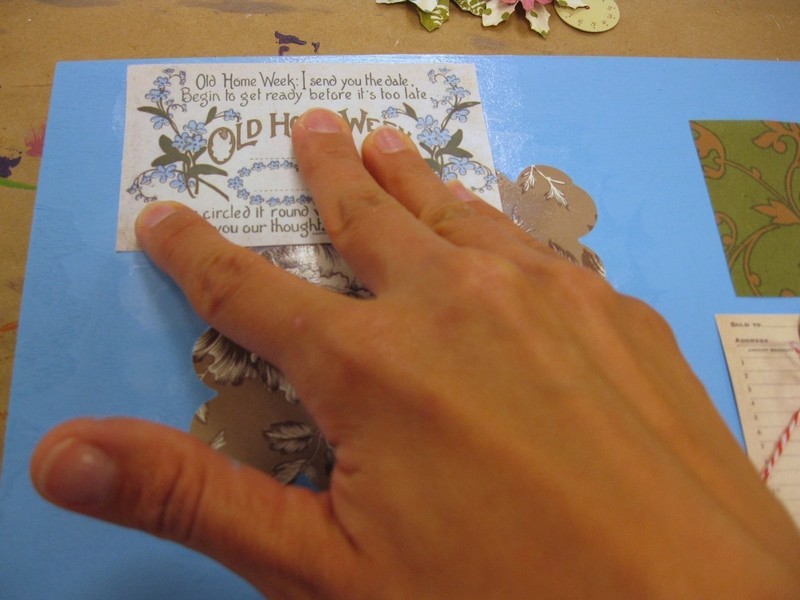
then I smoothed the paper down with my fingers. . .
-
 Step 7
I kept overlapping pieces and smoothing. . .
-
 Step 8
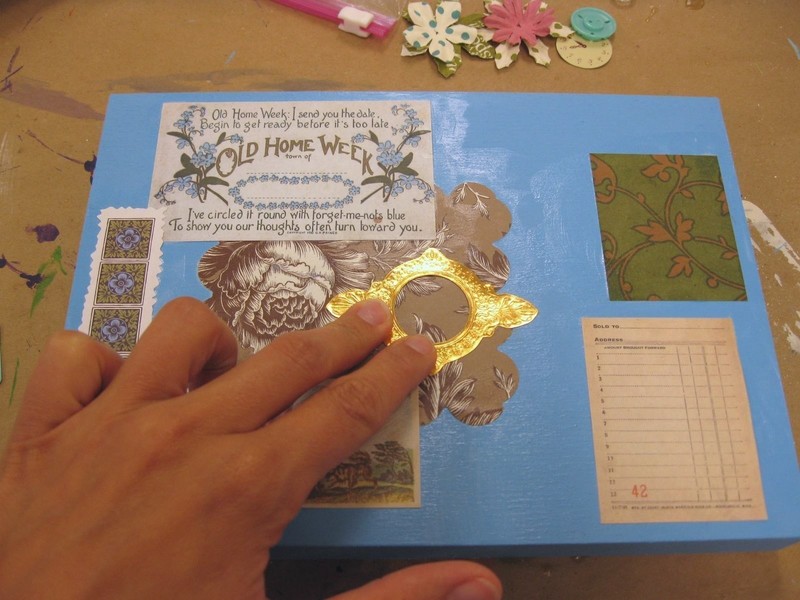
until all of the paper pieces were Mod Podged down. I didn't add any other embellishments at this time - I simply coated the entire top of the box (papers too) with Mod Podge. Same as the bottom. Two coats at least, allowing 15-20 minutes drying time between coats.
-
 Step 9
While the top was drying, I went back to work on the bottom, which had dried.
-
 Step 10
I attached the polka-dotty ribbon that came with my vintage findings kit all the way around my box with craft glue. I applied a thin bead of craft glue across the middle and smoothed the ribbon down with my fingers. I did this on the sides too, and then seamed in the back.
-
 Step 11
After the bottom ribbon application, I went back to the top. I started gluing my fun embellishments on with craft glue. I placed everything that you saw in the photos, but then added some extra buttons and rhinestones. Check through your stash!!! You probably have something you can throw on the top of your box.
-
 Step 12
After embellishment application, I stood back and assessed the situation. I was inspired to somehow incorporate a really cool product called Dimensional Magic. I haven't used it very much, but I love it, because I've seen the way it's used on jewelry. It makes a very hard shell just like a resin. I was experimenting, so I added it to the top of the clock faces. I then added my initial "A" (an epoxy sticker) to the center of the goal seal and doused it in Dimensional Magic. It was cathartic.
One you are done, set aside and allow everything to dry. I always allow my projects to dry for at least 24 hours before using. Oh yeah - don't forget to reattach the hardware silly! I've said before and I'll say it again: the Mod Podge Gloss tends to be sticky. To avoid this, spray your project with a clear acrylic sealer. You don't have to, but you probably want to. Just a thought.
-
 Step 13
SURPRISE.
-
 Step 14
Check out the inside!! I'm kind of forgetful, so I thought these three flowers might be an unexpected treat when I'm opening this box. What can this box store? More craft stuff, of course!! Are you kidding?


Glenda M