


About
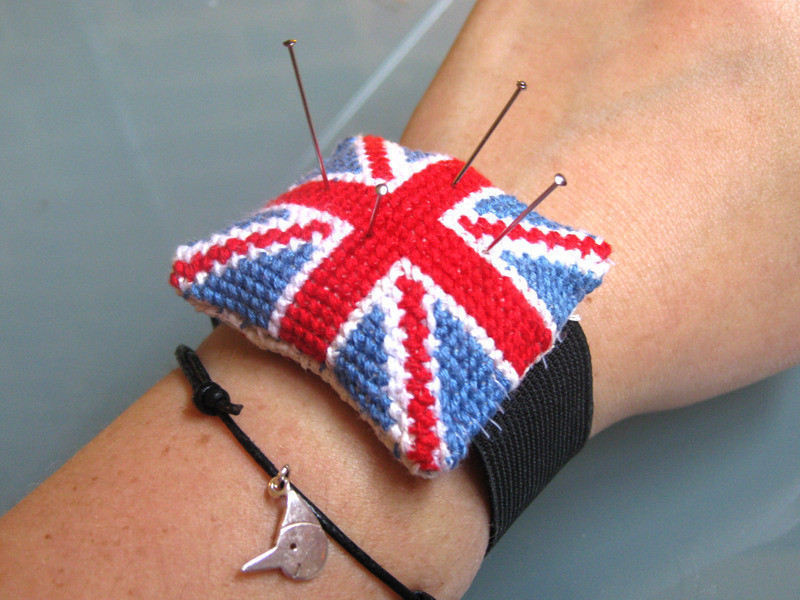
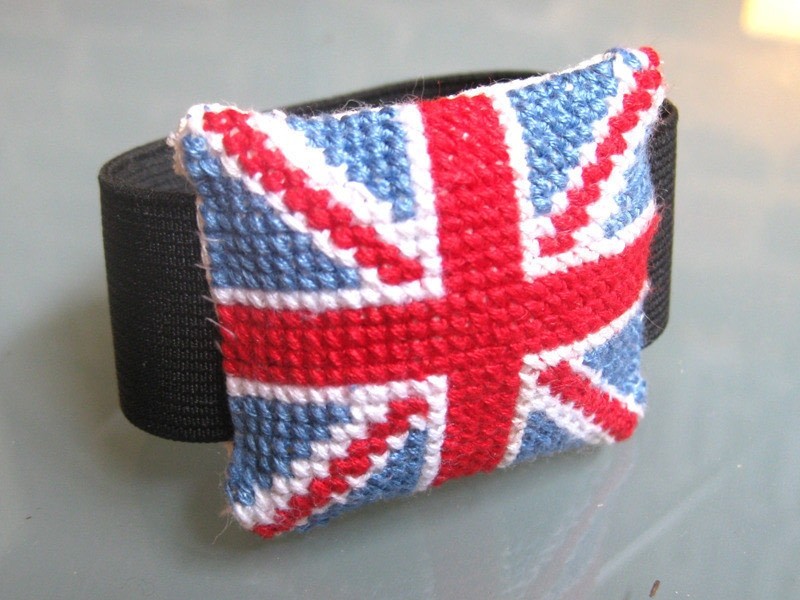
Keep your pins close at hand with some Brit kitsch!
I use to use a store bought plastic wrist pin cushion but it was really uncomfortable to wear, so I decided to make my own with an elastic strap.
Tags
-
 yarngamer favorited Union Jack Pin Cushion
11 Nov 22:18
yarngamer favorited Union Jack Pin Cushion
11 Nov 22:18
-
 kieeeera_ favorited Union Jack Pin Cushion
13 Feb 12:11
kieeeera_ favorited Union Jack Pin Cushion
13 Feb 12:11
-
 MandyCip_93 favorited Union Jack Pin Cushion
22 Nov 12:29
MandyCip_93 favorited Union Jack Pin Cushion
22 Nov 12:29
-
 CraftyCat favorited Union Jack Pin Cushion
29 Jul 07:40
CraftyCat favorited Union Jack Pin Cushion
29 Jul 07:40
-
 Michelle v. favorited Union Jack Pin Cushion
11 May 13:03
Michelle v. favorited Union Jack Pin Cushion
11 May 13:03
-
 shutupnoba favorited Union Jack Pin Cushion
02 Feb 15:03
shutupnoba favorited Union Jack Pin Cushion
02 Feb 15:03
-
 petitefoxy favorited Union Jack Pin Cushion
22 Jan 13:51
petitefoxy favorited Union Jack Pin Cushion
22 Jan 13:51
-
 Felicity Y. favorited Union Jack Pin Cushion
06 Oct 11:32
Felicity Y. favorited Union Jack Pin Cushion
06 Oct 11:32
-
 WerewolfCas favorited Union Jack Pin Cushion
14 Sep 04:37
WerewolfCas favorited Union Jack Pin Cushion
14 Sep 04:37
-
 Nariamma S. favorited Union Jack Pin Cushion
28 Aug 20:29
Nariamma S. favorited Union Jack Pin Cushion
28 Aug 20:29
-
 Step 1
Cut a square of aida fabric and secure it in to an embroidery hoop.
-
 Step 2
Thread a needle with some red embroidery floss. Most people use 2 strands but I like to use 3. Make a \ stitch and knot the stitch in place at the back.
-
 Step 3
Make 4 more \ stitches.
-
 Step 4
Stitch back the way with 4 / stitches, making 4 squares.
-
 Step 5
Repeat this method and stitch a total of 10 rows.
-
 Step 6
Miss out 4 rows and stitch 10 more rows.
-
 Step 7
Starting 12 blocks to the left of the cross, stitch 28 blocks wide.
-
 Step 8
Repeat this for all the other rows down until you have 4 rows.
-
 Step 9
Now stitch the diagonal crosses, these are two blocks wide. Make sure to stop stitching one block before the cross.
-
 Step 10
Now thread your needle with blue floss and start stitching in the flag. Stitch up to 1 block away from the diagonal line and the cross.
-
 Step 11
On the other side of the diagonal line, stitch 2 blocks away from the line.
-
 Step 12
The pattern alternates depending on which area of the flag you're working on, so make sure your stitching matches this design.
-
 Step 13
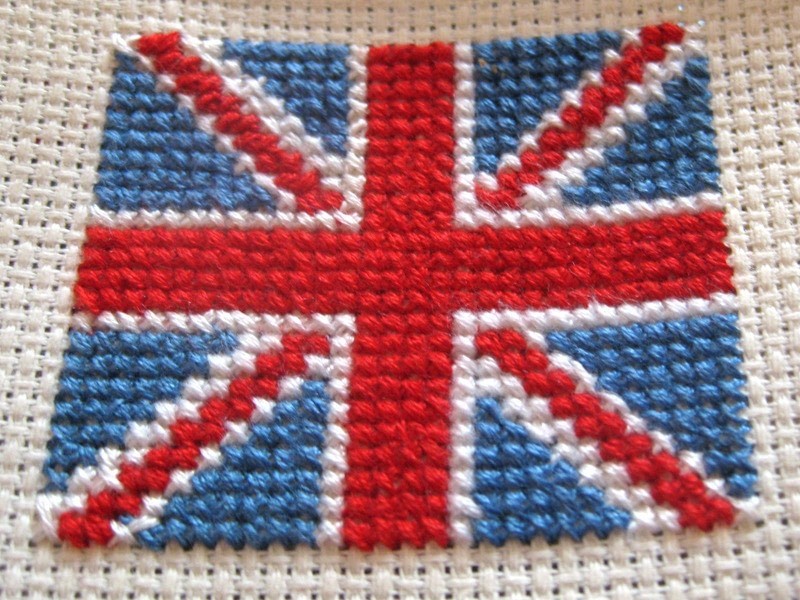
Thread your needle with white floss and stitch in the white lines,
-
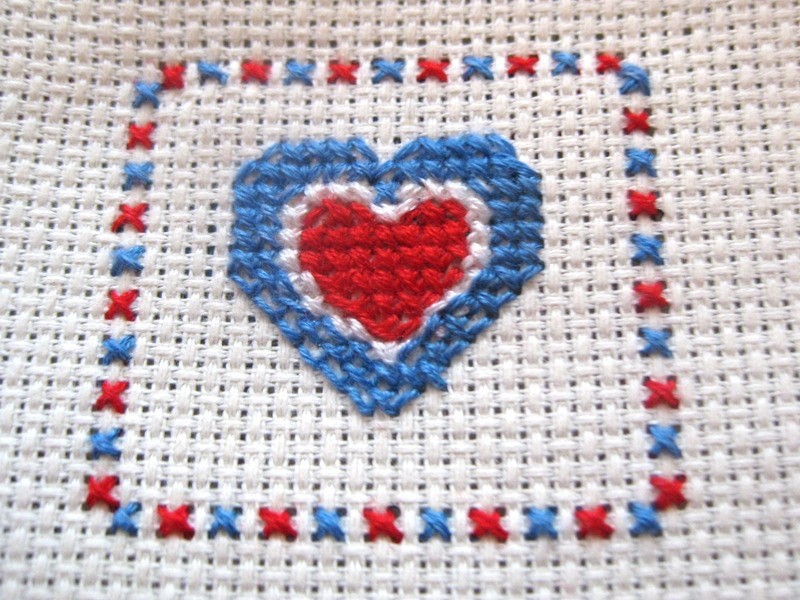
 Step 14
It should look like this when its all done.
-
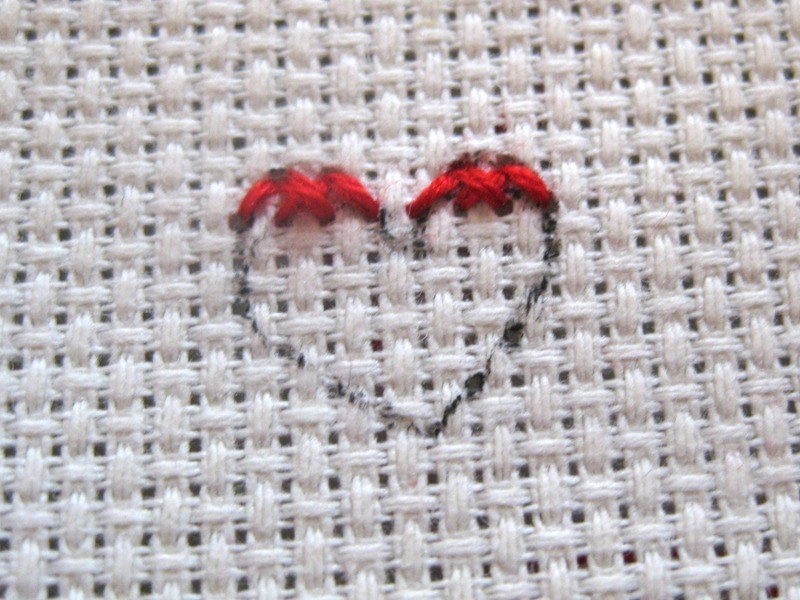
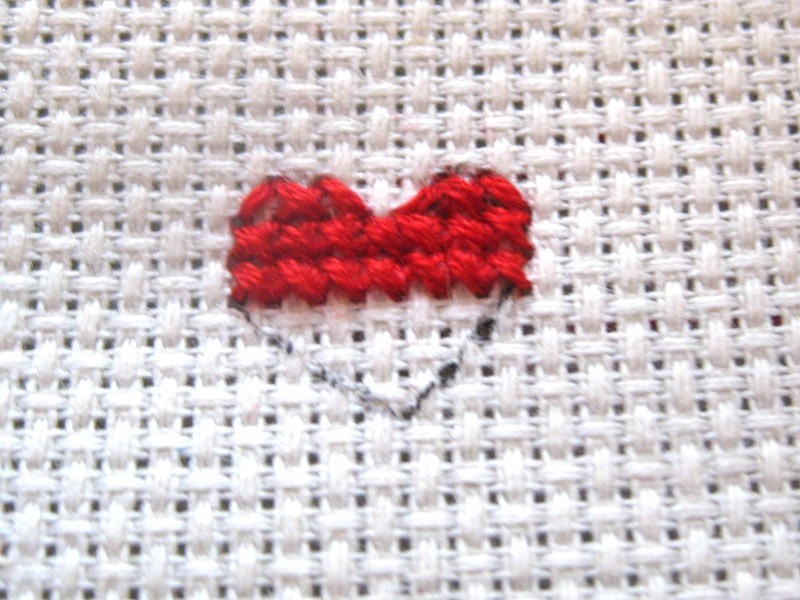
 Step 15
You can leave the back of your cushion blank but if you want to make it super cute, you could stitch a little heart.
-
 Step 16
Make two / stitches, then skip two holes and stitch two more / stitches.
-
 Step 17
Make a \ stitch one hole further to the right and then make one more. Miss out two holes and make two more \ stitches.
-
 Step 18
Stitch 2 rows of 7 blocks.
-
 Step 19
Start the 4th row with a \, stitch5 blocks and end the row with a /.
-
 Step 20
Continue this down, decreasing by one block at either side.
-
 Step 21
Decrease by another block on either side and your red heart is finished.
-
 Step 22
Stitch one white lines around the outside of the red, repeating the same pattern.
-
 Step 23
Now stitch a blue heart, 2 blocks wide around the outside of the white.
-
 Step 24
Your heart should look like this.
-
 Step 25
I made a little border by stitching one red block, missing a block and then stitching a blue block around the outside of the heart.
-
 Step 26
Cut out your two sides, leaving a 2 block border.
-
 Step 27
Place the two sides, wrong sides facing out and stitch a straight line along the top and bottom.
-
 Step 28
Fold right side out and it should look like this.
-
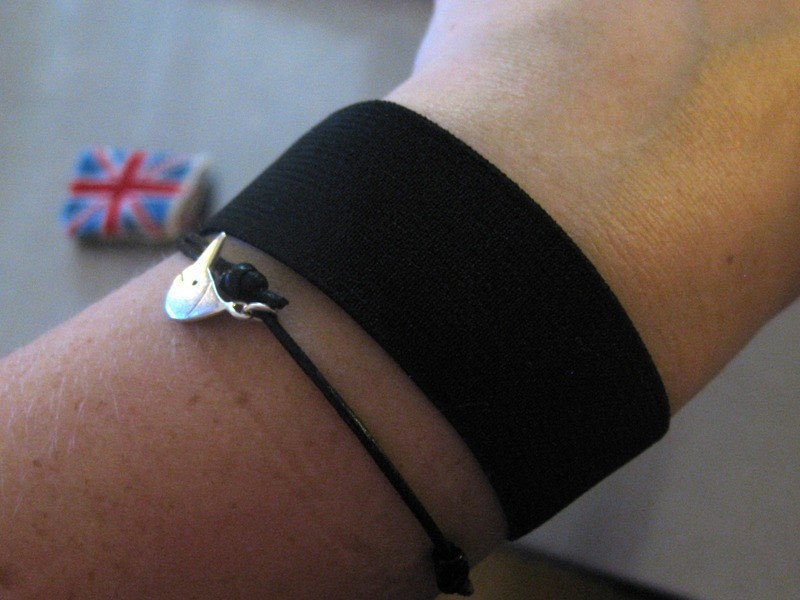
 Step 29
Cut a length of thick black elastic to fit your wrist.
-
 Step 30
Slip through your flag and stitch the opens end together. Place the stitched area on the inside of the flag. Fold the edges of one of the side under and stitch together, stitching through the elastic.
-
 Step 31
Stuff the open end with stuffing, so that the pin cushion is nice and fat.
-
 Step 32
Stitch the final end closed and you're all done.
-
 Step 33
Slip on your wrist and you're ready to start sewing!


absolutely awesome!!