About
A wall clock for the diehard twifan
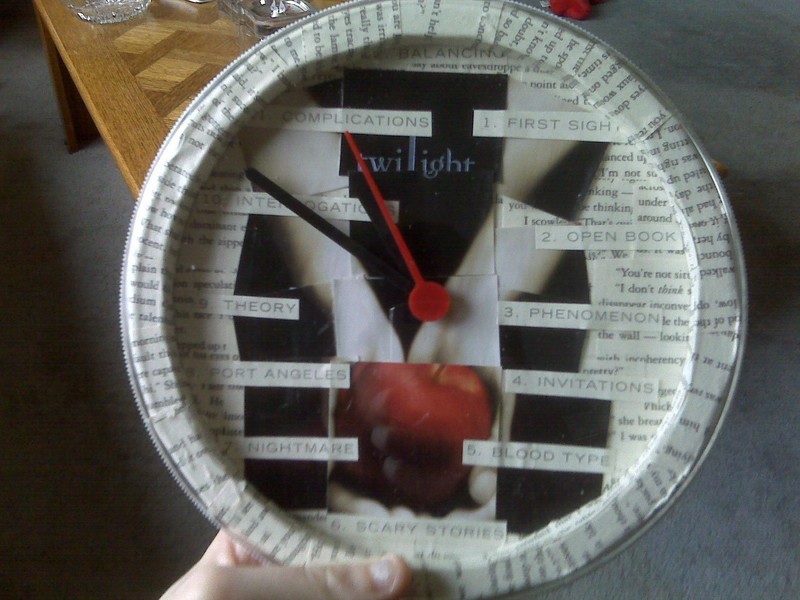
I wanted to make my niece something homemade that only she would have. So, I made a Twilight clock! It's all open for interpretation so don't be afraid to add anything extra!
Tags
-
 Ichigo M. favorited Twilight Clock
31 Aug 03:53
Ichigo M. favorited Twilight Clock
31 Aug 03:53
-
Step 1
Sorry about the lack of pictures, I didn't think to take many while making the clock. I only took one!
Step one is to take apart your old clock. Take off the front plastic, mine had a ring around the outside, take that off too. Take out all the hands and mechanical stuff. So you should be left with just the cardboard with the numbers on it, yes?
-
Step 2
Next is to pick your book. I chose Twilight due to my niece's obsession, but you can choose any book you like. I might make a Harry Potter one for myself :P
Now make sure you NEVER WANT TO READ THIS BOOK AGAIN. That is very important. In my case, I had another copy of Twilight, so using one wouldn't kill me.
-
Step 3
Now what I did was I cut out the chapter numbers and names, to use for the numbers on the clock. You'll want to cut those out and set them aside.
Then take random pages from the book and rip/cut them out. I cut them into little squares, but you can do strips or shapes, whatever you like!
-
 Step 4
Here is my one picture that I took.
Okay so first I copied where the numbers were onto the back of the cardboard, so I'd know where I was supposed to put the new numbers (I kinda messed up that step anyway... but it would be easier to do that)
So I started from the top and decoupaged the squares onto the cardboard. Don't worry about the circle in the middle, we can cut that out later. Cover your whole clock.
-
Step 5
I had a blue plastic ring that outlined the cardboard, so I covered that in pages as well. Go crazy!
-
Step 6
Next I wanted to incorporate the cover into the clock, so I cut the cover picture into squares. I then mod podged them into the middle of the clock, a little overlapping, to give it more of a collage feel. (at least that's what I was trying to get across.)
This might be a little tricky, as my cover page didn't want to stay down, the corners decided they wanted to curl up. So I just used a glue stick and stuck it down, then mod podged the crap out of it. -
Step 7
Your clock is starting to look wonderful, isn't it? Next, compare where your written numbers are on the back of the cardboard to where they should be on the front. If you have a plastic ring like I did, DON'T FORGET ABOUT IT. Make sure to take where it sits into account. I didn't, and as you can tell, my 12 is barely noticable.
I used a glue stick to stick these on and then mod podged them. -
Step 8
Almost done! Wait until all the mod podge is dry and flip it over. Cut around the edges so that the pages don't go off the cardboard anymore. For this I used an Xacto knife, but you could use scissors. Also cut out the little circle in the middle.
-
 Step 9
Put all your mechanical stuff back, including the hands. Then put the whole clock back together. It might be a tight fit due to the added pages, but just squish it a little.
There, you're done!
Hang it up on your wall so that all your friends and family can bask in your talent and creativity!

Comments