


About
Sew a tree & be a tree hugger.
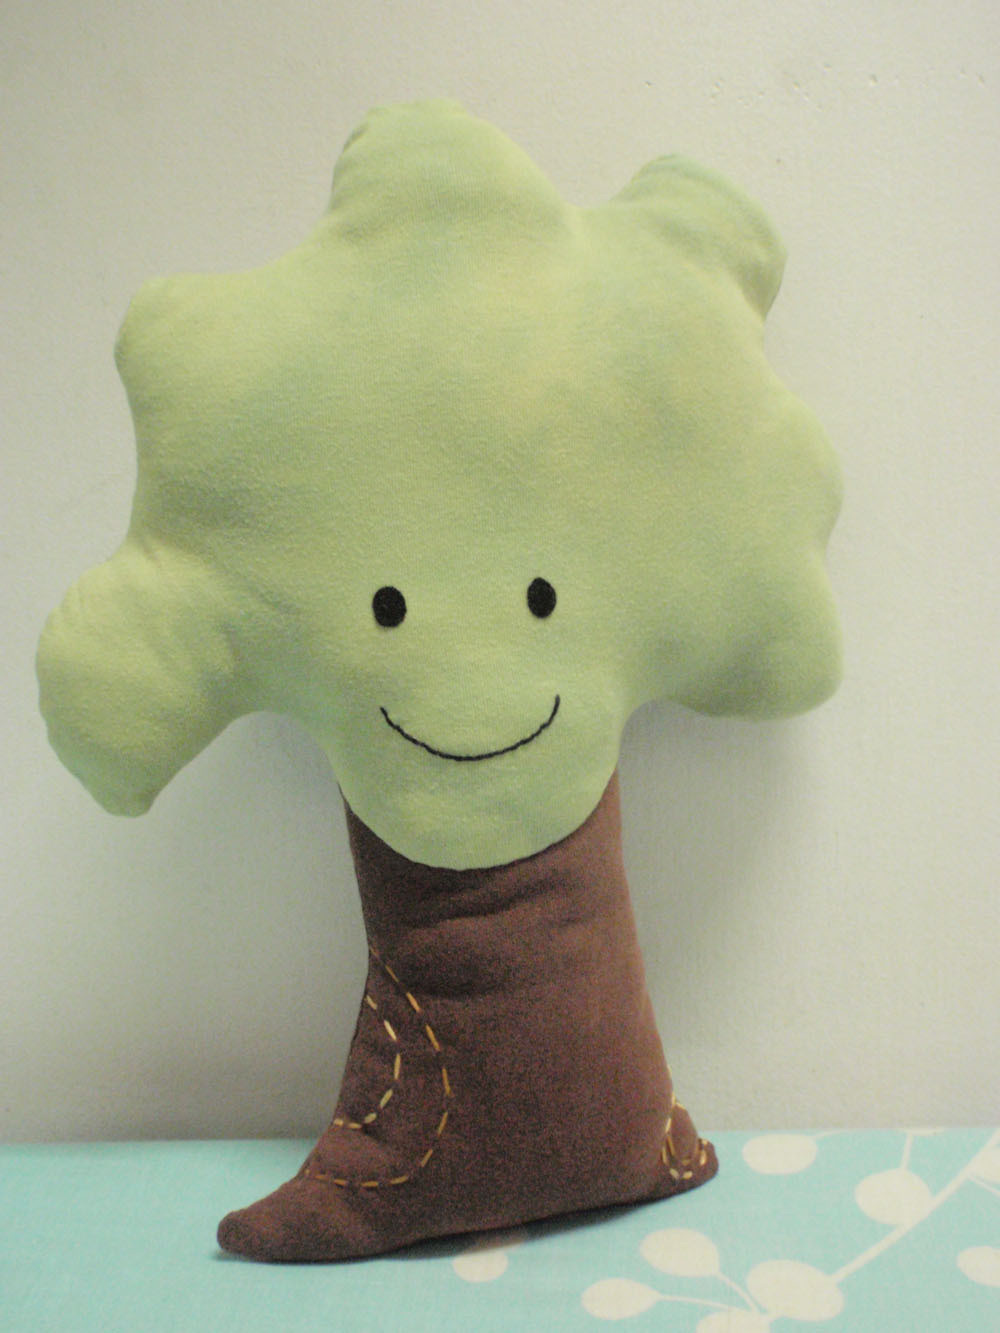
This project was done on Earth day, so I repurposed old shirt to make this cute tree plushie. No measurements needed as the shape was roughly drawn. You can draw and sew your own version of the tree plushie as big as you like. The softie is totally hand stitched.
I use 1/4" seam allowance
Tags
-
 Skyliva favorited Tree Plushie
24 Apr 16:37
Skyliva favorited Tree Plushie
24 Apr 16:37
-
 Aurelie L. added Tree Plushie to Doudou
14 Mar 22:23
Aurelie L. added Tree Plushie to Doudou
14 Mar 22:23
-
 Helen S. added Tree Plushie to Theo
04 Dec 21:54
Helen S. added Tree Plushie to Theo
04 Dec 21:54
-
 DocDoolittle favorited Tree Plushie
04 Mar 00:58
DocDoolittle favorited Tree Plushie
04 Mar 00:58
-
Shelby W. added Tree Plushie to Fleece
30 Jan 03:12
-
 Hannah E. favorited Tree Plushie
29 Dec 00:05
Hannah E. favorited Tree Plushie
29 Dec 00:05
-
 Bea R. entered her project Tree Plushie to Sweater Surgery Contest
05 May 20:13
Bea R. entered her project Tree Plushie to Sweater Surgery Contest
05 May 20:13
You Will Need
-
 Step 1
Draw the foliage using a washable marker on green t-shirt. Pin the shirt layers together and cut along the drawn lines. Place the 'foliage' on top of brown shirt. Draw the shape of a trunk. Pin and cut the brown trunk.
-
 Step 2
Mark the curvy line of the foliage that overlaps the bark. Cut off the extra material above the curvy line. Add 'texture' to the bark by drawing some lines or semicircles as shown. Embroider the lines with your favourite colour thread & stitches of your choice.
-
 Step 3
Mark the points where the top edge of the bark meets the foliage. Mark both layers of foliage. Put aside one layer of foliage & bark. Draw the eyes & mouth on the other foliage with a pencil. Cut black felt into two small circle for the eyes and stitch in place. Embroider the 'smile' with a black embroidery floss.
-
 Step 4
On the wrong side of the materials, hold together the center point where the foliage meets the bark. Pin together both materials. Hand stitch the layers together. (1/4" - 1/2" seam allowance). The right side will look as the above picture. Repeat the step for the other layers of foliage & bark.
-
 Step 5
Sandwich the two layers together with right sides facing. Pin the layers together. Sew along the tree perimeter, leaving a few inches opening at the bottom of the bark for turning. Turn the tree right side out and stuff it with poly-fill. Sew shut the opening with a slip stitch and you're done!


awesome done and great tute as well!!! thank you for the sharing;-D many xo's