

Travel Photo Album
Extract from At Home with Handmade Books • By Erin Zamrzla • Published by Roost Books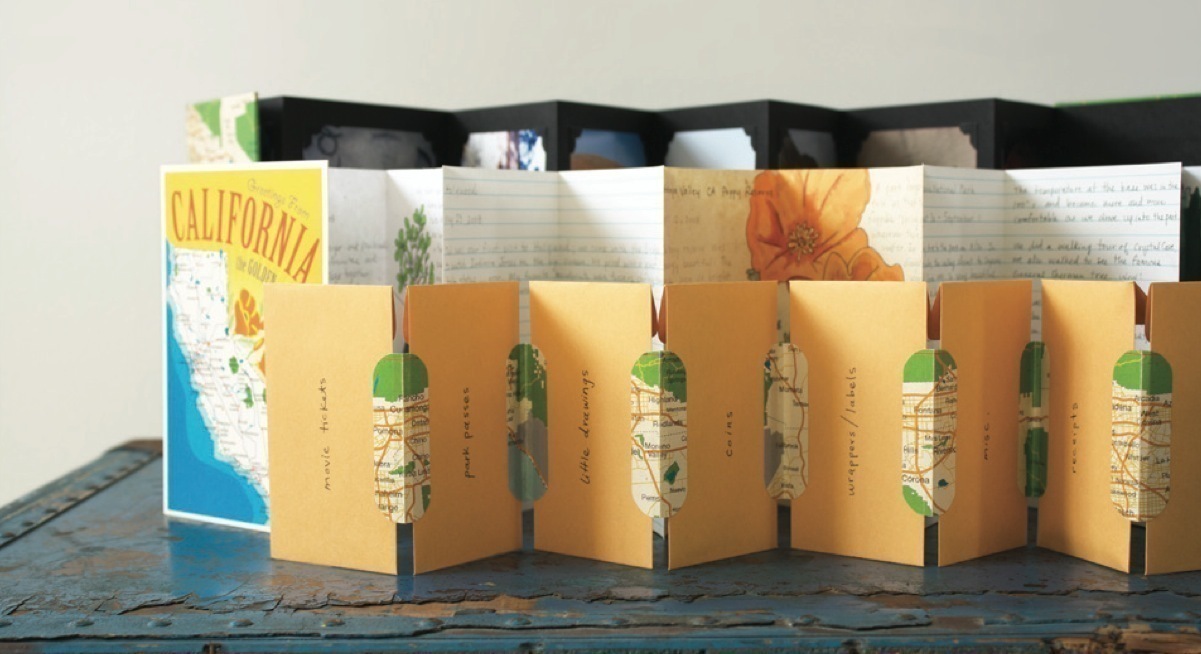


About
Keep a selection of favorite trip photos handy to share with others.
Use a map or paper from your trip for the covers. Photo corners hold the pictures in place, and a ribbon keeps the book closed. You can even display the book standing open on a shelf—just tie the ribbon to the back, out of the way.
Finished size
5 1?8 " x 7 5?8 " x 1?2 "
-
 shelly.anderson.547 added Travel Photo Album to Travel
18 Jul 05:49
shelly.anderson.547 added Travel Photo Album to Travel
18 Jul 05:49
-
shelly.anderson.547 favorited Travel Photo Album
18 Jul 05:49
-
 Pearle D. commented on Travel Photo Album
26 Feb 22:37
Pearle D. commented on Travel Photo Album
26 Feb 22:37
-
Pearle D. favorited Travel Photo Album
26 Feb 22:36
-
 arina m. favorited Travel Photo Album
08 Jan 23:27
arina m. favorited Travel Photo Album
08 Jan 23:27
-
 juliez favorited Travel Photo Album
26 Aug 00:16
juliez favorited Travel Photo Album
26 Aug 00:16
-
Alecia B. favorited Travel Photo Album
01 Aug 15:46
-
 dippydiscoball added Travel Photo Album to To-make list
01 Jun 06:14
dippydiscoball added Travel Photo Album to To-make list
01 Jun 06:14
-
 Rachael H. added Travel Photo Album to Books/Journals
17 Feb 09:49
Rachael H. added Travel Photo Album to Books/Journals
17 Feb 09:49
-
 Sneha J. added Travel Photo Album to paper work
18 Jan 19:04
Sneha J. added Travel Photo Album to paper work
18 Jan 19:04
You Will Need
-
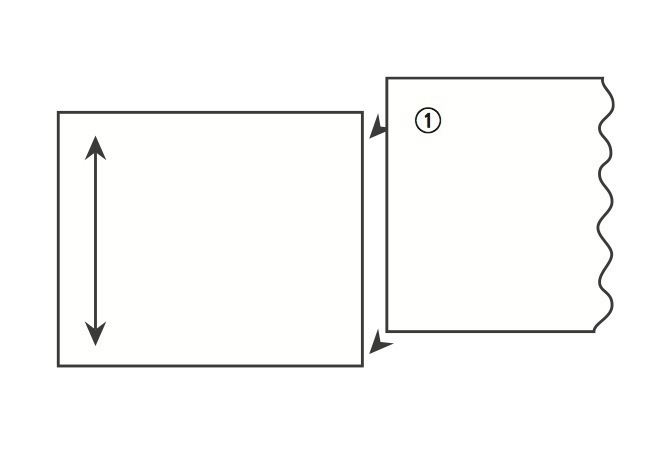
 Step 1
Notice the paper grain of your medium weight paper. Place the direction of the paper grain top to bottom, parallel to where the accordion folds will be. Piece as many pieces together as you need to reach 50" by applying paste to the end of a paper and overlapping papers by about 1?4".
-
 Step 2
Trim your papers and book board to size with a metal ruler and craft knife.
-
 Step 3
Using the ruler and awl (or pencil), measure and mark every other accordion fold along the bottom of the medium weight paper at these measurements: 5", 15", 25", 35", 45".
-
 Step 4
Fold the paper in, left to right, along
the fold marks. Burnish. You will have five folds. -
 Step 5
Match folded edge to folded edge to
create the reverse accordion folds. Burnish. You will have four more folds. -
 Step 6
Place the map papers face down.
Place a piece of book board in the very center of each map paper and trace with a pencil. -
 Step 7
Trim all corners from the map papers, leaving 1?4" beyond each corner of the penciled-in boxes.
-
 Step 8
Apply a thin layer of paste to the back
side of one trimmed map paper. Place one of the book board pieces directly inside
of the box that you drew. Flip the glued board over onto a piece of waxed paper and smooth to remove air bubbles. Flip it again.
Fold over the edges, long sides first and short sides last. Smooth. Press until dry. Repeat with the other cover. -
 Step 9
Make two marks on the inside of the back cover halfway between the top and bottom edges and 1?2" in from each side. Paste one end of each ribbon at the two marks inside the back cover. Press until dry.
-
 Step 10
Apply a thin layer of paste to the back side of the first accordion panel. Place it centered within the inside of the front cover. Smooth. Press until dry.
-
 Step 11
Repeat step 10, adhering the back ac- cordion panel to the inside of the back cover.
-
 Step 12
Use a pencil to mark the placement of the photos on each page. Place four photo corners to hold a 4" x 6" photo on each page. Fill the album with eight favorite pho- tos. Adhere photo labels 1?8" below each photo.
-
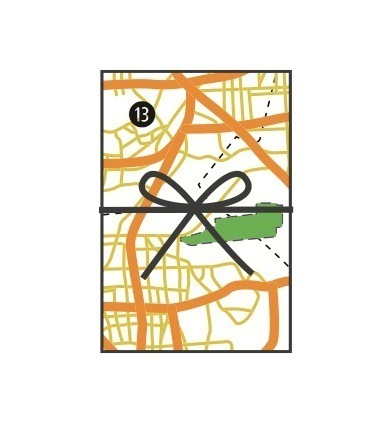
 Step 13
Wrap the ribbons around and tie in the front to keep the album closed.


Comments

