


About
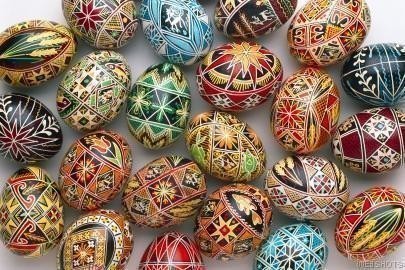
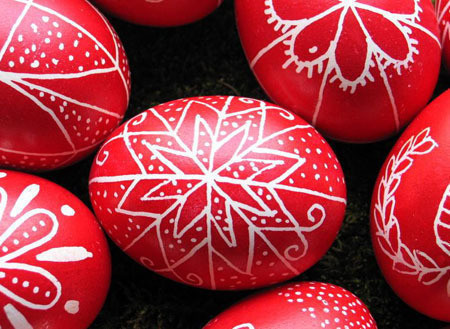
traditional hungarian ukrainian easter eggs
This is a traditional way how we paint the eggs here, in Hungary. Tha traditional supply for this is "íróka", which we can buy some places here, but I think, you can't buy it in places, where this thing is not traditional. So I show you how to make one.
Tags
-
 Charyawn221 favorited Traditional Easter Eggs (No Special Supplies)
20 Nov 21:18
Charyawn221 favorited Traditional Easter Eggs (No Special Supplies)
20 Nov 21:18
-
 Lex R. favorited Traditional Easter Eggs (No Special Supplies)
23 Mar 21:23
Lex R. favorited Traditional Easter Eggs (No Special Supplies)
23 Mar 21:23
-
 Jeanine S. favorited Traditional Easter Eggs (No Special Supplies)
19 Apr 18:10
Jeanine S. favorited Traditional Easter Eggs (No Special Supplies)
19 Apr 18:10
-
 Chachee.rayna added Traditional Easter Eggs (No Special Supplies) to Other
04 Apr 20:59
Chachee.rayna added Traditional Easter Eggs (No Special Supplies) to Other
04 Apr 20:59
-
 Spookachtige favorited Traditional Easter Eggs (No Special Supplies)
20 Apr 19:24
Spookachtige favorited Traditional Easter Eggs (No Special Supplies)
20 Apr 19:24
-
B S. favorited Traditional Easter Eggs (No Special Supplies)
20 Apr 07:57
-
 Banndit1 added Traditional Easter Eggs (No Special Supplies) to Easter
13 Apr 05:23
Banndit1 added Traditional Easter Eggs (No Special Supplies) to Easter
13 Apr 05:23
-
Banndit1 favorited Traditional Easter Eggs (No Special Supplies)
13 Apr 05:23
-
 Laura D. favorited Traditional Easter Eggs (No Special Supplies)
21 Jun 00:55
Laura D. favorited Traditional Easter Eggs (No Special Supplies)
21 Jun 00:55
-
 Step 1
Firstly, put the eggs in vinegar for 5 minutes, to avoid any oils and dirt. Than you're gonna have to blow the egg out of its shell. With a knitting needle, bore two holes on the egg, one on the bottom, one on the top, and start to blow one of the holes. On the other hole, the egg will come out (Wash the egg very well, before you do this!)
-
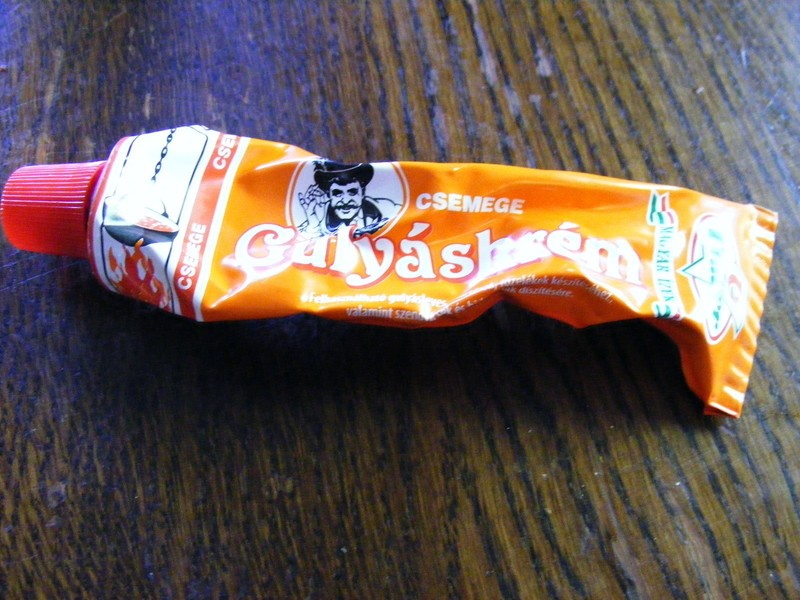
 Step 2
Now, get an empty aluminium tube, e.g a gulyás (goulash) cream tube :D Than cut the top part and the sides off, and make a flat rectangle of it. (you can flatten it out with a rolling pin)
-
 Step 3
Cut a tiny little piece of the flattened aluminium
-
 Step 4
Get a pin, and curl the thingy around it. The little hole on the end really shouldn't be bigger than the pin, which you curled it around.
-
 Step 5
Now, get a stick from the garden, and split it like 5 cms (2 inches) long with a knife. Put your little cone between the stick, and tie it together. (my íróka's end is black, because I used it already, it's totally normal)
-
 Step 6
put a little beeswax in the cone. You can use any colour, it doesn't matter, I found green one at home.
-
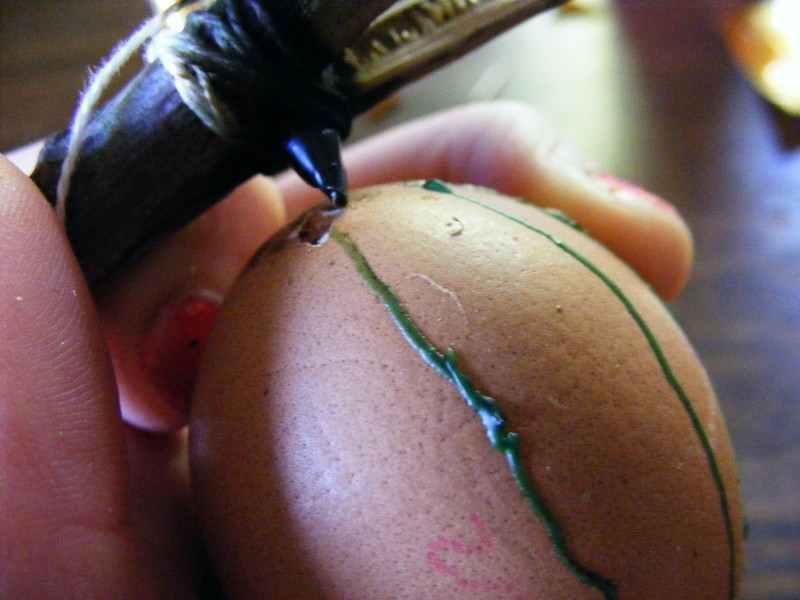
 Step 7
Put the cone part in a candle's flame, so the beeswax will melt. Get a piece of paper too, because maybe you're gonna wanna drag some strokes before you draw on the egg, to avoid the too much beeswax and the drips.
-
Step 8
Put the eggs in paint, and when the paint is dried peel/rasp the wax from your egg. You can also melt it down, but i think, its easier to rasp, especially if your strokes were thick (not wide) enough to peel it down.
(sorry, no pictures of this one, because I had no egg paint at home. The beautiful eggs on the main images are not painted by me) -
Step 9
you can put a matching ribbon through the two holes on the egg, so you can hang it up.


saved it for next year ;P
have a nice fun easter time;-D