


About
Who says you can't make a metal necklace?
I was exceptionally excited for this one, because it involved materials I’ve always wanted to experiment with but never had the chance to. I saw a similar necklace in Topshop and loved it so I thought it might just make a manageable and fab DIY project!
Tags
Downloads
- Operation_Overhaul_-_Metal_Necklace_Pattern.jpg 1.3 MB [ Download ]
-
 Lara L. favorited Topshop Inspired Metal Necklace
27 Feb 21:29
Lara L. favorited Topshop Inspired Metal Necklace
27 Feb 21:29
-
 Jessy added Topshop Inspired Metal Necklace to Wicked
06 Oct 09:43
Jessy added Topshop Inspired Metal Necklace to Wicked
06 Oct 09:43
-
Jessy favorited Topshop Inspired Metal Necklace
06 Oct 09:42
-
 kenye.reid added Topshop Inspired Metal Necklace to Things to try out
24 Aug 20:43
kenye.reid added Topshop Inspired Metal Necklace to Things to try out
24 Aug 20:43
-
 Taylor K. favorited Topshop Inspired Metal Necklace
11 Jul 22:10
Taylor K. favorited Topshop Inspired Metal Necklace
11 Jul 22:10
-
 kyra r. favorited Topshop Inspired Metal Necklace
01 Jul 12:09
kyra r. favorited Topshop Inspired Metal Necklace
01 Jul 12:09
-
 Jinx added Topshop Inspired Metal Necklace to Necklaces
18 Jun 04:41
Jinx added Topshop Inspired Metal Necklace to Necklaces
18 Jun 04:41
-
 Sissi favorited Topshop Inspired Metal Necklace
02 Jun 14:23
Sissi favorited Topshop Inspired Metal Necklace
02 Jun 14:23
-
 Ada B. added Topshop Inspired Metal Necklace to Necklaces
14 Apr 11:42
Ada B. added Topshop Inspired Metal Necklace to Necklaces
14 Apr 11:42
-
 Nora E. added Topshop Inspired Metal Necklace to Projects to try
05 Apr 16:37
Nora E. added Topshop Inspired Metal Necklace to Projects to try
05 Apr 16:37
-
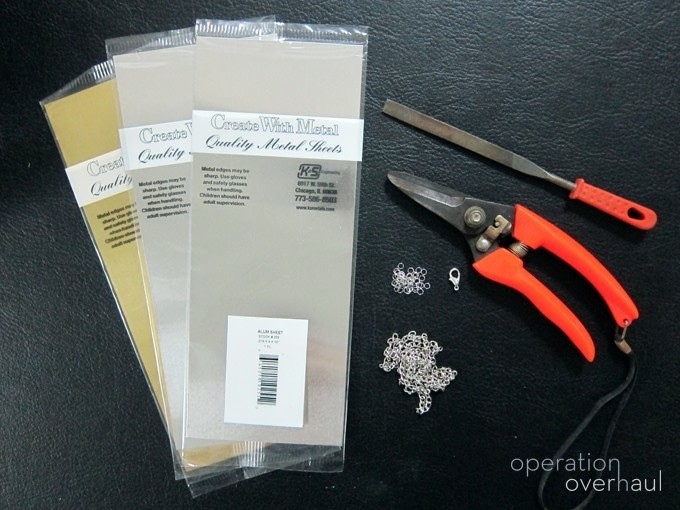
 Step 1
- 1 Metal Sheet 0.16 x 4 x 10?
- Jump Rings
- Chain
- Lobster Clasp
- Shears
- Metal File
- Craft Drill or Nail & Hammer (Not pictured)
- Marker (Not pictured) -
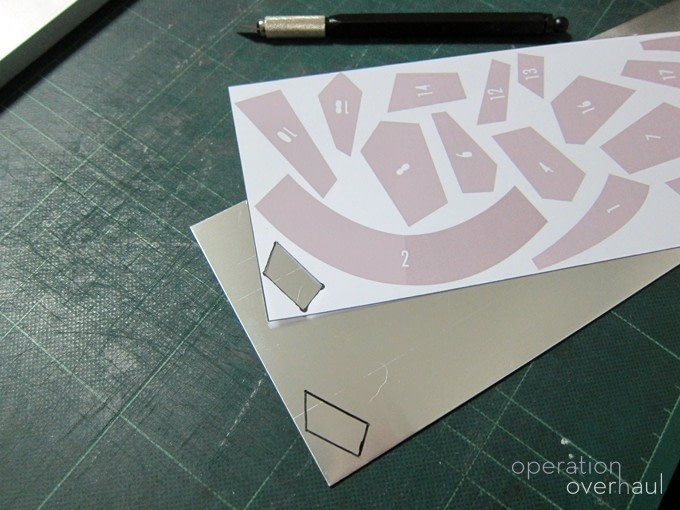
 Step 2
Using the downloadable pattern, create a template and trace out all 18 parts of the necklace onto the metal sheet. Make sure to use a semi-permanent marker that you can erase after!
-
 Step 3
When you’re done, use a pair of pruning shears to cut out the pieces! (Thinner metal sheet might “curl” so do experiment and find the best way to cut yours!)
-
 Step 4
File down the edges and sides as they might be sharp and uneven. Be careful!
-
 Step 5
Arrange the pieces according to the Necklace Pattern. As you can see, my printout was a draft version!
-
 Step 6
Using the same marker, mark out the spots where the holes are needed. Then, use a craft drill to create a holes close to the edge. Alternatively, hammer a nail through the metal sheet to create a hole.
(Pattern sheet downloadable on OperationOverhaul.com!)
-
 Step 7
The edges of the holes might be sharp so it might be a good idea to file down again at this point.
-
 Step 8
Referring to the diagram once again, reposition all the pieces again and attach the jump rings as pictured.
(Pattern sheet downloadable on OperationOverhaul.com!)
-
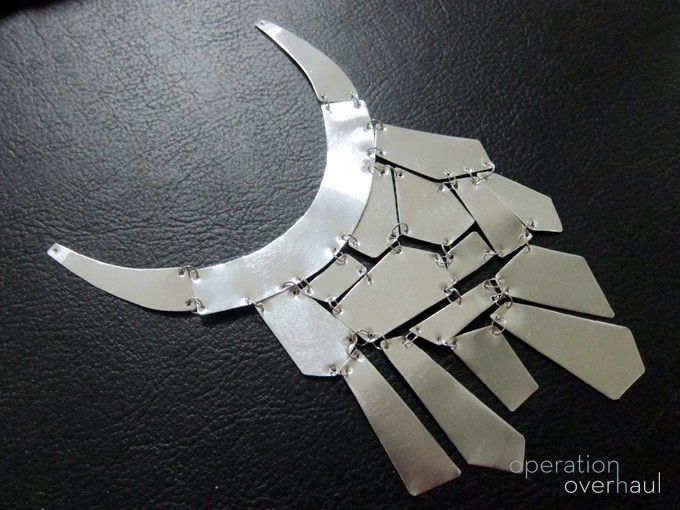
 Step 9
After adding all the jumprings, you're almost done!
-
 Step 10
Lastly, add chains to both ends. Finish with a lobster clasp! You’re done!
-
 Step 11
Finished Product!


Comments

