


About
A cute little lantern to hang in your room or decorate a shelf
I've known how to make paper lanterns for as long as I can remember; my mom taught me how. I've made it a little more complicated by making it very small and adding a faux "light" in the center.
Make some of every color and string them up for a party!
-
 Ann A. commented on Tiny Little Paper Lantern
02 Jul 06:18
Ann A. commented on Tiny Little Paper Lantern
02 Jul 06:18
-
Ann A. favorited Tiny Little Paper Lantern
02 Jul 06:18
-
 Tibbles favorited Tiny Little Paper Lantern
08 Sep 12:49
Tibbles favorited Tiny Little Paper Lantern
08 Sep 12:49
-
 Lishieesaur favorited Tiny Little Paper Lantern
03 Aug 03:10
Lishieesaur favorited Tiny Little Paper Lantern
03 Aug 03:10
-
 Jay .. favorited Tiny Little Paper Lantern
24 Jul 05:29
Jay .. favorited Tiny Little Paper Lantern
24 Jul 05:29
-
 Len favorited Tiny Little Paper Lantern
08 Jul 04:18
Len favorited Tiny Little Paper Lantern
08 Jul 04:18
-
 Erin entered their project Tiny Little Paper Lantern to Fiskars Craft Contest
11 Jul 17:26
Erin entered their project Tiny Little Paper Lantern to Fiskars Craft Contest
11 Jul 17:26
You Will Need
-
 Step 1
First things first; cut two rectangles of paper. The paper you're using for the outside of the lantern should be twice as long as it is wide. The paper for the "light" should be the same length, but a bit skinnier. I didnt have yellow paper on hand, so I colored it with a highlighter.
-
 Step 2
Fold the paper you're using for the lantern in half hot-dog way.
-
 Step 3
Fold the end up a little ways, and do the same on the other side. Crease it well!
-
 Step 4
Now unfold step 3. You may want ot leave it sticking up a little so you can see the crease better. Cut slits right up to the crease all the way down the folded edge.
-
 Step 5
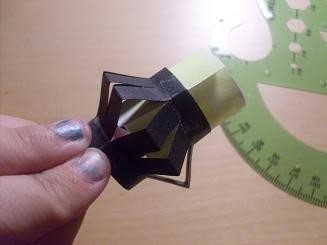
Now unfold the whole paper. Curl it around into a tube, and put a little peice of tape on both rims to hold it together. Squish it so it looks like this from the top.
-
 Step 6
Unsquish the lantern and now you're ready to put in the yellow paper. Roll the yellow into a tube and insert it into lantern. Mark where the yellow paper overlaps, take it out, and secure the yellow tube with tape.
-
 Step 7
Before you slip the yellow tube back in, put a few tiny rolls of tape inside the rim of the lantern. Put the yellow tube in, and press the two layers together where you put the rolls of tape.
-
 Step 8
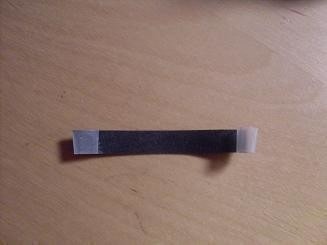
Cut a little strip in the same color you made your lantern in. Add two little rolls of tape to each end of it.
-
 Step 9
Slip each end between the lantern layer and the light layer and press together. You're finished! So cute!
Let me know if anything was unclear. Have fun!


Versions

Comments


