


About
Prettier mail makes me happy, and the postman, too!
I used these envelopes to hold the cards together for my wedding invitations, then the whole packet went into a larger envelope for mailing.
In this tutorial, I'll assume that we are making a 4X6 inch envelope, but you can always adjust measurements as needed!
-
 Alex favorited Ticket Slider Envelopes
20 Jun 18:14
Alex favorited Ticket Slider Envelopes
20 Jun 18:14
-
 Sayaka Y. added Ticket Slider Envelopes to envelope
25 Sep 23:09
Sayaka Y. added Ticket Slider Envelopes to envelope
25 Sep 23:09
You Will Need
-
Step 1
Once you ave gathered your materials, decide on the size of your envelope and if you will or will not want to create a seam for your envelope. Seams will make them look more professional, but are lots more work!
-
Step 2
If not using a seam:
- Cut your card stock into a rectangle with the measurement 8X6. (We have doubled the length of the desired envelope size)If using a seam:
- Add 1/4 inch all around -
Step 3
If not using a seam:
- Using a bone folder, fold your rectangle in half to make a 4X6 rectangle.
*Note: if you are using patterned or textured cardstock, fold your rectangle inside out, press with the bone folder, then fold it back to the right side and press gently on the fold. Textured paper can wrinkle or tear at the fold otherwise!If using a seam:
- Do the same as above, then use the bone folder to fold each 1/4 inch seam under. -
 Step 4
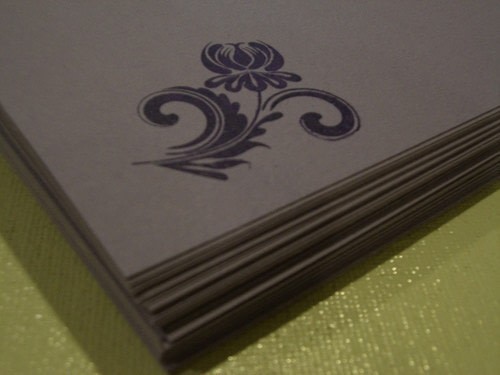
Decorate your envelope now if desired. These are done with the gocco, but you can rubber stamp them, paint them, draw on them by hand, whatever! Just don't add any bulky items like ribbon, glitter or gems yet!
-
Step 5
If not using a seam:
- Run a line of glue or very thin double sided tape along the inside of the bottom and outside edges. Press paper together firmly, being careful to line up the edges. Let dry.If using a seam:
- Run a line of glue or very thin double sided tape along the inside of the bottom and outside seams. Press seams together firmly being sure to line them up correctly. Let dry. -
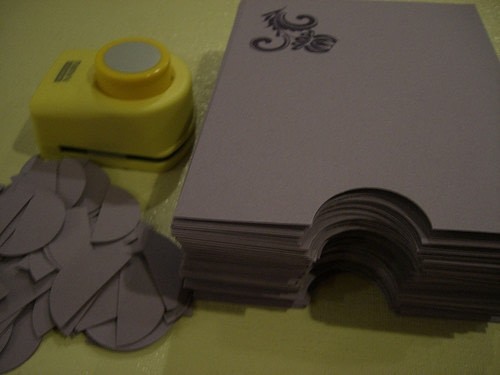
 Step 6
Using a large round punch, cut a semi-circle in the center of the open end. I measured and stuck a piece of duct tape at the halfway point of my round punch. That way I could only slide the paper in exactly halfway, creating perfect semi-circles each time!
Comments

