Three Tiered Outdoor Planter
Extract from DIY Rustic Modern Metal Crafts • By Laura Putman • Published by F+W Media


About
DIY Rustic Modern Metal Crafts
I made the first version of this project with my husband a few years ago. Since then, we’ve learned a lot about simplifying the process, so you get to benefit from our mistakes. Having a planter this size is perfect if you want to add flowers at a front entrance or plant herbs or vegetables right outside of your kitchen.
-
 goldielocks . added Three Tiered Outdoor Planter to garden
14 Oct 17:38
goldielocks . added Three Tiered Outdoor Planter to garden
14 Oct 17:38
-
 Harmonee.seal added Three Tiered Outdoor Planter to Want to Make
27 Jan 03:08
Harmonee.seal added Three Tiered Outdoor Planter to Want to Make
27 Jan 03:08
-
Harmonee.seal favorited Three Tiered Outdoor Planter
27 Jan 03:08
-
 Harley Q. added Three Tiered Outdoor Planter to Inspiration to be Creative
08 Apr 08:44
Harley Q. added Three Tiered Outdoor Planter to Inspiration to be Creative
08 Apr 08:44
-
 Alissa B. favorited Three Tiered Outdoor Planter
23 Jan 23:26
Alissa B. favorited Three Tiered Outdoor Planter
23 Jan 23:26
-
 FW Media published his project Three Tiered Outdoor Planter
22 Jan 09:00
FW Media published his project Three Tiered Outdoor Planter
22 Jan 09:00
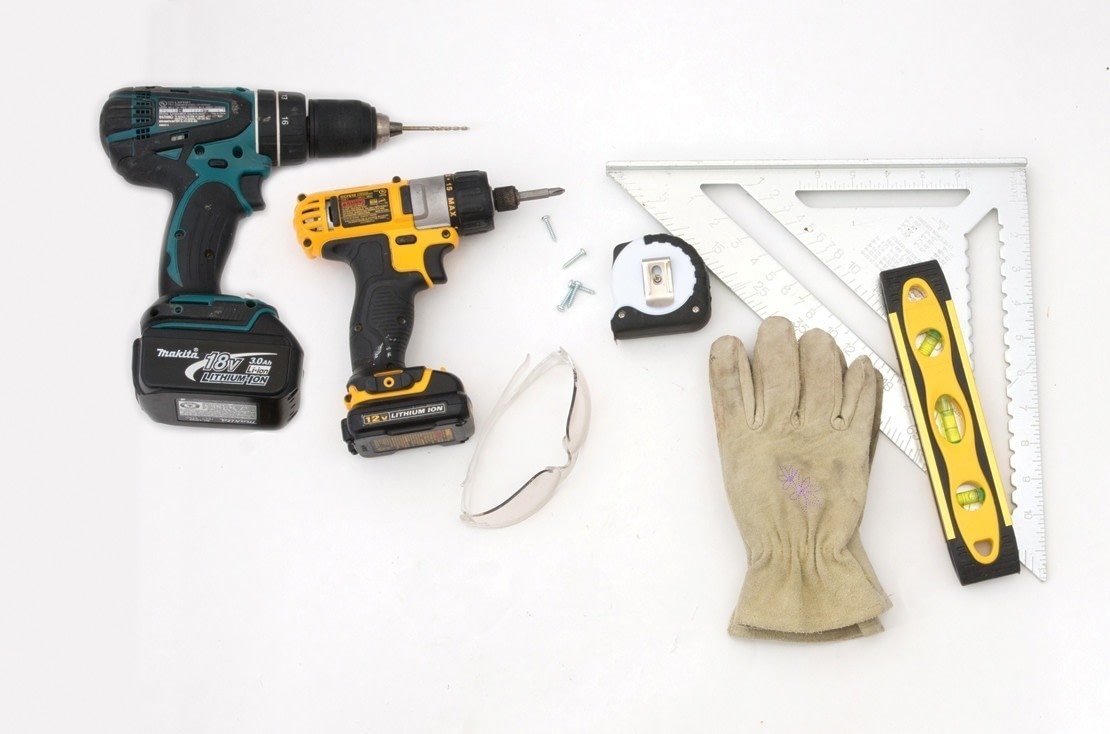
You Will Need
-
 Step 1
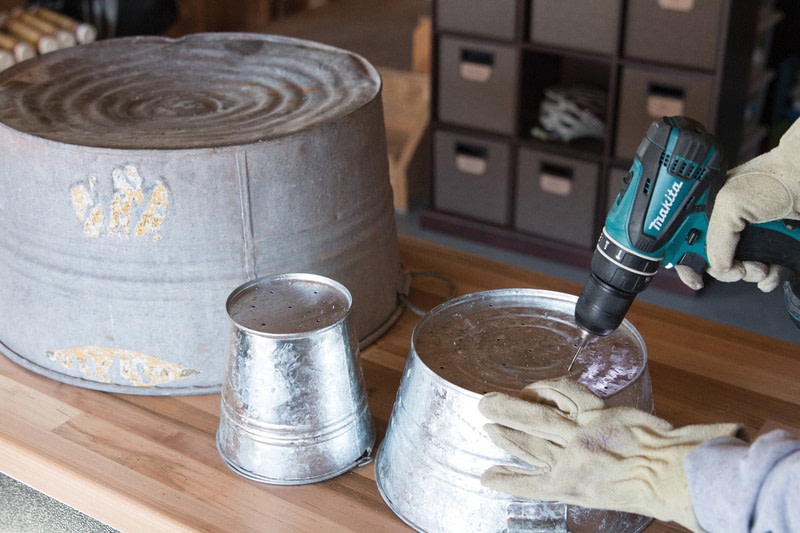
Put on your work gloves and eye protection and use your drill to create drainage holes in the bottom of each of the galvanized buckets. I drilled seven holes for the smaller buckets and eighteen holes for the largest bucket.
-
 Step 2
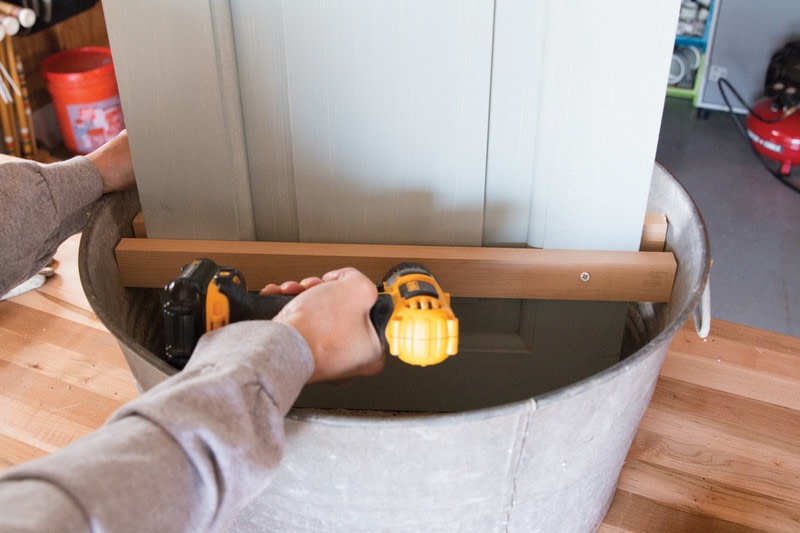
Use your measuring tape and measure the diameter of the largest bucket a few inches down from the top. Also measure the diameter of the bottom of the bucket for later use. With your miter box or chop saw, cut two pieces of wood strapping to the length of the bucket’s diameter a few inches down from the top (your first measurement). Place the door, shutter, or piece of plywood in the base of the large bucket and sandwich the door between the two pieces of wood strapping board. Use your screw gun to attach each end of the wood strapping to the bucket with a sheet metal screw from the outside of the bucket.
-
 Step 3
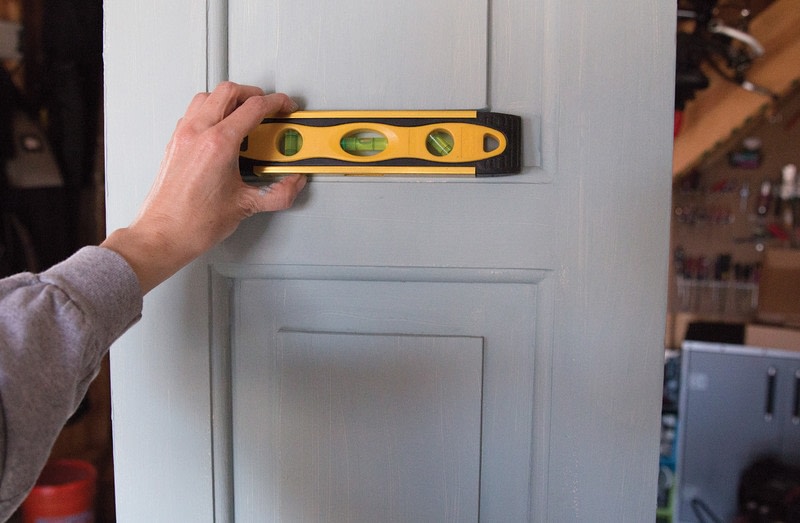
Use your level to check that your door is straight.
-
 Step 4
Use your drill to create a pilot hole at the center and at each end of the front side of the strapping, then attach the strapping boards to the door with your screw gun and a wood screw through the pilot holes.
Tips & Recommendations
Although this project works great for flowers, it is also a great for herbs or even some vegetables. Keep the planter close to your kitchen access and you can easily pick some herbs or vegetables while you are cooking. -
 Step 5
Lay the door down so you can have access to the bottom of the bucket. Use your screw gun and attach a sheet metal screw through the center of the bottom of the bucket and into the bottom of the door.
-
 Step 6
With your miter box or chop saw, cut a piece of wood strapping as long as the diameter of the bottom of the bucket (your second measurement in step 2). Cut the ends at a 45-degree angle and place the strapping vertically in the bottom of the bucket, on the back side of your door, shutter, or plywood. Use your screw gun to attach the vertical piece of strapping with a wood screw where it meets the horizontal strapping board.
-
 Step 7
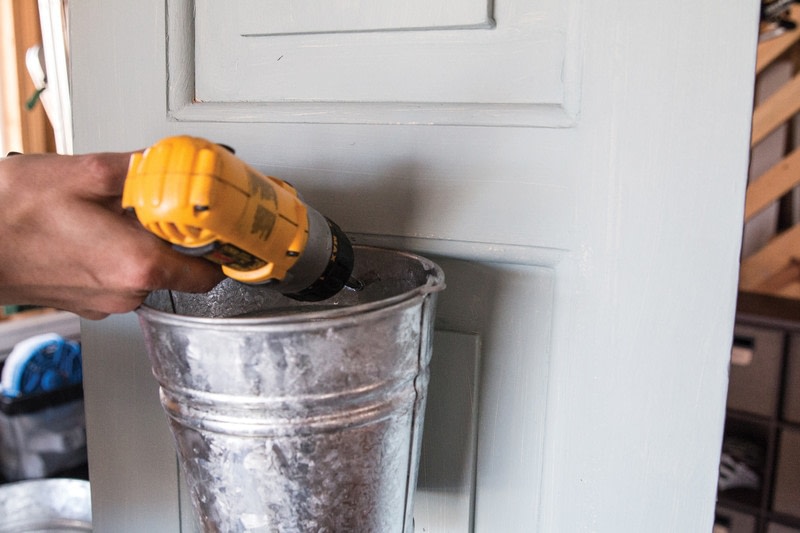
Attach each of your two smaller buckets to the front of the door with a screw gun and 1 sheet metal screw.
-
 Step 8
Add a wood screw under each bucket but do not drill it all the way in. The purpose of this screw is to support the weight of the planter.
-
 Step 9
If desired, use plate hangers to attach decorative plates on the back of the door.
Tips & Recommendations
If you are unable to find a vintage door or shutter, look at new ones. When all else fails, you can also use a piece of plywood with molding attached.