


About
*♫♪♫♪And one of these days these Rockabilly Boots are gonna walk all over you!♫♪♫♪*
I say cheap because I have had these boots for years. Acrylic paint was $1.29 a bottle at the dollar ( I remember when it was only a dollar...lol) store. Fixative was $3.00. I was inspired by Liberty Boots Company. I love their boots but I can honestly say that my favorite pair was almost $2000.00 and there is no way I could afford that or if I could would I pay that much. But their boots are beautiful! I put that it took almost 10 hours but since I had to let the boots dry tween coats it was longer than that but worth it.
P.S. A lot of crafters here don't know that I have a prostethic leg a.k.a. Fake Leg. I had to modify the boot so that I can wear it. Doesn't look real pretty but it is ok. I have the steps on how I did that also. If anyone wants to know how I did that let me know and I will post a how-to and pics of it. ﺕ
-
 Miss Vicky Viola added These Boots Were Made For Walking to Dolly Parton!
09 Apr 09:17
Miss Vicky Viola added These Boots Were Made For Walking to Dolly Parton!
09 Apr 09:17
-
 Afilover47 favorited These Boots Were Made For Walking
28 Nov 05:04
Afilover47 favorited These Boots Were Made For Walking
28 Nov 05:04
-
 justlori entered her project These Boots Were Made For Walking to Daisy Rock
07 Nov 18:18
justlori entered her project These Boots Were Made For Walking to Daisy Rock
07 Nov 18:18
You Will Need
-
 Step 1
This is what the boots looked like before starting. Make sure to clean the boots thoroughly.
-
 Step 2
Pick out what colors you want to use. I used Dusty Rose and Turquoise. Start by picking out which color you want for the main color. Taking a small brush start painting just insile the stitch lines. Let dry overnight. Next day apply a second coat and again let dry overnignt.
-
 Step 3
Using your contrasting clor start painting just outside of teh main color. It looks a little jaggedy but wait! Let dry over night. Next day apply a second coat and again let dry overnignt.
-
 Step 4
Using a black Sharpie go around the edges of what you have painted. I used the Sharpie to staighten the lines then when I was finished with the boots I used the sharpie to add a little more detail. This can be seen in the finished project.
-
 Step 5
I drew a design to add a little more detail to the boots. I tried to incorporate some of the design of the stitching. You can skip this step if you want. I decided I wanted more color on my boots.
-
 Step 6
I tried to use carbon paper but I couldn't get to work so I freehand drew the design on both the toe and heel of the boot. I started with the main color and let dry overnight. Then put a second coat on and again let it dry overnight.
-
 Step 7
Toe.
-
 Step 8
The back of the heel after being painted and Sharpied.
-
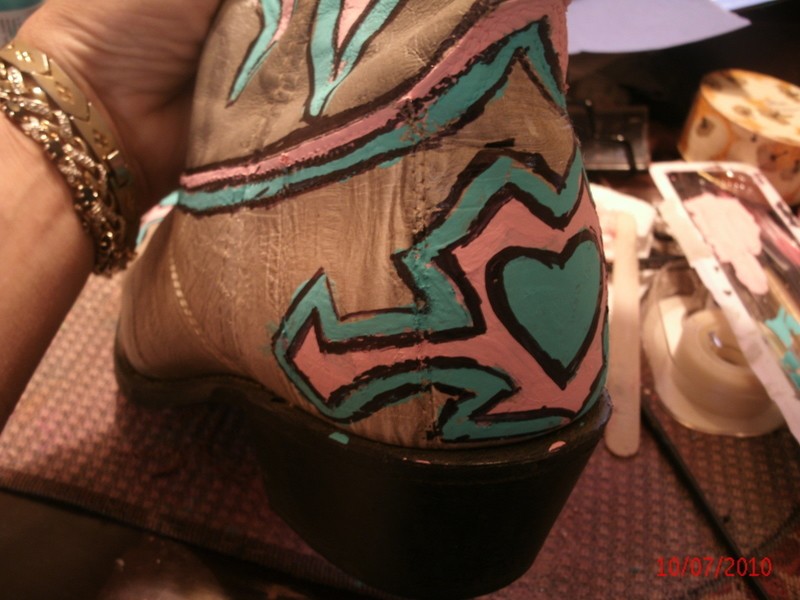
 Step 9
Side of heel.
-
 Step 10
Back of heel.
-
 Step 11
Here is where I used the Sharpie to add more detail to the edges of the paint. These are almost finished. I took the books outside to spray the fixative over the boots. Fumes can be bad.
-
 Step 12
Done.


Comments


