


About
Need Storage? Want Something that Screams you? Make a BA shelf out of Cardboard!
Alright so I really needed some extra storage and I decided why not pinch some pennies and make a self? So I did using this huge cardboard box that was sitting in my cardboard collection. I decorated it to reflect me and it is VERY sturdy contrary to what many skeptics told me.
I made mine look like a locker because I never had one to decorate! But I want you to do it your way. Mine is complete with a door. But you can do it with out one. You can paint it, give it a cool knob, the possibilities are endless!!!! Just know you need a lot of patience and time :]
-
 Conner W. added The Ultimate Upcycle The Eco Friendly Shelf Of Cardboard! to wall ideas
11 Feb 23:24
Conner W. added The Ultimate Upcycle The Eco Friendly Shelf Of Cardboard! to wall ideas
11 Feb 23:24
-
 Lesley D. favorited The Ultimate Upcycle The Eco Friendly Shelf Of Cardboard!
19 Mar 00:09
Lesley D. favorited The Ultimate Upcycle The Eco Friendly Shelf Of Cardboard!
19 Mar 00:09
-
 Lesley D. favorited The Ultimate Upcycle The Eco Friendly Shelf Of Cardboard!
21 Feb 18:01
Lesley D. favorited The Ultimate Upcycle The Eco Friendly Shelf Of Cardboard!
21 Feb 18:01
-
Conner W. added The Ultimate Upcycle The Eco Friendly Shelf Of Cardboard! to craft ideas
09 Jul 22:26
-
Conner W. favorited The Ultimate Upcycle The Eco Friendly Shelf Of Cardboard!
09 Jul 22:25
-
 Musiicorn favorited The Ultimate Upcycle The Eco Friendly Shelf Of Cardboard!
25 Mar 08:49
Musiicorn favorited The Ultimate Upcycle The Eco Friendly Shelf Of Cardboard!
25 Mar 08:49
-
 RiaCreations favorited The Ultimate Upcycle The Eco Friendly Shelf Of Cardboard!
21 Jan 16:23
RiaCreations favorited The Ultimate Upcycle The Eco Friendly Shelf Of Cardboard!
21 Jan 16:23
-
 Li P. favorited The Ultimate Upcycle The Eco Friendly Shelf Of Cardboard!
08 Dec 04:46
Li P. favorited The Ultimate Upcycle The Eco Friendly Shelf Of Cardboard!
08 Dec 04:46
-
 andie favorited The Ultimate Upcycle The Eco Friendly Shelf Of Cardboard!
07 Aug 01:42
andie favorited The Ultimate Upcycle The Eco Friendly Shelf Of Cardboard!
07 Aug 01:42
-
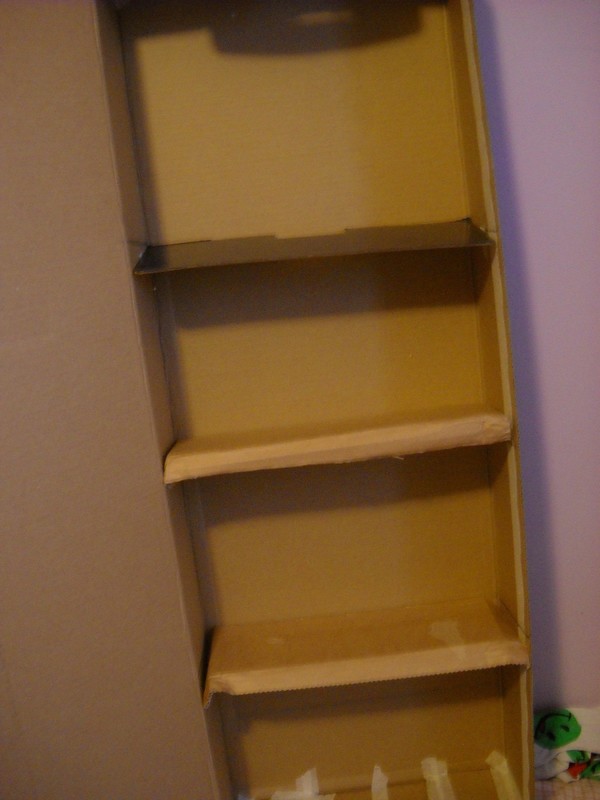
 Step 1
first thing is first you need cardboard. I was lucky enough to have a pre-shaped box. This is preferred as you will have less to secure and tape up. It also is best if you want an open and shut door.
-
 Step 2
For Pre-made Boxes:
These should already have a seam. Just undo this seem and disconnect the top and bottom. Cut off any unneeded flaps. If you you want a door you can keep the connected portioned, however if you don't just cut it off.AVOID SLOPPY CUTTING, YOU MAY NEED THESE PIECES LATER
If From Scratch:
[V1 Several Boxes]If you have a series of boxes stacking them would be your best option. You'd leave one box alone and cut out on side of the other. Like this you'd at least have one shelf slot already implemented.
[V2 pieces of Cardboard] If you just have random pieces of cardboard, you will have to measure out how long you want your shelf to be. Long pieces are preferable but if you don't have those, you will need to duct tape pieces together to achieve your desired height.
-
 Step 3
Once you have cut off all the unneeded content, secure all ends. I used masking tape in my project because it is a very powerful tape actually. Duct tape works very well too. If you prefer glue you can glue instead. You can also use a stapler to secure this. Staple guns may work better but I saw able to use a normal stapler with this.
-
 Step 4
The next step is to mark where you want your shelves. Measure the distance you want between each shelf slot and mark it with your marker. I made four slots in mine.
If you are decorating this:
Don't make the same mistake I did later on and accidentally cover your marks. This can be avoided depending on what order you do each step. If you do it in my order, an easy solution to avoiding this is to mark the area with tape. If you decided to put the shelves in before decorating that is an option too. However I warn you, this is harder to collage-decoupage so painting or full felt placement may be more ideal. -
 Step 5
Now either using the scraps and/or additional pieces of cardboard, cut out the separators for your shelf. Luck for me the additional top flap I had cut off the door portion earlier was the perfect width and length.
-
 Step 6
Test to make sure that the pieces fit in their slots
You may input your slot now if you wish, If you decide to do this, skip to the end of this tutorial to see how to input shelves.
Personally I put in the shelves last in order to decorate them first.
-
 Step 7
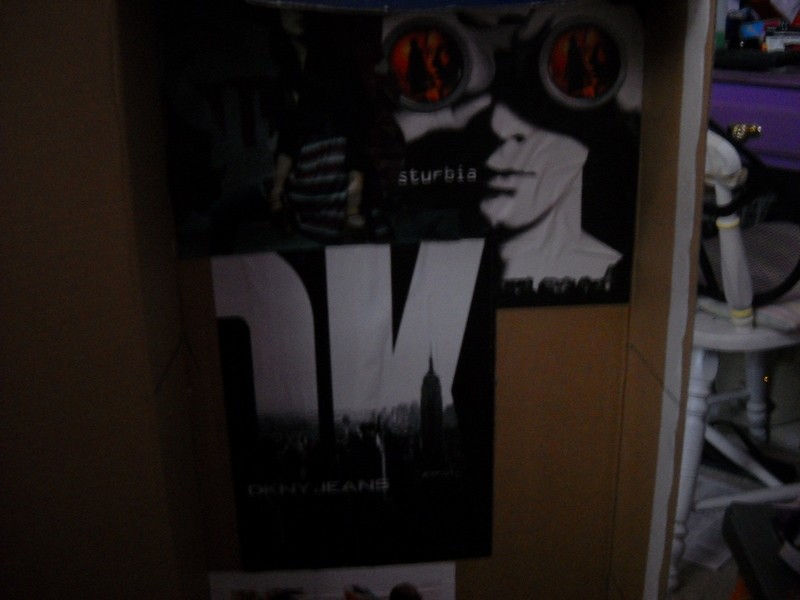
Now For Decoration!
Plan out how you want to decorate your shelf. I decided to collage-decoupage and hence used magazine images and misc pictures to decorate mine
For Those Who want to Paint: You need ton of Newspaper. If you want a smoother texture to paint you shelf you will have to follow the next steps to cover it with newspaper. Unless newspaper is what you are going for in your look or you want the roguh texture to paint on.
-
 Step 8
In order to stick the images or newspaper, you will need to make a mixture of glue and water. And you will need a paintbrush to brush it on the areas you are pasting your images on.
-
 Step 9
Where to start depends on what design you're going for. Regardless there are two techniques to applying th glue
1- Apply the glue to the surface and smooth the image on the area
2- Apply the glue onto the image and smooth it onto the surfaceEither way works, and either way you are susceptible to wrinkles so be careful while smoothing.
For decoupagers and painters:
I recommend staring the inside and then working on the outside since the inside takes much more effort. Layering can help if your decoupage doesn't go that way you are hoping.For Painters:
Once the newspaper dries, you can paint.If you decide to use felt:
If you decide to felt the inside, then I recommend working on the outside first. -
 Step 10
It you decided to do this last decorate your separators as well. I decided to make them all the same theme.
-
 Step 11
THIS STEP IS FOR THOSE WHO USE FELT:
I decided I wanted my top and bottom to be covered with felt. So I measured the felt to size and cut it with extra in order to fold the edges for smooth edging.
I used Tacky glue for this
-
 Step 12
THIS STEP IS FOR THOSE WHO USE FELT:
I then lined it up with the box and cut off an excess that went over the edge.
Again you need tacky glue or strong glue for this.
-
 Step 13
With all the pieces done, check again to make sure your shelf separators still fit comfortable in your shelf. Trim if necessary. It is time to secure your separators.
-
 Step 14
Using small scraps of cardboard, fold them in half to create a securing pillars. You will need two of these for each separator.
If you want to decorate it, do this BEFORE you attach it to the shelf.
THESE PIECES WILL GO ON THE ENDS OF THE SEPARATOR
Tape, Glue or staple one end to the separator. Then attach the other end to the sides of your shelf. If gluing, hold this down for a few minutes to make it stick and lay the shelf down on the side to have gravity help keep it down.
-
 Step 15
Once again, using longer or more scraps this time, create a support pillar in the shape of an isosceles triangle. Attach the ends
As before, decorate be fore attaching if you must decorate. Attach to the middle of separator and the back fo the shelf.
THIS PIECE GOES IN THE MIDDLE OF THE SEPARATOR AND AGAINST THE BACK OF THE SHELF
The one in the picture looks awkward, disregard its awkwardness. I forgot to take a picture of a fixed one.
-
 Step 16
Let your shelf completely dry and then test the sturdiness of your shelves. Mine can hold about 4-6 pounds depending which section you put it in.:]
-
 Step 17
OPTIONAL AND ADDITIONAL CREATVITY:
If you have a door on your shelf, why not add a knob? I personally made a handle out of ribbon so that I can hide it discreetly.
You can also add extra appendages. In a rack I am making, I plan to add a bottle holder to the side :]
-
 Step 18
And there you have it Viola! YOU OWN UPCYCLED SHELF!
Get creative and get cracking. Good luck!


Versions

Comments

