


About
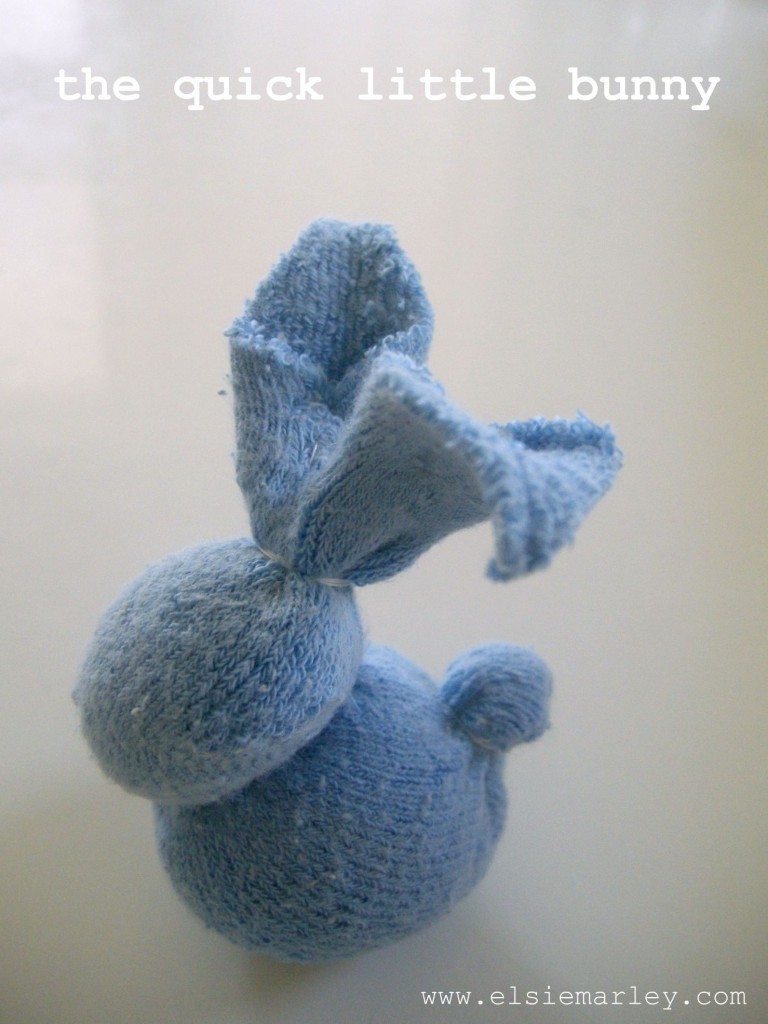
the quick little bunny tutorial
I really wanted to make the sock bunny that Heidi (from My Paper Crane) created, but I didn’t have any of those fantastic red and brown monkey socks. What I do have is baby socks: tons of cute, mismatched, totally useless, never stay on baby socks. Now that my littlest is very much not an infant and too soon will be a toddler it seems kind of silly to keep all those teeny tiny socks. So I made a bunny out of them. And a tutorial too.
This is indeed a quick little bunny. After I figured out the pattern, start to finish each bunny took me just 15 minutes. So if you are anything like me and never get around to the easter baskets until the night before, you can whip up this little softie and still have time to run to the drugstore to score the last bag of jelly beans.
Tags
-
 Liz hart favorited The Quick Little Bunny
16 Jun 21:34
Liz hart favorited The Quick Little Bunny
16 Jun 21:34
-
 Elena B. added The Quick Little Bunny to sock toys
30 Mar 23:45
Elena B. added The Quick Little Bunny to sock toys
30 Mar 23:45
-
Elena B. favorited The Quick Little Bunny
30 Mar 23:45
-
 Ghost C. favorited The Quick Little Bunny
07 Feb 11:25
Ghost C. favorited The Quick Little Bunny
07 Feb 11:25
-
 olivoyle favorited The Quick Little Bunny
29 May 10:29
olivoyle favorited The Quick Little Bunny
29 May 10:29
-
 fishywilleatchu favorited The Quick Little Bunny
27 Jan 19:35
fishywilleatchu favorited The Quick Little Bunny
27 Jan 19:35
-
 Xfluffy_unitatoX favorited The Quick Little Bunny
17 Nov 18:21
Xfluffy_unitatoX favorited The Quick Little Bunny
17 Nov 18:21
-
 artpanda18 favorited The Quick Little Bunny
19 Aug 21:06
artpanda18 favorited The Quick Little Bunny
19 Aug 21:06
-
 Chachee.rayna added The Quick Little Bunny to Sew, Sew!
04 Apr 21:28
Chachee.rayna added The Quick Little Bunny to Sew, Sew!
04 Apr 21:28
-
Gabi C. favorited The Quick Little Bunny
30 Mar 22:34
You Will Need
-
 Step 1
Make that bunny:
Before you start sewing take second to look at the sock you have. Most of the foot part will be the body and the heel area will be the head. Yours might be a little different, depending on your sock. If you look at the picture below you can almost see the bunny already. -
Step 2
the body:
Take some stuffing and stuff the foot part of the sock–not too tight! this is just a little, squishy baby bunny. Where the foot part ends and the heal begins sew a running stitch around the sock and pull to gather it. I like to wrap my thread around where I’ve stitched a few times just so it’s secure. Knot your thread and snip. -
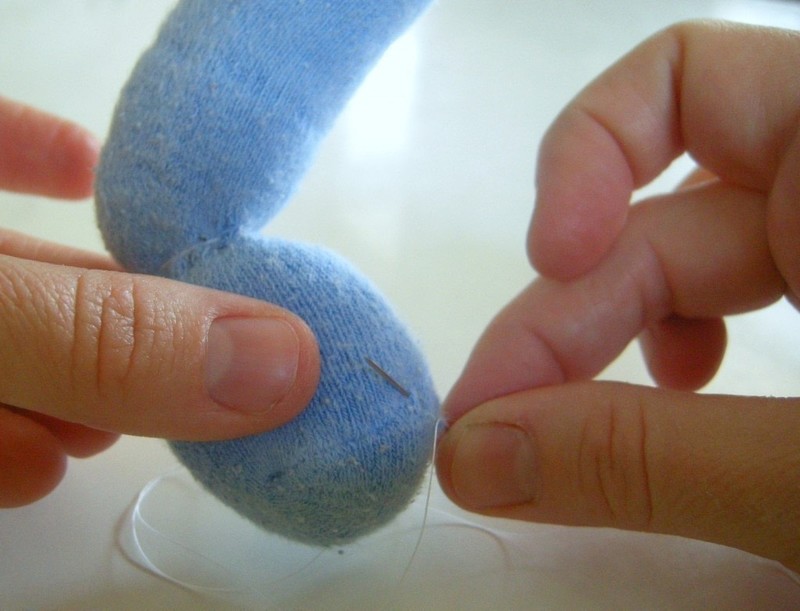
 Step 3
the tail:
On the top of the bunny’s back, sew a circle about an inch in diameter with a simple running stitch. Then pull to gather. You may have to mush the stuffing around so you can pull it tight to make a tail shape. When you have a little bunny tail, wrap your thread around a few times and knot off (do people say “knot off?” does it sound too much like I’m yelling at you to go “knot off!”).
-
 Step 4
the head:
To make the head, put a little stuffing inside the sock and sew a running stitch around the top of the heel. Before you pull it taut make sure all the stuffing is pushed down under your stitches. Then wrap the thread around and knot off!
-
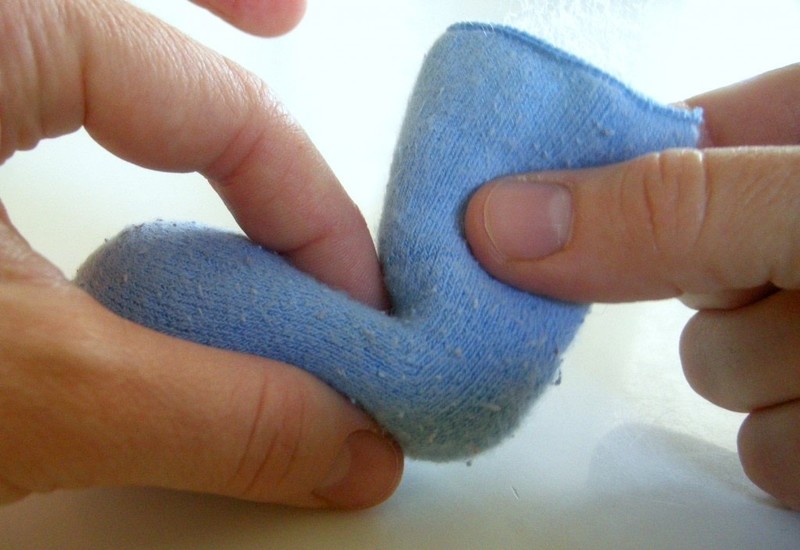
 Step 5
the ears:
Cut a big V shape out of the top of the sock. Now trim the top part of each ear to a point. Then fold the two sides of the bottom part of one ear in to meet and sew together.
-
 Step 6
This is a little easier to understand when you look at a picture:
-
 Step 7
When you sew that seam down the middle of the ear, it’s good to catch some of the back of the ear with your stitches, so the ears are a little thinner.
-
 Step 8
The attitude:
Okay, that is a dorky title, but this is the fun part. Now you can play around with the ears and the head, moving them to where you want and putting a stitch here and a stitch there so they will stay. -
 Step 9
You don’t have to give your bunny an attitude, but you should stitch the back of the head to the body a little, so it looks more bunny like and less like a cinched up sock. There! you did it! Now go dig around in the sock drawer and see what else you can make into a bunny.


love this !!! thank you for the great tute and sharing.