
About
Two shirts mashed up into one chic new look
Inspired by Anthro's "Conductor Stripe Top", this top mashes up two basic elements into one new look. Find yourself some oversized shirts, one knit and one button up. I got mine at the thrift store. The button up should preferably have a longer, shirt tail hemline. Don't worry about logos or graphics on the front of the tee. I actually used the back of my shirt to avoid the red Polo man.
-
 Pimke added The Mash Up Blouse to Upcycling
23 Feb 14:10
Pimke added The Mash Up Blouse to Upcycling
23 Feb 14:10
-
 Kristi P. favorited The Mash Up Blouse
20 Feb 20:42
Kristi P. favorited The Mash Up Blouse
20 Feb 20:42
-
 bemeself favorited The Mash Up Blouse
15 Jun 17:35
bemeself favorited The Mash Up Blouse
15 Jun 17:35
-
 Taba__tina added The Mash Up Blouse to da fare
03 Oct 18:42
Taba__tina added The Mash Up Blouse to da fare
03 Oct 18:42
-
Taba__tina favorited The Mash Up Blouse
03 Oct 18:42
-
 phoebediep favorited The Mash Up Blouse
13 Jul 02:04
phoebediep favorited The Mash Up Blouse
13 Jul 02:04
-
 Patricia J. favorited The Mash Up Blouse
02 Jun 00:13
Patricia J. favorited The Mash Up Blouse
02 Jun 00:13
-
 Peggals <3 favorited The Mash Up Blouse
21 May 04:53
Peggals <3 favorited The Mash Up Blouse
21 May 04:53
-
 Karen R. added The Mash Up Blouse to To-make list
18 May 18:48
Karen R. added The Mash Up Blouse to To-make list
18 May 18:48
-
Cindy N. favorited The Mash Up Blouse
18 May 06:15
You Will Need
-
 Step 1
Find yourself two shirts...
-
 Step 2
...and start chopping! Neatly cut out one panel (either front or back) from your tee. As previously mentioned, I used the back of Mr. Polo.
-
 Step 3
Next you need to dissect the button up.
Neatly lop off both arms. Save them!
-
 Step 4
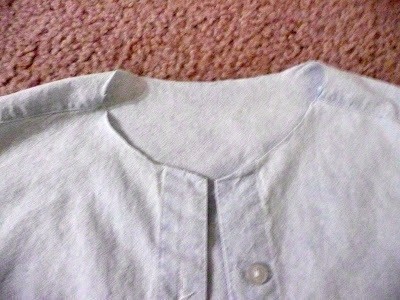
Next cut off the collar.
-
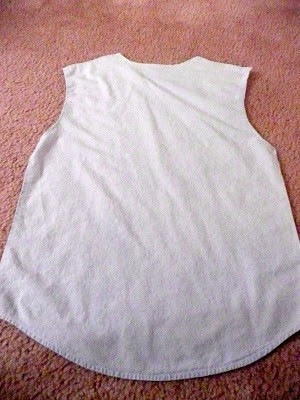
 Step 5
And last, cut out the back panel.
-
 Step 6
Depending on the relative size of your shirts, now is the time to do a little trimming. To avoid having to re-hem the t-shirt's bottom, I lined up the side edges (see second picture) and trimmed the arm and neck holes to match.
When reshaping the neckline, make sure it's large enough to get your head through! I tried mine on a couple times until the fit was perfect.
-
 Step 7
Line up edges and pin.
Using a stretch stitch, sew the side seams.
-
 Step 8
Time to put the arms back in! With right sides together, nestle the sleeve in the armhole and pin. If you've never sewn a sleeve before, turn your garment right side out to double check that it's pinned correctly - it's easy to put in a sleeve inside out!
-
 Step 9
This is where you may hit a bump. What do you do if the sleeve no longer fits perfectly in the armhole? 'Cause chances are, it won't.
If the sleeve is bigger than the armhole, make a small gather at cap of the sleeve (where it sits on the shoulder).
If the armhole is bigger than the sleeve (more likely), remove the excess armhole by sewing at an angle from the side seam. In the following picture, you can see where I've eliminated about an inch of extra armhole.
-
 Step 10
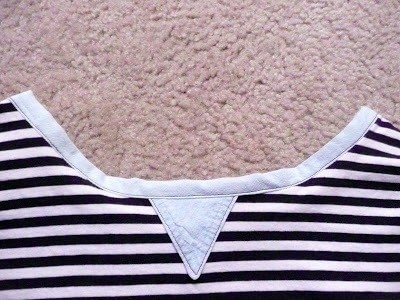
Now it's time to add the cute neck detail (optional, but who would want to leave it off??).
Remember the collar, cut off with loving care? Retrieve it.
Cut off one corner into a visually pleasing triangle.
-
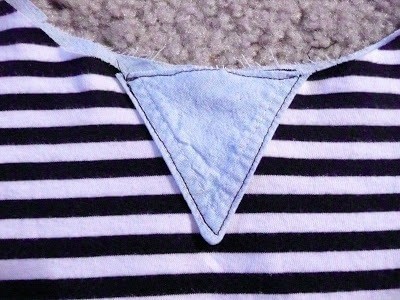
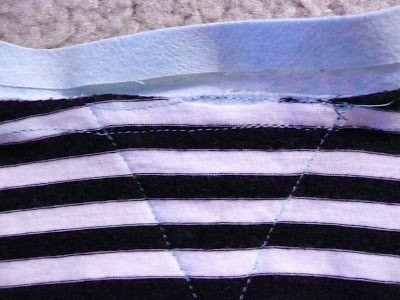
 Step 11
Center your nice triangle on the neckline.
Edge stitch in place. Look, I didn't even bother to make it neat. That's how cool this shirt is.
-
 Step 12
You're almost done! All that's left is to bind the neck.
Here's where you have options.
Option 1: Go buy pre-made double fold bias tape.
Option 2: Live on the wild side and make your own.If you choose the latter option, here's what you need to do.
Remember those front panels that you put away with care?
-
 Step 13
Cut the longest 2" strip that you can.
(Disclaimer: I realize that this is technically not bias tape because it's not cut on the bias...but it will do.)
The strip of fabric should be long enough to go around the neckline of your shirt. If it's not, sew two strips together. -
 Step 14
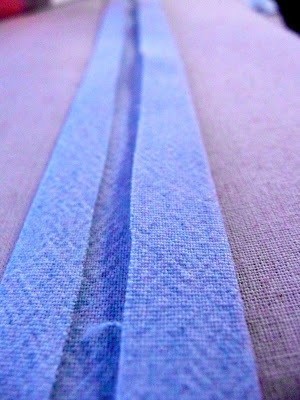
Press in half with a little starch.
-
 Step 15
Open and fold edges towards the center. Bring one side completely to the center, the other only halfway to the center. Press again.
-
 Step 16
Fold in half again and press.
-
 Step 17
Unfold the bias tape. Center one end on the back neckline and align with right sides together.
The smaller-fold side should be touching the neckline. (Go ahead and fold the raw edge over.)
-
 Step 18
Keeping the edges aligned, stitch in the crease all the way around the neck.
I didn't pin for this step. You'll need to keep adjusting the tape to line up on the edge, and pins are just an unnecessary bother.
-
 Step 19
Now you're going to fold the rest of the tape over to the wrong side (inside) of the shirt.
(View from the inside, tape still flipped up)
-
 Step 20
(View from the inside, tape flipped down)
-
 Step 21
On the right side, sew 1/8" to 1/16 from the edge.
-
 Step 22
And you're done!