About
Surprise your loved ones with this super easy DIY watercolor calligraphy greeting card
If your handmade card endeavours are dying out of ideas , this is just the post to revive them! Learn how to create this beautiful piece of hand lettering "Thank you" card for your loved ones using dip pen watercolor calligraphy technique.
-
 Kimya J. favorited Thank You Card Using Watercolor Calligraphy
06 Jun 02:12
Kimya J. favorited Thank You Card Using Watercolor Calligraphy
06 Jun 02:12
-
 RareJewel favorited Thank You Card Using Watercolor Calligraphy
09 Feb 09:52
RareJewel favorited Thank You Card Using Watercolor Calligraphy
09 Feb 09:52
-
 Cheryl S. added Thank You Card Using Watercolor Calligraphy to Creating Cards
19 Dec 16:12
Cheryl S. added Thank You Card Using Watercolor Calligraphy to Creating Cards
19 Dec 16:12
-
 Drishti D. published her project Thank You Card Using Watercolor Calligraphy
11 Oct 09:00
Drishti D. published her project Thank You Card Using Watercolor Calligraphy
11 Oct 09:00
-
 Step 1
You can cut down watercolor paper to greeting card size, or you can use a nice cardstock. I prefer to write down my words very lightly in pencil to be sure about spacing and centering.
-
 Step 2
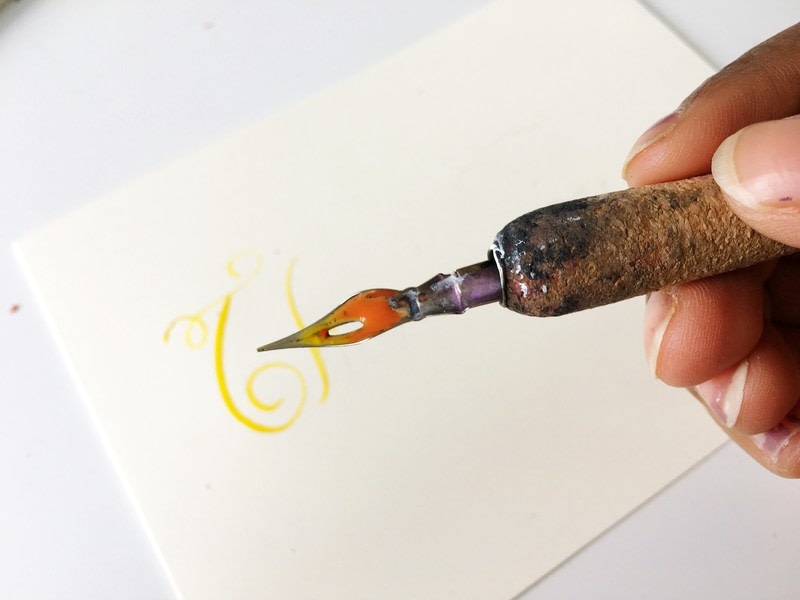
Create two or more color-wells as per your choice. Dip your brush in the well and load it with the first pigment.Transfer the pigment to the back of the nib as shown.
-
 Step 3
Now we are ready to write the first two letters with the color. Any time you stroke upward, release pressure so only the tip of your nib touches the page.
-
 Step 4
Without washing off the nib add the second color to the base of the first. I have chosen red which blends beautifully with yellow.
-
 Step 5
Complete the rest of the letters and watch how seamlessly the colors blend into each other. Bingo! You are done. This project will take you under 5 minutes. Why not cut out a bunch of cardstock and make a whole set of stationery to last the whole year?