
![[insert joke about being horny here] . Free tutorial with pictures on how to make an ear / horn in under 165 minutes by molding and decorating with wire, acrylic paint, and hot glue gun. Inspired by costumes & cosplay. How To posted by SammiSpork. Difficulty: 3/5. Cost: Cheap. Steps: 19](https://images.coplusk.net/project_images/130863/image/SUNP0089.jpg)
![[insert joke about being horny here] . Free tutorial with pictures on how to make an ear / horn in under 165 minutes by molding and decorating with wire, acrylic paint, and hot glue gun. Inspired by costumes & cosplay. How To posted by SammiSpork. Difficulty: 3/5. Cost: Cheap. Steps: 19](https://images.coplusk.net/project_images/130862/image/SUNP0085.jpg)

About
[insert joke about being horny here]
So, I love Homestuck. I even dyed my mohawk back to black after bleaching it just to cosplay Tavros. My friend made me some pretty nice horns but they were a bit too skinny, and gave me a bit of trouble, so I decided to make my own!
The time to make this doesn't include the drying of the Model Magic, just to let you know.
Bear with me, this is my first tutorial, my camera sucks, and I craft in a haywire fashion. Here we go!
Tags
-
 paige h. favorited Tavros Horns Tutorial
22 Aug 18:41
paige h. favorited Tavros Horns Tutorial
22 Aug 18:41
-
 Key West Witch favorited Tavros Horns Tutorial
10 Sep 09:00
Key West Witch favorited Tavros Horns Tutorial
10 Sep 09:00
-
 Conner W. favorited Tavros Horns Tutorial
07 Jul 14:23
Conner W. favorited Tavros Horns Tutorial
07 Jul 14:23
-
 Kristine commented on Tavros Horns Tutorial
02 Sep 13:51
Kristine commented on Tavros Horns Tutorial
02 Sep 13:51
-
Kristine favorited Tavros Horns Tutorial
02 Sep 13:36
-
 mary m. commented on Tavros Horns Tutorial
29 Apr 13:44
mary m. commented on Tavros Horns Tutorial
29 Apr 13:44
-
 kimberly.hodges.5059 commented on Tavros Horns Tutorial
21 Apr 01:10
kimberly.hodges.5059 commented on Tavros Horns Tutorial
21 Apr 01:10
-
Andy M. commented on Tavros Horns Tutorial
15 Feb 17:00
-
 Linkin Logs added Tavros Horns Tutorial to Cosplay
13 Jan 23:39
Linkin Logs added Tavros Horns Tutorial to Cosplay
13 Jan 23:39
-
 ilovearadia favorited Tavros Horns Tutorial
09 Jan 00:38
ilovearadia favorited Tavros Horns Tutorial
09 Jan 00:38
-
 Step 1
To start, take your pool noodle(mine had a hole in the middle, but yours doesn't have to), and cut two equal sections to the size you want the middle of your horns. Remember to cut and angle into them, too, to help give them the curved top section later on.
-
 Step 2
Cut some wire and bend it into a point in the middle.
-
 Step 3
Curve your wire into the right shape and insert it into the pool noodle. It doesn't have to be absolutely prefect, and don't worry if the wire stabs through the outside! Just take it out, fix it, and put it back in. Trust me, I messed up plenty.
-
 Step 4
Repeat the last two steps to make a top section, bending and easing it into place so it overlaps the other wire the right way.
Plug in your glue gun real quick!
-
 Step 5
Tinkerbull and I here to remind you to be safe while crafting! Or something like that. PSA over.
-
 Step 6
Hold the wires in place as you glue them, AND as the glue is cooling. This'll hold your wire skeleton together well enough.
-
 Step 7
Break out an old school notebook you've been hoarding for no apparent reason because you're awesome and have one. Or get and old notebook you didn't hoard in a backpack for no apparent reason.
-
 Step 8
Rip that shit!
-
 Step 9
Crumple it up and shove it in your wire skeleton. Flesh it out nicely. Or messily. Whatever, as long as it's filled up with old paper.
-
 Step 10
Dig out the duct tape. All I had was this wicked awesome tye dye stuff, but good ol' silver or anything else works too. Wrap your papery-wiry mess in tape (do this fairly neatly.) and stuff more paper in as needed.
-
 Step 11
Model Magic time! Now, this stuff IS really fun and airy and squishy, but I'd advise you use it wisely. Wasting it and having none left is never fun. You wanna be able to make more horns, right?
Start at the top of your horn, working your way down and smoothing as you go. Smoothing is really important! Any little seam or bump can become a huge crack when this dries.
-
 Step 12
When you get to the noodle part, it gets harder for the Model Magic to stick. You can cover it in more duct tape before you put the clay over it, but in this case I didn't have enough to do that so I toughed it out. It's not impossible to make it work if you take it careful and slow. These things are your babies. Love them.
-
 Step 13
Once they're completely covered (mine kinda look lumpy) and smoothed, put them somewhere safe to dry and FORGET ABOUT THEM. My layer of Model Magic was thin, so I left them for about one and a half to two days. They were pretty dry by then but....
-
 Step 14
AGH CRACKS! Let's fix those.
-
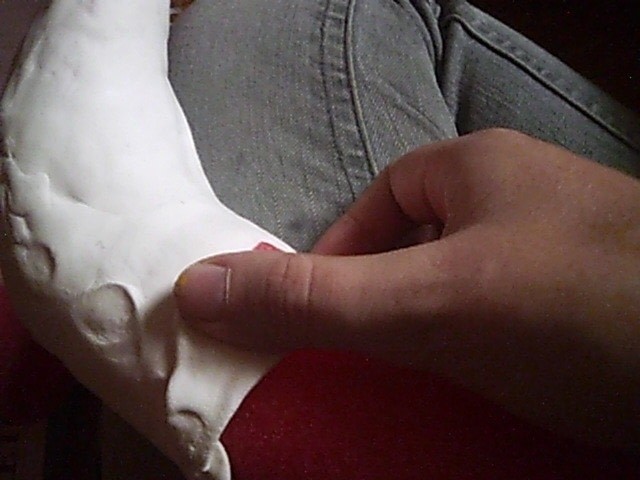
 Step 15
Wood filler is your friend. Take it, squish it onto the cracks, push it down and smooth it with your finger or thumb.
Repeat with all the cracks, take your time, and be careful. These horns are your babies. Remember.
-
 Step 16
Hey, now I'm outside!
Once the wood filler is all dry, take some sandpaper and smooth your horns. (That seems to be a reoccurring theme...) I went outside because I don't like gross dust in my house, so I'd suggest that too. If you notice more cracks, fill them now, then sand them.
-
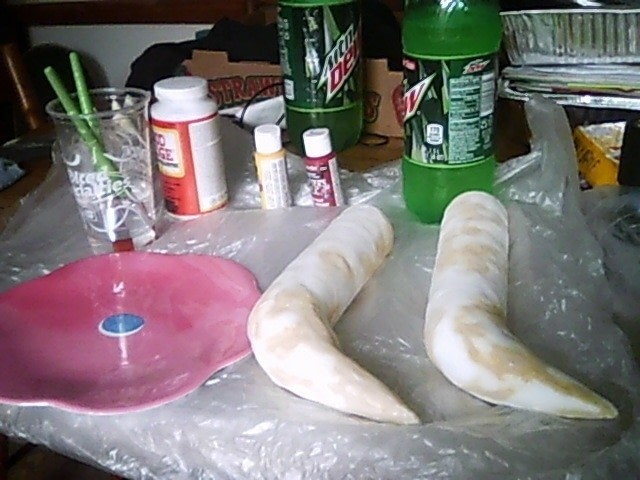
 Step 17
Back inside again!
Set up a nice, neat workstation to paint your horns. Also, arm yourself with copious amounts Mountain Dew because hey, why not.
Then, start painting! I start with yellow, covering the whole thing and working down, but you can paint them however you want. Let them dry.
-
 Step 18
Mod podge! (I'd advise using a different brush than you painted with, unless you washed it really well.)
I cover mine in two coats 'cause I like nice, shiny horns, but you can do as little/much as you want. Again, let them dry.
-
 Step 19
Mine are attached to a sturdy headband, with ribbon on the bottom to tie it securely to my head, but you probably have your own method.
So attach them to some head wear however you need/want, and you're done!


Comments


