


About
Turn your old tank top into a lovely dress
Very easy reconstruction. I hope all the steps are clear, feel free to ask if something is unclear.
-
 Glenda W. favorited Tank Top Dress
30 Jul 00:01
Glenda W. favorited Tank Top Dress
30 Jul 00:01
-
 Kacieariss favorited Tank Top Dress
27 Jul 14:49
Kacieariss favorited Tank Top Dress
27 Jul 14:49
-
 Rebecca C. favorited Tank Top Dress
11 Aug 05:12
Rebecca C. favorited Tank Top Dress
11 Aug 05:12
-
Hollie P. added Tank Top Dress to saving for later
24 Aug 17:28
-
 yhorak favorited Tank Top Dress
16 Mar 14:37
yhorak favorited Tank Top Dress
16 Mar 14:37
-
Georgette k. added Tank Top Dress to Pending
14 Apr 04:52
-
 Danielle H. added Tank Top Dress to To-make list
09 Jan 06:55
Danielle H. added Tank Top Dress to To-make list
09 Jan 06:55
-
Danielle H. favorited Tank Top Dress
09 Jan 06:55
-
Rhonda G. favorited Tank Top Dress
08 Jul 19:36
-
 Andrea K. favorited Tank Top Dress
31 Mar 09:17
Andrea K. favorited Tank Top Dress
31 Mar 09:17
-
 Step 1
I saw this picture of the Hannah Montana girl and I love these tank top dresses so I made my own.
-
 Step 2
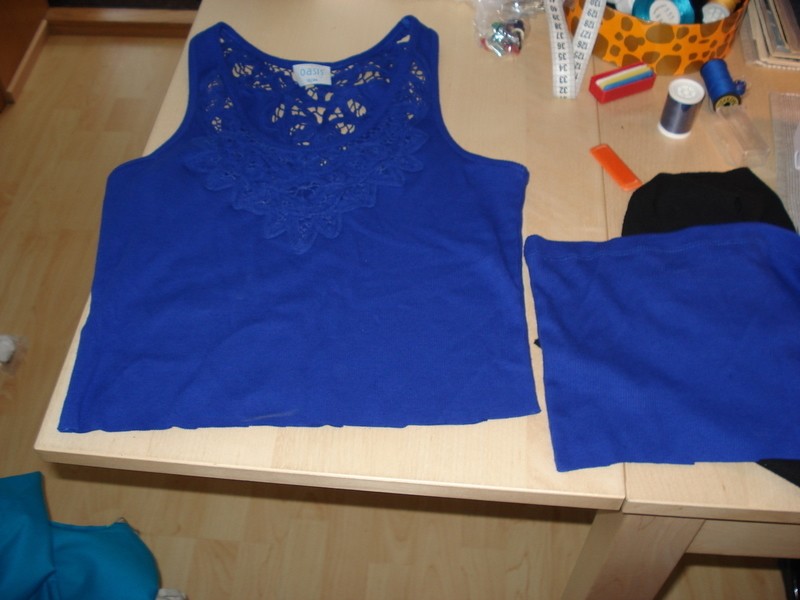
First thing you need is a tank top that fits you nicely. You can use and old one but I saw this one on sale the other day and totally fell in love with it and decided to use it for this project.
Try it on and with tailor's chalk mark where you want the black "belt" thing to start. As you can see with the original dress in step one it starts somewhere below your bust and above your belly button.
Then cut the top apart but don't throw away the fabric you cut away, that can be used later as a belt for another dress! -
 Step 3
This is not really a step, it's just showing where the belt will fit in later..
-
 Step 4
So, then you measure your waist and cut out from a stretchy fabric like jersey or an old tank top the belt. I used fabric that I have no idea what is called in English but has tiny ruffles in it and tank tops are often made with this fabric and also cuffs on sleeves. Hope you all know what I mean.
Anyway, back on track!
So the belt is:
Length: Your waist measurement +seam allowance.
Width: 10 cm +seam allowance. -
 Step 5
Then sew the ends together so it becomes a continuous belt.
-
 Step 6
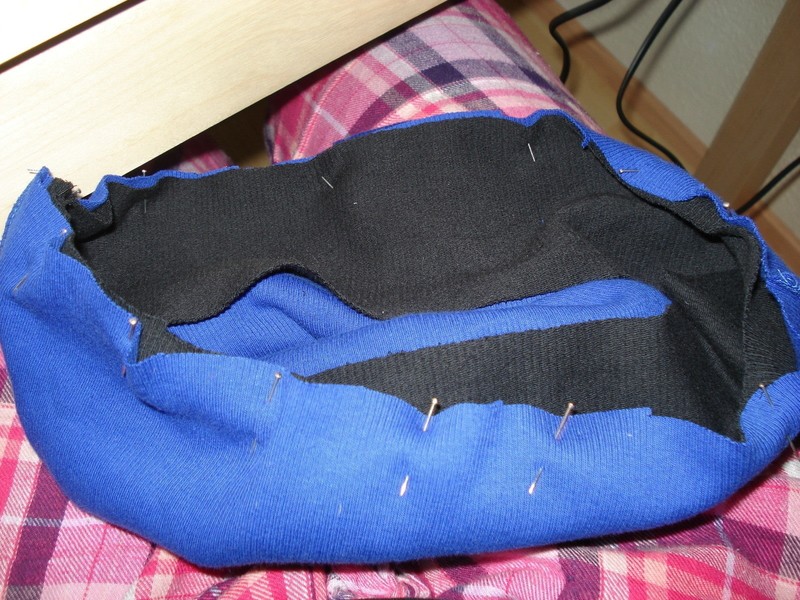
Pin the belt and the tank top together and sew.
I probably don't have to mention it but I will any way for the beginners that when the belt and then in later steps the skirt part is sewn on, make sure before you start sewing that all pieces are on the right side, basically so the seams will be inside the dress and it all looks nice and neat on the outside. -
 Step 7
Then the skirt part.
Use stretchy fabric like jersey or like I did, the bottom part of an extra large T shirt.It's important for the top part of the skirt to be a generously measured because the gathering takes up fabric as seen in the gathering step.
If you use fabric then just measure how long you want the skirt and sew it together at the sides and then follow the Gathering step.
If you use a T shirt like I did, then all you do is cut the shirt where the arms/sleeves start and cut it in half, from sleeve to sleeve and then you have the skirt ready for you! Very simple.
Then onwards to next step: THE GATHERING.
The gathering is how we make the little ruffles in the skirt and that's why it's important that the skirt is not a tight fit at the top because the ruffles take up extra fabric.
Use a normal straight stitch but adjust the seam so it will be the longest seam possible. Usually a wheel that you turn on you sewing machine.
Sew with that the entire top part of the fabric with 1 cm from the edge but do not sew anything together or attach the thread, as in going a little bit backwards. The thread is supposed to be loose.
Then hold the thread that can be pulled loose and push the fabric together along the thread so it forms the ruffles. Just be careful that the gathering can unfold at the other end of the fabric. Distribute gathering evenly over the entire skirt.This is extremely simple, I'm just giving a very thorough explanation on how this is done if someone hasn't done gathering before.
-
 Step 8
Then, just like in step 6, pin the skirt part to the belt part and sew it together. When you are sewing to attach the skirt to the belt/tanktop bit, sew into the thread where the gathering is. That makes the gathering thread unseen and gathering folds nicely on your dress.
-
 Step 9
Congratulation! You are now a proud owner of a supercool dress!
Sorry it has to be displayed on a hangar but I didn't have anyone around to take a pic of me in it but it looks very good.


Hopefully I can make this in the future, great job!
When i make one I can wear it to liquid!! =D
x