


About
A sexy refashion with a little punch
I had been wanting to make my own lingerie for a long time but I had a hard time justifying putting that much time and energy into something I could only wear in my own house. Finally I gave up trying to justify it and just started sewing. Besides, I have made a number of pieces of men's lingerie (true story), why not make my own?
-
 Alma added T Shirt To Cheeky Garter Belt Refashion to Lingerie
10 Jun 15:36
Alma added T Shirt To Cheeky Garter Belt Refashion to Lingerie
10 Jun 15:36
-
 Key West Witch favorited T Shirt To Cheeky Garter Belt Refashion
05 May 07:49
Key West Witch favorited T Shirt To Cheeky Garter Belt Refashion
05 May 07:49
-
 Sveta favorited T Shirt To Cheeky Garter Belt Refashion
04 Dec 18:01
Sveta favorited T Shirt To Cheeky Garter Belt Refashion
04 Dec 18:01
-
 SlinkSkull favorited T Shirt To Cheeky Garter Belt Refashion
22 Jul 00:10
SlinkSkull favorited T Shirt To Cheeky Garter Belt Refashion
22 Jul 00:10
-
 Jade H. favorited T Shirt To Cheeky Garter Belt Refashion
05 Feb 14:37
Jade H. favorited T Shirt To Cheeky Garter Belt Refashion
05 Feb 14:37
-
 VillainousNinja added T Shirt To Cheeky Garter Belt Refashion to Make this
08 Sep 01:54
VillainousNinja added T Shirt To Cheeky Garter Belt Refashion to Make this
08 Sep 01:54
-
 Phoebe C. added T Shirt To Cheeky Garter Belt Refashion to Sewing Undergarments
28 Jun 01:05
Phoebe C. added T Shirt To Cheeky Garter Belt Refashion to Sewing Undergarments
28 Jun 01:05
-
 Rebeccah D. favorited T Shirt To Cheeky Garter Belt Refashion
23 Jun 16:55
Rebeccah D. favorited T Shirt To Cheeky Garter Belt Refashion
23 Jun 16:55
-
 Sarah D. added T Shirt To Cheeky Garter Belt Refashion to Sexy
29 Oct 07:13
Sarah D. added T Shirt To Cheeky Garter Belt Refashion to Sexy
29 Oct 07:13
-
 mmotse03 favorited T Shirt To Cheeky Garter Belt Refashion
30 Jan 09:54
mmotse03 favorited T Shirt To Cheeky Garter Belt Refashion
30 Jan 09:54
You Will Need
-
 Step 1
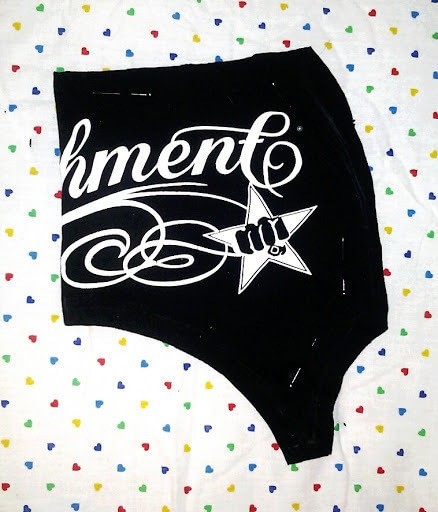
I was inspired by this awesome graphic T I mined from a corporate thrift store in my neighbourhood. Originally they were going to be panties but I decided that wasn't quite cheeky enough for this find.
-
 Step 2
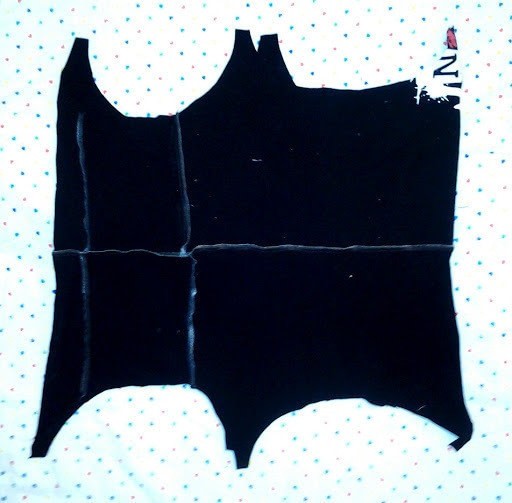
I started by cutting the tshirt open at the seams to create flat pattern pieces.
-
 Step 3
I marked my pattern on the right side so that I wasn't having to constantly flip it back and forth to make sure I wasn't cutting through the graphic.
-
 Step 4
I folded the shirt in half to make sure my cut was symmetrical.
-
 Step 5
I did the same with the blank back of the shirt. The blank piece will be the front of the garter.
-
 Step 6
I also made a liner out of the rest of the t-shirt so that the t-shirt cotton wouldn't stretch out of shape as easily. For the liner I just cut duplicates of the first two pieces. I sewed both the sets of pattern pieces together separately.
-
 Step 7
And attached them at the top, right sides together.
-
 Step 8
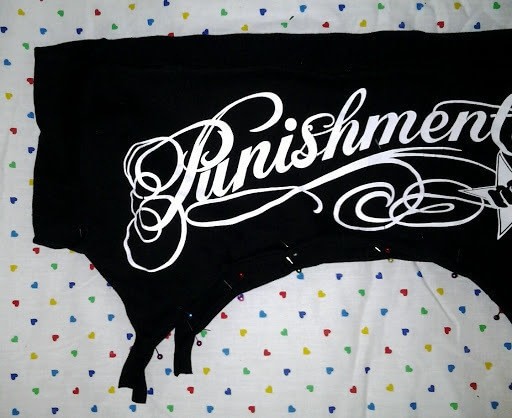
At the bottom I folded both hems in toward each other and sewed the bottom hem with a zig zag stitch.
-
 Step 9
With scraps from the t-shirt I created these four garters by cutting 1.25" widths and folding them in on each other so no raw edges are visible. I sewed them closed with a zig zag stitch.
-
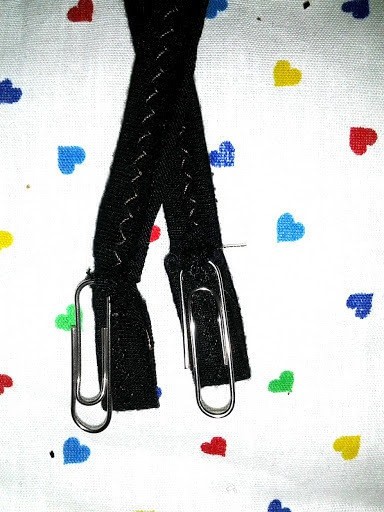
 Step 10
For lack of ready garter clips I re-purposed paper clips which worked surprisingly well. So well that I doubt I'll replace them.
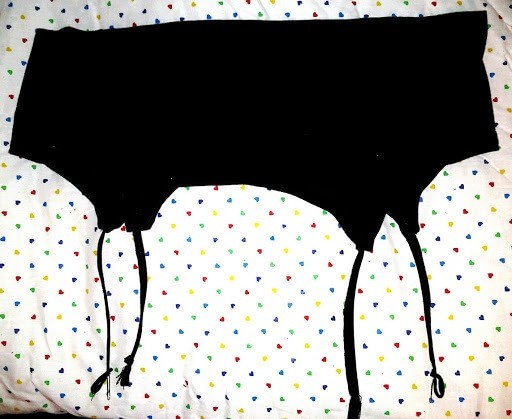
And we're finished!
Now go show them to somebody you really like ;)


Comments


