


About
Now you can have your cake and wear it too!
I was asked to do a tutorial for this so, here it is!
I'm sorry I didn't take pics along the way :(
I did my best to show you several views of this so you can get a good idea of how it was done :D
Good luck!
Tags
-
 Key West Witch favorited Sweet Lolita Strawberry Cake Hat/Head Piece
12 May 16:28
Key West Witch favorited Sweet Lolita Strawberry Cake Hat/Head Piece
12 May 16:28
-
 Luna D. favorited Sweet Lolita Strawberry Cake Hat/Head Piece
24 Apr 15:18
Luna D. favorited Sweet Lolita Strawberry Cake Hat/Head Piece
24 Apr 15:18
-
Barbara M. favorited Sweet Lolita Strawberry Cake Hat/Head Piece
29 Sep 14:28
-
 Bette C. favorited Sweet Lolita Strawberry Cake Hat/Head Piece
12 Nov 01:04
Bette C. favorited Sweet Lolita Strawberry Cake Hat/Head Piece
12 Nov 01:04
-
 Nankita favorited Sweet Lolita Strawberry Cake Hat/Head Piece
12 Apr 17:27
Nankita favorited Sweet Lolita Strawberry Cake Hat/Head Piece
12 Apr 17:27
-
Tiffany G. favorited Sweet Lolita Strawberry Cake Hat/Head Piece
06 Dec 01:06
-
 Kay T. favorited Sweet Lolita Strawberry Cake Hat/Head Piece
21 Nov 23:49
Kay T. favorited Sweet Lolita Strawberry Cake Hat/Head Piece
21 Nov 23:49
-
 Deven S. favorited Sweet Lolita Strawberry Cake Hat/Head Piece
03 Aug 04:13
Deven S. favorited Sweet Lolita Strawberry Cake Hat/Head Piece
03 Aug 04:13
-
 Chica C. favorited Sweet Lolita Strawberry Cake Hat/Head Piece
14 Jun 04:33
Chica C. favorited Sweet Lolita Strawberry Cake Hat/Head Piece
14 Jun 04:33
-
 cokerewardsfan favorited Sweet Lolita Strawberry Cake Hat/Head Piece
23 Mar 16:45
cokerewardsfan favorited Sweet Lolita Strawberry Cake Hat/Head Piece
23 Mar 16:45
-
 Step 1
Tools:
* scissors
* pencil
* fabric glue
* needle
* push pins
* iron (alternate option will not require an iron) -
 Step 2
Gather your materials:
* deco ribbon for the 'icing'
* knitted lace for the 'cream' around the edges and under the strawberry
* rickrack for the middle layer
* decorative lace (goes under the cake)
* doily
* 4' lace ribbon
* small amount of stuffing for your strawberry
* red, green, white felt
* pink fleece (felt can be used too)
* gold and red thread
* Poly Foam
* white material (must be able to iron it on a high setting)
* stiff fusible interfacing I suppose you could use cardboard or something else stiff -
 Step 3
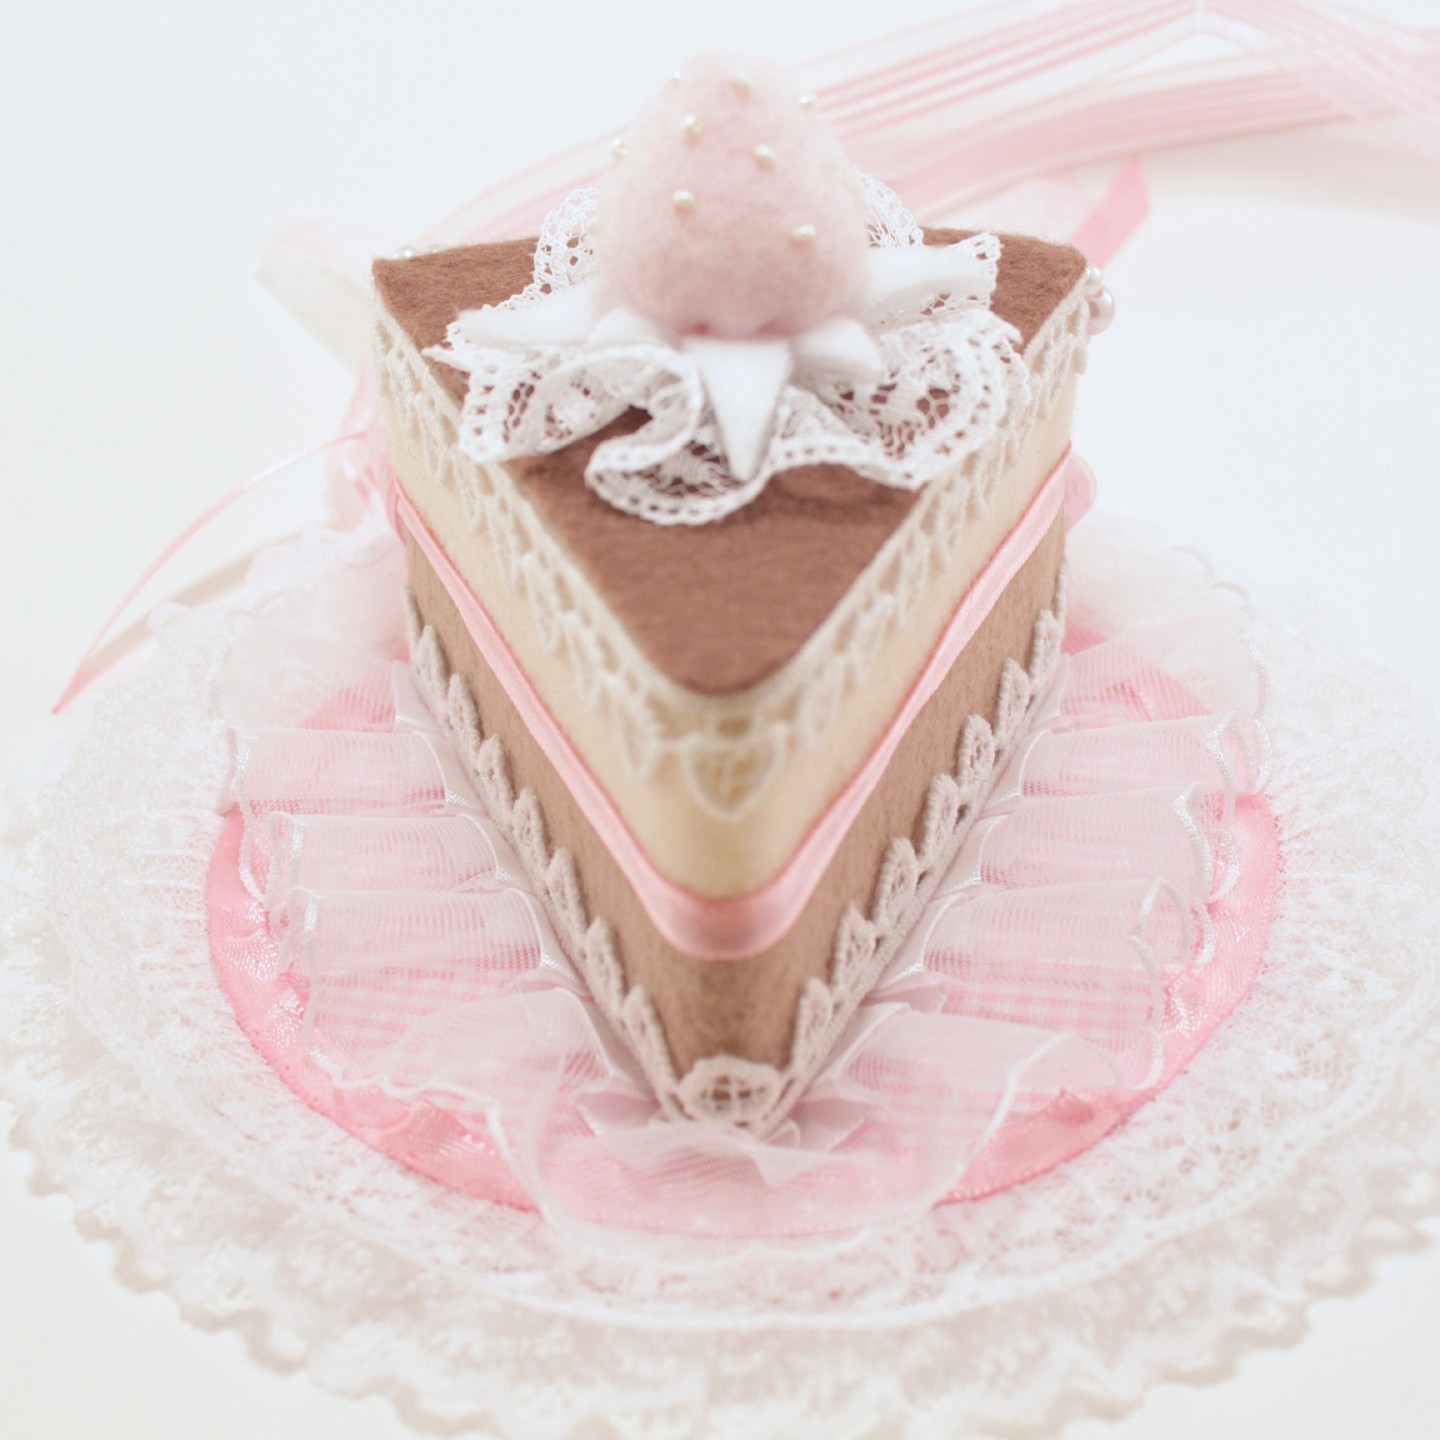
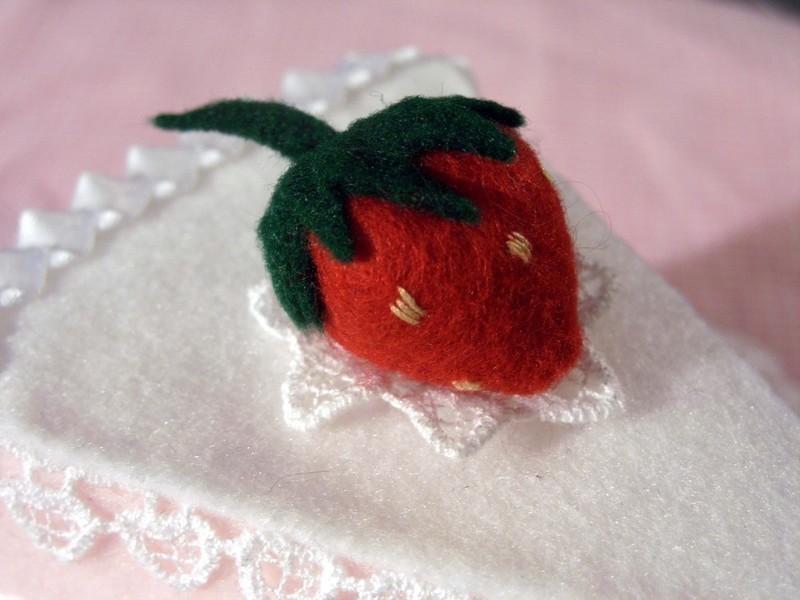
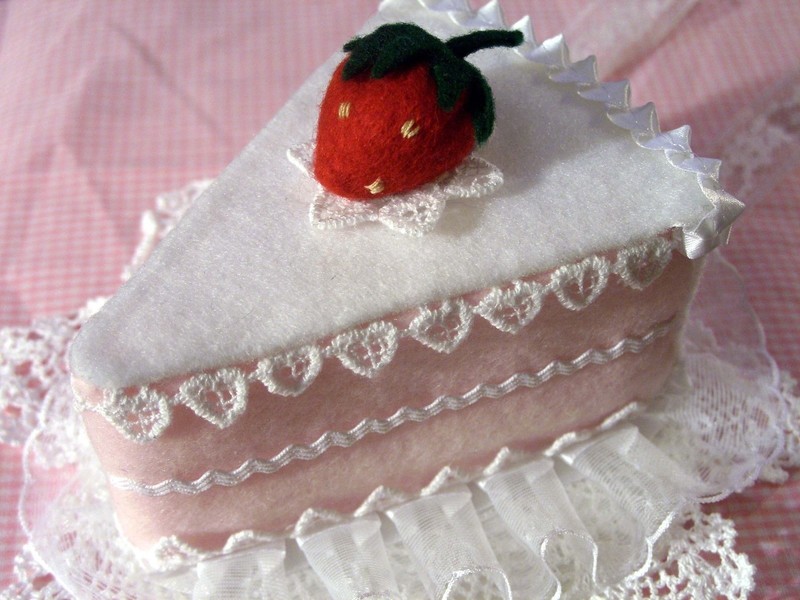
Strawberry:
Use Fondasaurusrex's tutorial for the strawberry @ http://www.cutoutandkeep.net/projects/simple_felt_strawberryI used gold thread to create the seeds on the outside.
Set aside. -
 Step 4
Cake Step 1:
Cut two identical pieces of your poly foam in a triangle shape that measures 4"X3" and glue together.
Round the 3" portion a tad before gluing for a more realistic look.
Glue pink felt along the two long sides (this will be the 'inside' of the cake).
Glue the rickrack and 'cream' to the middle and edges, use push pins to hold it in place. -
 Step 5
Cake Step 2:
Now that your glue is dry, cut and glue white felt to cover the top and 'back' of your cake.
It's a good idea to add your 'icing' ribbon at the same time so you can tuck the ends under the white felt.
Turn your cake slice over and glue the decorative lace to the bottom.
Remember to use your push pins!! -
 Step 6
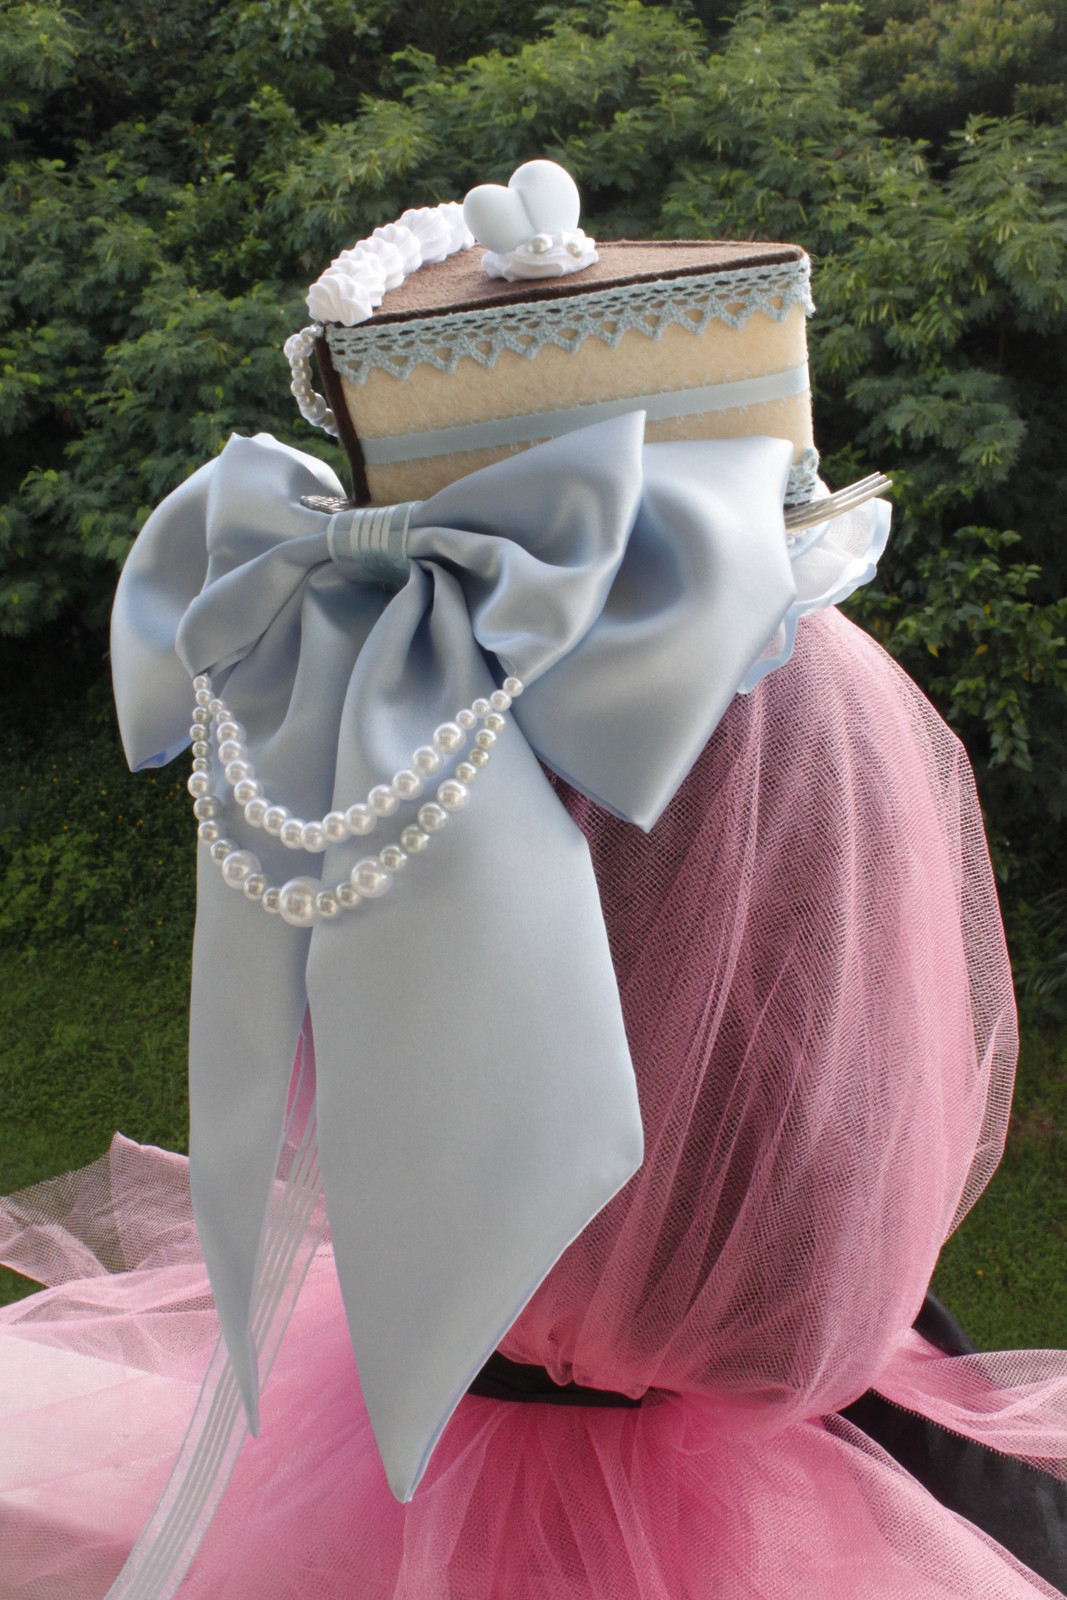
Plate/Base:
Cut out 2 circles measuring 4.75" out of your white material (mine had a white print on white to mimic fine china) and 1 circle of the same size out of stiff fusible interfacing.
Make a sandwich out of them so the the interfacing is in the middle and right sides of the fabric is facing out.
Follow the instructions for the interfacing.
Trim your edges if necessary.
Cut two .5" slits in the center about 2" apart and thread your 4' lace ribbon through it.* You can also choose to run a head band through or attach clips instead.
-
 Step 7
Assemble:
Glue the strawberry to the top, then glue the cake to the base.
Secure it with push pins.
FIN! -
 Step 8
Tips:
* You don't need globs of glue... just a dab will do.
* Dimples are cute, but not on your cake...the glue will hold whatever shape your material is in when you secure it with push pins.


I'm trying it as soon as I have some free time
CO + K User
Haha, you fooled me
Haha, you fooled me
(p.d.i loose the contestU.U)