

About
Simple yet still romantic
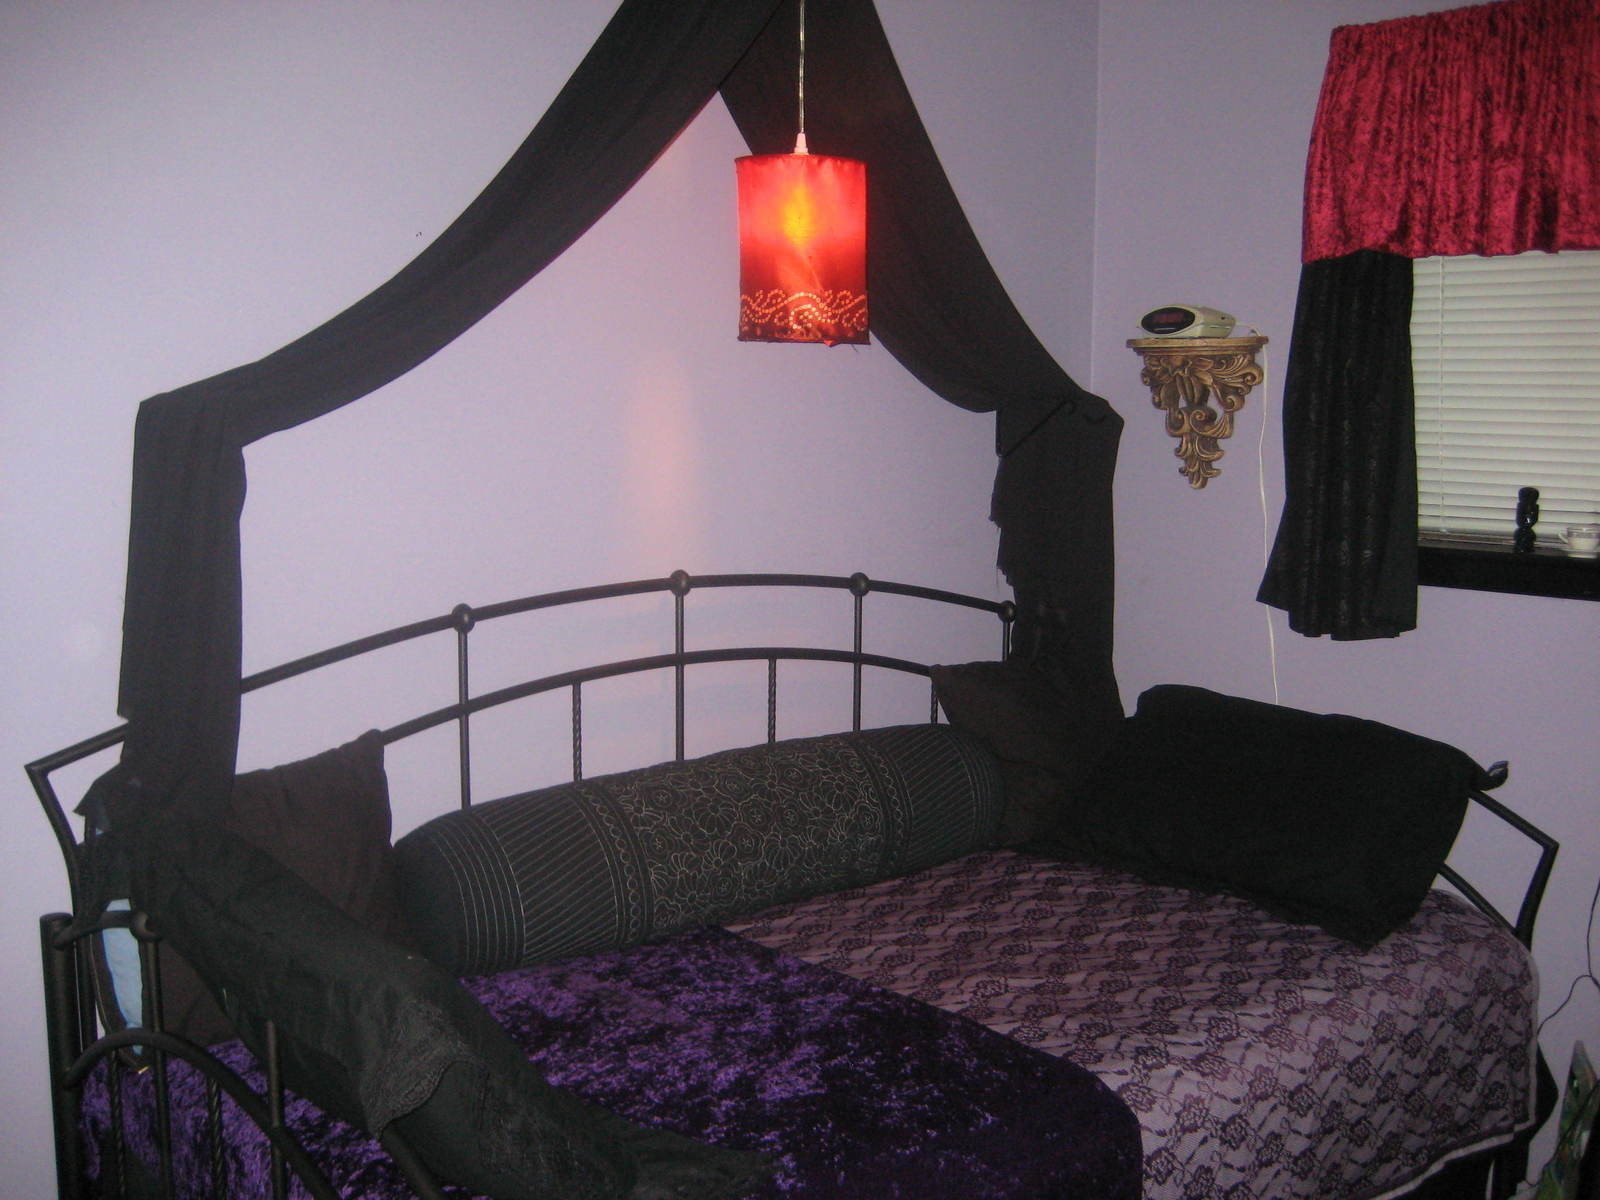
We've all become familiar with the hooped bed canopy, using a large hoop and draping the fabric accordingly. Alas, that uses a lot more fabric for a more dramatic effect (say, covering your entire bed instead of the headboard area).
This is a different bed canopy technique that requires a little less fabric (unless you want more fabric, which you are free to do) and is easy to install - and it's no sew. This projected was under $20 for me. To keep this project "nice 'n' simple" it's advised that you get a helping set of hands.
-
 Vi F. favorited Swagged Tent Canopy
21 Sep 17:17
Vi F. favorited Swagged Tent Canopy
21 Sep 17:17
-
 AlterEgo Designs added Swagged Tent Canopy to DIY The Room- Gotham's Selena Kyle
05 Feb 17:25
AlterEgo Designs added Swagged Tent Canopy to DIY The Room- Gotham's Selena Kyle
05 Feb 17:25
-
 Tracey H. favorited Swagged Tent Canopy
15 Dec 03:24
Tracey H. favorited Swagged Tent Canopy
15 Dec 03:24
-
 choco s. favorited Swagged Tent Canopy
05 Feb 20:38
choco s. favorited Swagged Tent Canopy
05 Feb 20:38
-
 CraftJitsu added Swagged Tent Canopy to My Dream House
28 Jan 14:32
CraftJitsu added Swagged Tent Canopy to My Dream House
28 Jan 14:32
-
 noraknickers added Swagged Tent Canopy to DIY Betsy Johnson
03 Jun 23:53
noraknickers added Swagged Tent Canopy to DIY Betsy Johnson
03 Jun 23:53
-
 Lee Rose added Swagged Tent Canopy to Vardo
16 Mar 23:17
Lee Rose added Swagged Tent Canopy to Vardo
16 Mar 23:17
-
Lee Rose added Swagged Tent Canopy to Vardo
14 Mar 19:23
-
Rachel F. favorited Swagged Tent Canopy
28 Sep 22:18
-
 CountessAudronasha added Swagged Tent Canopy to Dracula's room
24 Aug 20:04
CountessAudronasha added Swagged Tent Canopy to Dracula's room
24 Aug 20:04
-
 Step 1
Gather your materials. I used three garden brackets: one 15" and two 9" (you can use three 15" if you'd like). I went with the design that offered a flat surface to lay the fabric over. Make sure that they come with screws. I suggest using a "flowly" fabric, like chiffon.
-
 Step 2
Plan the position of the brackets. You want a tent-like shape, so the longest bracket should be the highest up and the shortest should be lower AND LEVEL. Make sure that the lower brackets are level to each other (and try to make the shape out to be isosceles, or at best, equilateral :/ ). To mark your positions, mark a dot on the wall through the holes provided in the brackets. Use a pencil, since it might take some time to get the right position (Tip: I started with the highest bracket). To make this easier, get your helping hands outs (a brother is suitable).
-
 Step 3
Once you got the bracket positions exactly how you want it, make a peleminary hole by half way drilling the screws provided over the dots. This will make it easier to screw the brackets in.
-
 Step 4
Drill the brackets into the wall. To make it even EASIER, drag your helping hands out of his room again. ;]
-
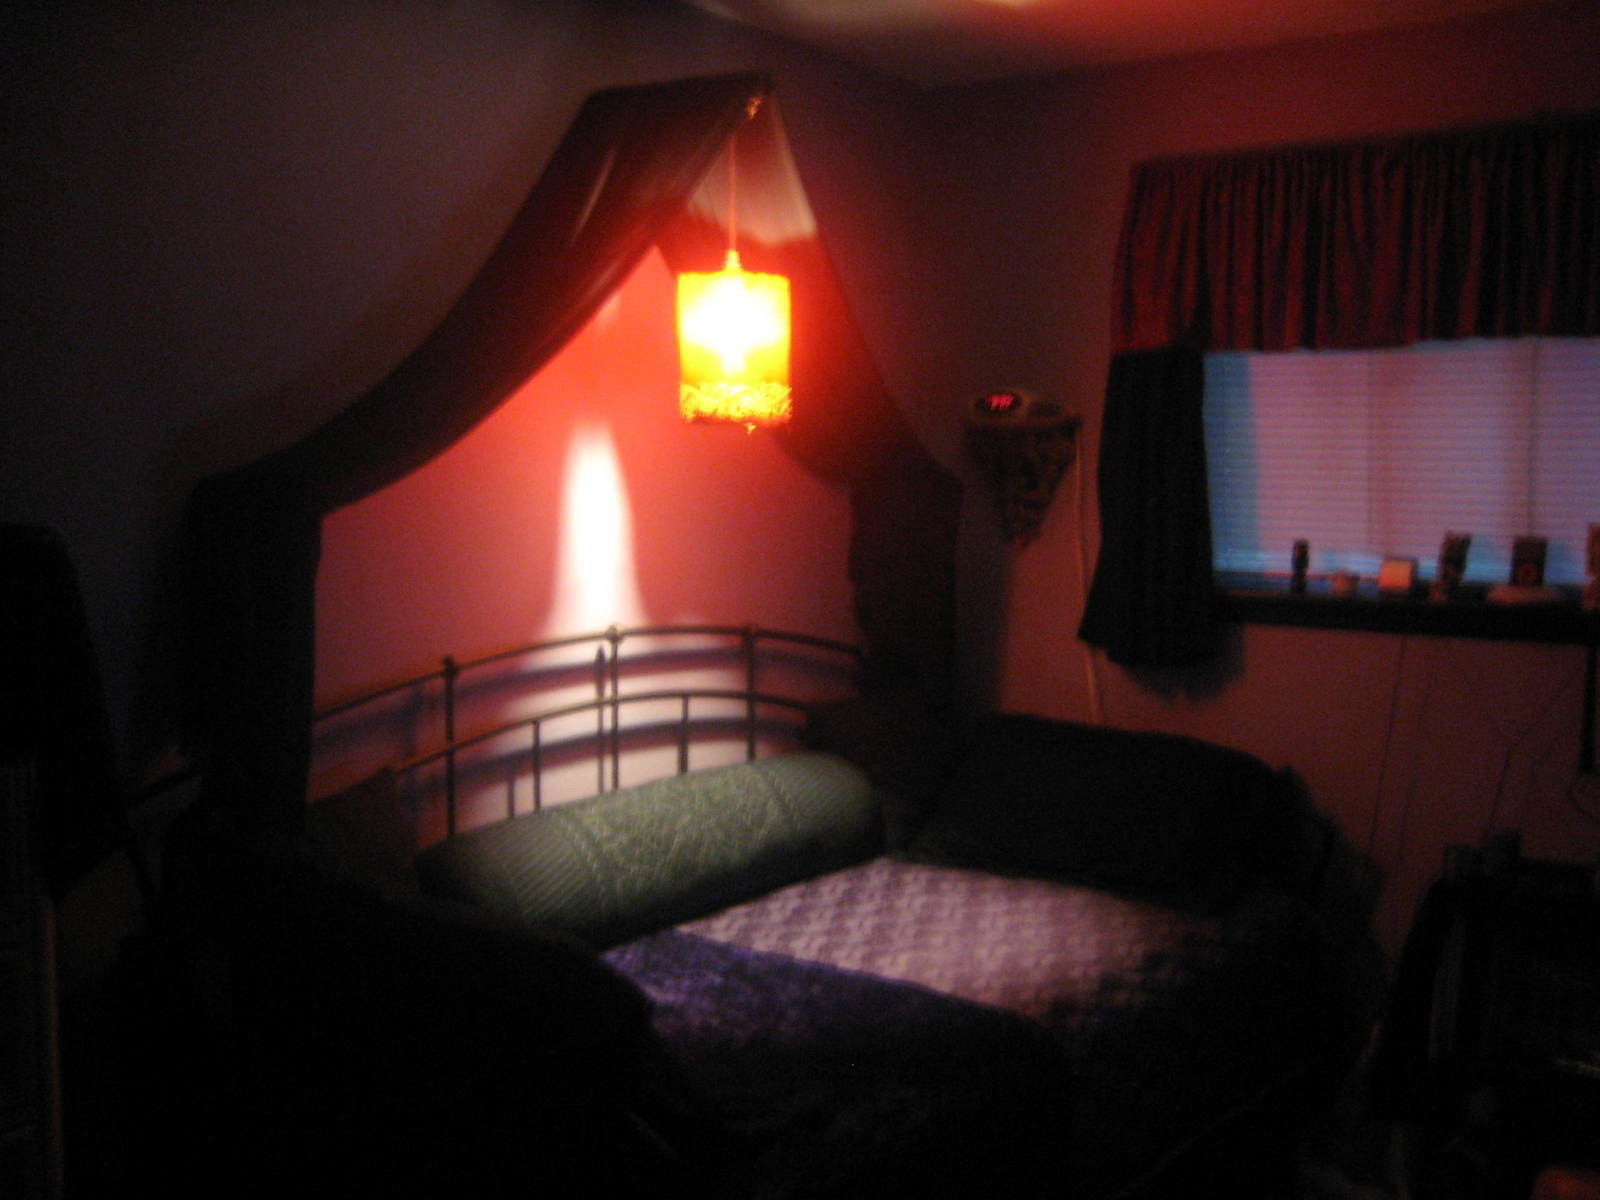
 Step 5
Drape your fabric over the brackets.
-
 Step 6
Now you may fill in the void however you wish. Hang a pretty wall decoration under the canopy, like a wire structure or a mirror or some wall candles (be wary of fire hazards). Hang ornaments or candle holders from the wire brackets (again, be wary of fire hazards). I hung my sari lantern from the top most bracket. This type of canopy is great for daybeds like mine. Now you can sit and relax like a queen as you watch your helping hands being "punished" for being an ingrate by your servants, for, I don't know, eating the last cupcake. >:]


Versions

Comments


