


About
Be a superhero for a day!!!
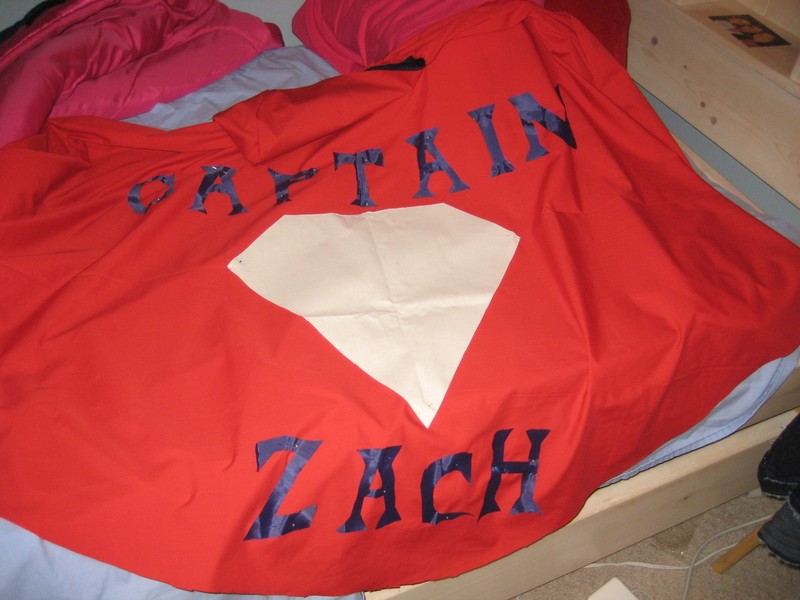
After losing a bet, I made a deal with my friend Zach to make him a red cape that said "Captain Zach" with a diamond on it. I never thought I would be making a cape for my 20 year old friend, but you know he's young at heart! It came out so nice that I don't even want him to wear it! He needs to frame it. The only thing that makes this tricky is the applique of the letters. once you get the hang of it, though, you're golden!
Tags
You Will Need
-
 Step 1
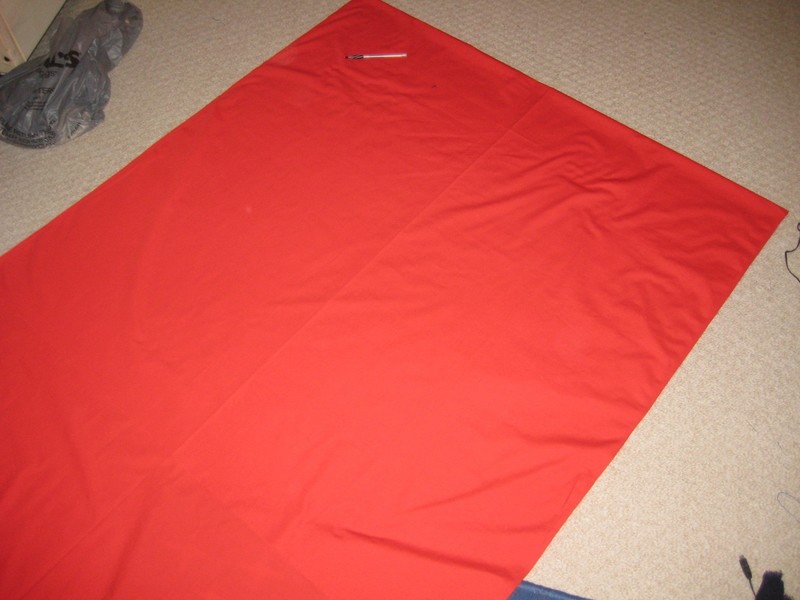
I used just cheap broadcloth for the cape. I had about three yards of it which seemed to be plenty. Fold the fabric in half. Creat a compass with a pen and non-stretchy string to trace out 1/4 of a circle. Apparently I suck at geometry because I pretty much ended up free handing this part.
-
 Step 2
After you've cut the 1/4 cirlce, I folded it in half again (so 4 times thickness) just to make sure all parts of the circle matched up. If you unfolded the fabric at this point, it would make a perfect semi circle, but don't or you'll throw off the directions!
-
 Step 3
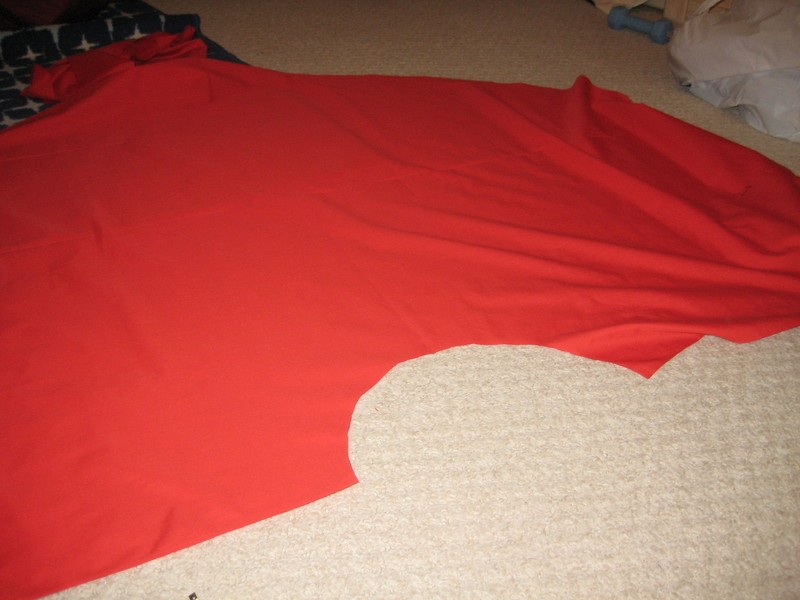
About 15 cm from the point of the circle, cut another act to make the neck hole.
-
 Step 4
At this point, you can now unfold the cape. It should look like the picture. Along the neck hole, create a loose seam that will be gathered later to match the hood. For help with gathering, check out google. Sounds hard, but its not with practice!
-
 Step 5
Now to the hood! Create two rectangles 13 in by 10.5 inches. You can create two more rectangles of equal size out of whatever fabric you would like to line it with. Now, adjust the hood so there is a curve at the back. My curve had a radius of about 3 inches, but depending on the size of your head, this could be different.
-
 Step 6
Ok, this can be done a million ways so seams don't show, but I messed up on mine, so here's what I essentially did to remedy that. Create a stack of the 4 cuts of hood. Blue, red, red, blue. Like a sandwich with blue bread basicly if that makes sense. Sew all along the curved line until you reach the two corners. then, turned inside out, it should create a hood with a blue lining.
-
 Step 7
Ok, I mentioned earlier the gathering. Super simple, just pull the string and adjust the gather so the length of the neck hole is the same length as the actual hood bottom. The just sew the two together. If you wanted, you could iron up 1/2 inch of the hood bottom so that when sewn together you wouldn't see any of the raw edges. At this point, I didn't really think Zach would care, so I just sewed through all the layers.
-
 Step 8
Ok, so now comes the most time consuming process. Sewing on the letters! I used word to copy a fun looking font for the letters. My printers broken so I free handed it, as with the diamond. We'll define the facets later.
-
 Step 9
Now pin everything in place how you would like it on the cape. I would also try it on at this point to make sure everything's even when it's actually being worn.
-
 Step 10
Now to applique. I used the smallest zig-zag stitch my machine could do and then just followed the edge of the letter, adjusting the fabric and turning it as necessary. This will be very time consuming and annoying, so hopefully your friends
a.) have short names
b.) don't have lots of curvy letters in their name -
 Step 11
Ok, so everything's appliqued in place. Now time to move on to the diamond facets. I cut skinny strips of black fabric and laid it out on the diamond to make sure everything fit. I then sewed on each strip on at a time. I thought it was easiest to do the diagonal strips first and then cover with the horizontal strips just to give a nicer look.
-
 Step 12
I know you're getting annoyed of zig zag stitches at this point, but it is so worth it! It looks so great once you're done!
-
 Step 13
I created a bias tape with the same fabric as I used to line the hood and sewed this over the opening of the hood to give it a more finished look. So close....
-
 Step 14
Now final steps. Just hem up the bottom. I used a double cuff. And then the sides of mine didn't have raw edges, hopefully yours works out the same. Then attach some type of closure to tie around the neck. I just used some simple gold ribbon. You just made a beautiful super hero cape!!!!


CO + K User
P.S. I think we have the same sewing machine! Is it a blue Kenmore? That's cool!