


About
Garden Party Anyone?
Ok, so I picked up this dress from Value Village, I loved the pattern but the dress fit me wrong in all the wrong places. So I picked up a mens dress shirt and proceeded to hack away at both the dress and the shirt.
-
 Key West Witch favorited Summer Dress
29 Jun 09:41
Key West Witch favorited Summer Dress
29 Jun 09:41
-
 Alma added Summer Dress to Dresses
07 Jan 19:26
Alma added Summer Dress to Dresses
07 Jan 19:26
-
 Kay T. favorited Summer Dress
12 Nov 14:34
Kay T. favorited Summer Dress
12 Nov 14:34
-
 Claire M. favorited Summer Dress
07 Oct 22:37
Claire M. favorited Summer Dress
07 Oct 22:37
-
 catie.allen92 favorited Summer Dress
02 Jul 18:34
catie.allen92 favorited Summer Dress
02 Jul 18:34
-
 Billie F. favorited Summer Dress
02 Jul 03:47
Billie F. favorited Summer Dress
02 Jul 03:47
-
 Kristen P. favorited Summer Dress
01 Jul 08:57
Kristen P. favorited Summer Dress
01 Jul 08:57
-
 Alex Poser added Summer Dress to Clothing Mods
11 Jan 19:01
Alex Poser added Summer Dress to Clothing Mods
11 Jan 19:01
-
 Amanda M. favorited Summer Dress
01 Jan 00:17
Amanda M. favorited Summer Dress
01 Jan 00:17
-
catarina n. favorited Summer Dress
13 Sep 15:00
-
 Step 1
Find a dress and a mens dress shirt (preferably extra large in the shirt, so you have more material to work with)
-
 Step 2
Cut the dress in half, separating the bust from the skirt.
-
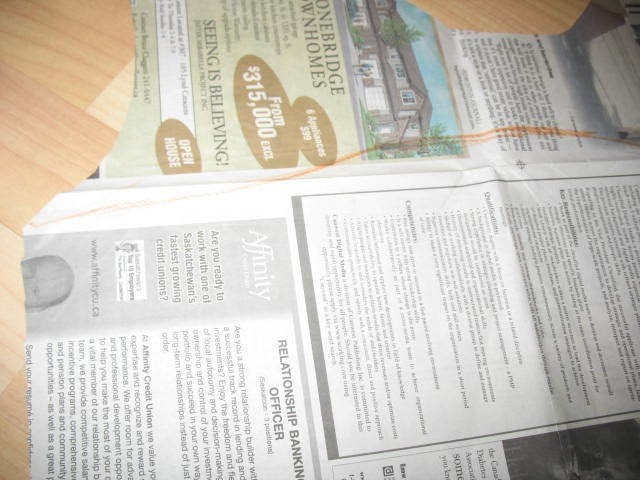
 Step 3
Take newspaper and an ink pen to create a pattern
-
 Step 4
Lay the bust portion out on the newspaper and trace the edges. this will show you how much material you have to work with, so you can create a new bust.
-
 Step 5
You are left with the existing bust pattern. Now take your pen and mark out the new bust shape. (Use your own measurements of you bust and your underbust to create the pattern)
- Note: My dress fit me in the bust, so I had to do very little resizing, please resize to your shape.
-
 Step 6
This is the bust pattern used on this dress, In order to get both sides the same fold your newspaper in half and mark out the pattern on one side, then while keeping the newspaper folded, cut along your marked lines.
-
 Step 7
This is what the pattern will look like folded before you cut
-
 Step 8
Now on to creating the back pattern, follow the same steps that you used to create the bust pattern. The back pattern should look something like this.
-
 Step 9
Now you want to pin the bust pattern to the bust.
-
 Step 10
Then you can cut out the bust pattern, but make sure you only cut the front of the bust, not the back.
-
Step 11
Now repeat steps 10 and 11, only this time with the back of the bodice and the back pattern.
..sorry no photo :(
- Keep one side of the bust open, either the left or the right since you will need to put a zipper in here later.
-
 Step 12
Now take the top of the bust and back and fold it towards the back with about 1/4" of material to create the hem. Sew along this with a straight stitch
-
 Step 13
To fully create the bust shape, we now want to insert pleats in the centre of the bust. Basically you just pucker the material, parallel to the top of the bust and pin these puckers in place.
- sorry photo is kind of fuzzy.
-
 Step 14
Now, take your bust and sew a single straight seam down the newly pinned pleats, try to do this in a thread that is the same colour as your material.
-
Step 15
The next step is to measure around your waist, this is how to figure out your bodice piece. Measure your waist, then half the measurement, this will give you your front measurement.
At this point you will also need to measure from your underbust to your waist (the thinnest part of your body) This measurement will become the length of the bodice, since the skirt portion of the dress will actually start at your natural waist.
-
 Step 16
Now that you have your measurements the next step is again to create a pattern from newspaper, this time for the bodice of the dress.
-
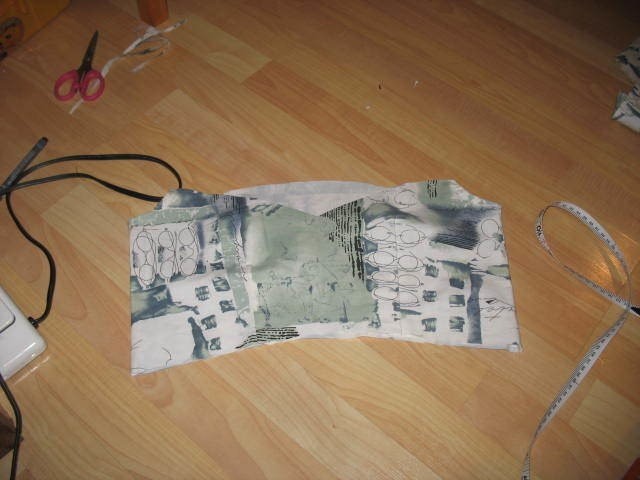
 Step 17
Now the next step is to take your bodice piece and pin it onto the mens dress shirt (note that my bodice is very long, this is because I was experimenting with the length of the bodice)
-
 Step 18
At this point you want to pin the bodice to the bust portion of the dress (wrong sides of the fabric together), remember to keep one side open for a zipper.
- now you can sew a straight stitch to attach the bodice to the bust, keeping one side open.
- check out the cow pj pants :D
-
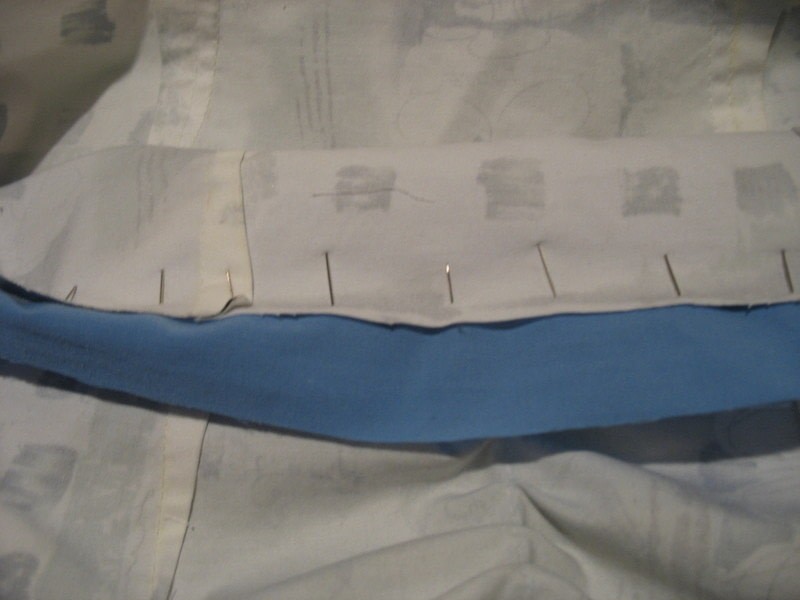
 Step 19
Now pin the bodice to the skirt, remember to keep the wrong sides of the fabric together when you do this, again, leaving one side of the skirt open for a zipper (since the skirt will now be the same size as your natural waist)
- If the skirt portion is larger than your natural waist, pin pleats into the hem of the skirt (preferably to either side of the skirt) as you are pinning the skirt to the bodice.
- Once it is all pinned you can now sew the skirt to the bodice with a straight stitch, remember to keep one side open for a zipper
-
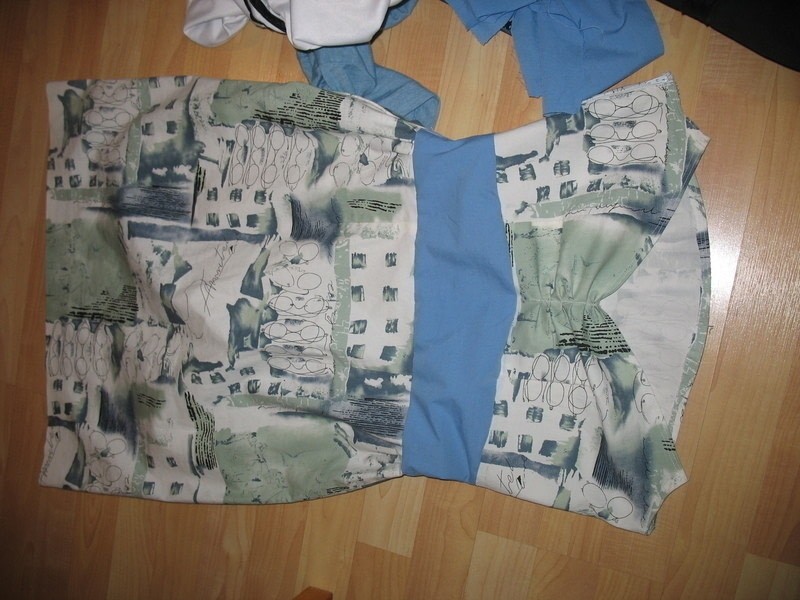
 Step 20
Now that everything is sewn together, it is time to pin in the zipper.
Once the zipper is pinned in, you can sew it in with a straight stitch...
I suck at sewing in zippers, so I recommend really slowing it down and taking your time if you are inexperienced.
If your opening is longer than your zipper, now is the time to pin the sides together (wrong sides out remember), and stitch them together with a straight stitch.
-
 Step 21
Now you have your basic dress body.
-
 Step 22
Here we add the straps, again create a pattern out of newspaper, I made the back of the straps thicker than the front, but feel free to experiment.
Fold both edges over and pin them, now you can use a straight stitch to sew a hem in.
You can now attach the straps to your dress however you feel, criss crossed, straight, halter, have fun!
-
 Step 23
I will give the tutorial for the bottom of the dress, but again, experiment and have fun.
figure out how high you want the bunching on the dress to go. (showing some leg ladies!)
- Now you want to pin in pleats, much like you did with the middle of the bust.
- When it is pinned, you can now sew a single line of straight stitch down the middle of the pleats. again much like the bust of the dress.
-
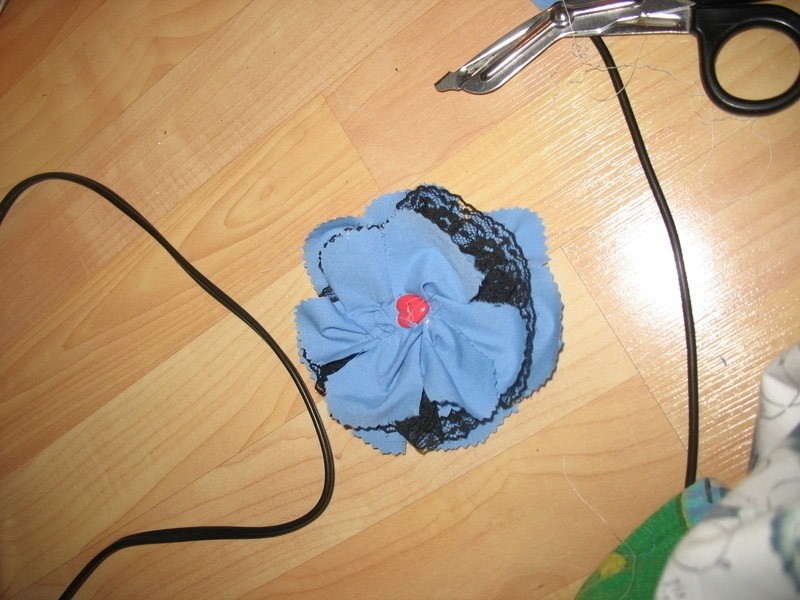
 Step 24
I sort of made up my own fabric flower, but there are great tutorials out there. I highly recommend http://blairpeter.typepad.com/weblog/2006/03/fabric_flowers.html
for a tutorial, just skip the last step for the brooch, since you will be sewing a few darts to hold your flower in place on your dress.
-
 Step 25
And Voila! finished dress!! Ready for a great garden party and an awesome wide brimmed hat.
- Variations on the bottom of the dress could be, but are not limited to:
- ruffle on the bottom
- cut higher on one side than the other (angle cut)
- so on and so forth


:O
Thanks!