About
Summer cool oriental fan
As summer approaches it is always nice to be able to keep cool, this paper fan is fun to make and looks really pretty.
-
 SassyGinger_24 added Summer Cool to Japanese Garden Party
17 Apr 14:38
SassyGinger_24 added Summer Cool to Japanese Garden Party
17 Apr 14:38
-
 Callie added Summer Cool to MiniMoon
19 Mar 17:13
Callie added Summer Cool to MiniMoon
19 Mar 17:13
-
 englishwren added Summer Cool to Summer daze
13 Jun 15:13
englishwren added Summer Cool to Summer daze
13 Jun 15:13
-
 Maladignia added Summer Cool to Victorian/Steampunk wedding
06 Jul 11:43
Maladignia added Summer Cool to Victorian/Steampunk wedding
06 Jul 11:43
-
 Sandra C. added Summer Cool to Manualitats
07 Sep 21:26
Sandra C. added Summer Cool to Manualitats
07 Sep 21:26
-
 Jenn favorited Summer Cool
10 Jun 23:50
Jenn favorited Summer Cool
10 Jun 23:50
-
 gettothepoint added Summer Cool to make one day
06 Jun 16:20
gettothepoint added Summer Cool to make one day
06 Jun 16:20
-
 Laura favorited Summer Cool
26 May 23:07
Laura favorited Summer Cool
26 May 23:07
-
 Helen W. favorited Summer Cool
26 May 16:29
Helen W. favorited Summer Cool
26 May 16:29
-
 Darcy UK published her project Summer Cool
25 May 06:00
Darcy UK published her project Summer Cool
25 May 06:00
You Will Need
-
 Step 1
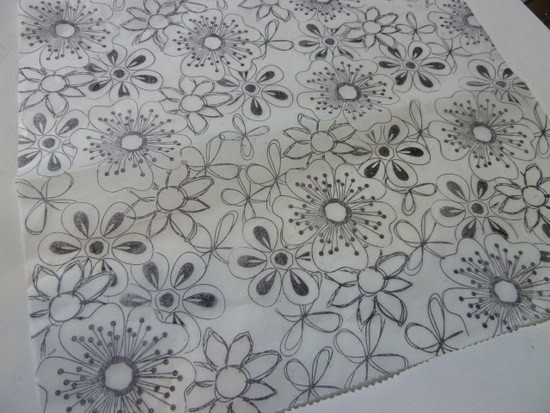
I saw lots of paper fans on the internet, but I wanted mine to be light and delicate, so I decided to use Deli paper. I wasn't sure how Letraset promarkers (you could use Copics or other permanent markers) would react to the shiny dry waxed side, so I played around for a while and discovered they work great. They don't dry immediately like they do on more porous surfaces, this made them easy to blend.
So I started by taking 2 sheets of deli paper, and using Memento ink in black, I stamped all over the sheets with some flower stamps.
-
 Step 2
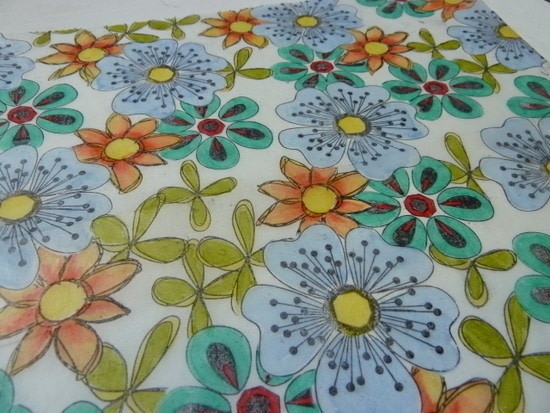
Once my flowers were all coloured in, I glued a, blank, piece of deli paper to the back of each of the coloured pieces to add a little strength, then I added a light coat of matte medium to the front. This again adds a little strength.
-
 Step 3
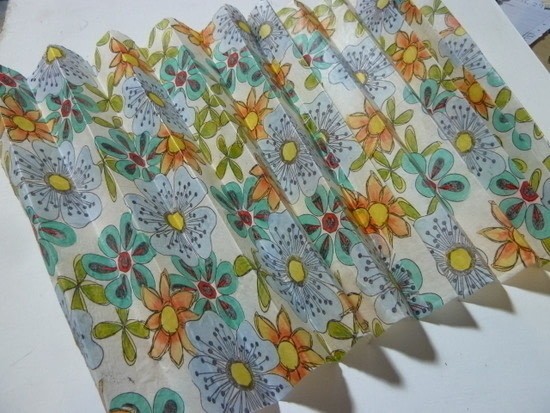
Next I folded the papers, concertina style, and glued the 2 sheets together, making one larger piece.
-
 Step 4
and tie with a piece of thread that has been coloured with one of the markers.
-
 Step 5
Now the fan can be brought around so that two short ends meat, these are now glued together.
-
 Step 6
I cut 2 lengths of chipboard and coloured them with brown markers.
-
 Step 7
These are glued to the outer edges of the fan.
-
 Step 8
Now you have a workable fan, but we need the 'legs' to stay together.
-
 Step 9
I coloured some ribbon and some beads with my markers.
-
 Step 10
Finally i punched a small hole in one of the chipboard sticks and added the ribbon and 2 beads,The ribbon and beads hold the fan closed when not in use, but also hold the handle part together when the fan is being used.
-
 Step 11
Pretty and delicate and works perfectly.....ahhh cool breeze!