About
Sublime Stitching Product Test
This project was to test some of Sublime Stitching's products. I was given free reign with what I wanted to do with them and as I had decided the cushion cover was going to be a gift for my teenage daughter I chose to make it reflect her interests. She loves darker colours and for things to be a bit quirky. She also loves writing and reading Gothic literature.The floss I used glows in the dark and looks fabulous under light or in the dark. This allowed me to dye stitch and appliqué the cushion cover, truly putting it to the test.
The floss I used glows in the dark and looks fabulous under light or in the dark. You will however have to take my word for it as I have failed to take a decent glow picture.
I am sure anyone who has done embroidery before could do this project a lot more quickly but for a beginner I would suggest this is a great project and product to start with.
Tags
-
 Key West Witch favorited Embroidered cushion cover
07 May 16:38
Key West Witch favorited Embroidered cushion cover
07 May 16:38
-
 mmotse03 favorited Embroidered cushion cover
19 Aug 22:19
mmotse03 favorited Embroidered cushion cover
19 Aug 22:19
-
 Chudames favorited Embroidered cushion cover
21 Mar 00:50
Chudames favorited Embroidered cushion cover
21 Mar 00:50
-
 Angelshimmery entered her project Embroidered cushion cover to Secret Santa
27 Dec 07:28
Angelshimmery entered her project Embroidered cushion cover to Secret Santa
27 Dec 07:28
-
Angelshimmery published her project Embroidered cushion cover
09 Nov 21:08
-
 Step 1
Sublime Stitching's throw pillow cover is a lovely 100% cotton and is ready to use straight away. All you require for the end result is an 18"x18" pillow insert.
-
 Step 2
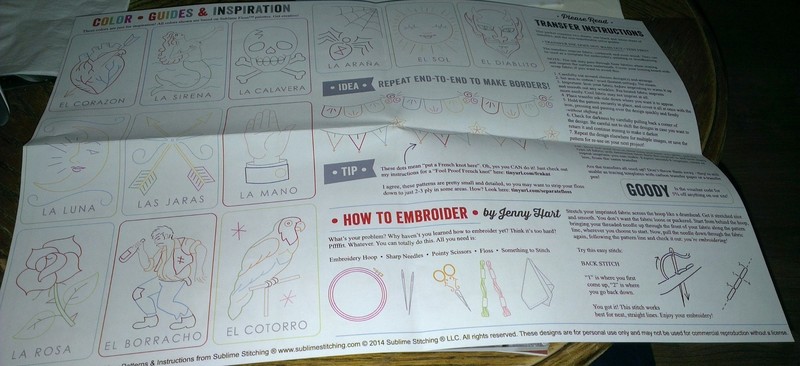
The instructions on the pillow cover suggest you can paint it, dye it and embroider it and direct you to www.sublimestitching.com for further embroidery stitch instructions.
-
 Step 3
I also received Sublime Stitching "Mexican Loteria" iron on embroidery transfer templates. These are a fantastic selection of 'not your granny's embroidery transfers' and come with easy to follow and encouraging instructions. Definitely what is needed the first time you are trying something out!
-
 Step 4
Given that the pillow case was glaringly white I found it a bit daunting to put needle and thread to it so decided to start by dying the cover.
Just follow the instructions on the dye packet and remember to wear rubber gloves. -
 Step 5
The cushion cover dyed really well due to the fact that it is 100% cotton.
-
 Step 6
The embroidery transfers had clear and easy to follow instructions.
-
 Step 7
The most difficult part was choosing which of the fantastic designs to choose from.
-
 Step 8
Before applying the transfer the instructions suggest warming the material you are going to apply the transfer to as it will work better. So get the iron ready at the hottest setting and no steam.
-
 Step 9
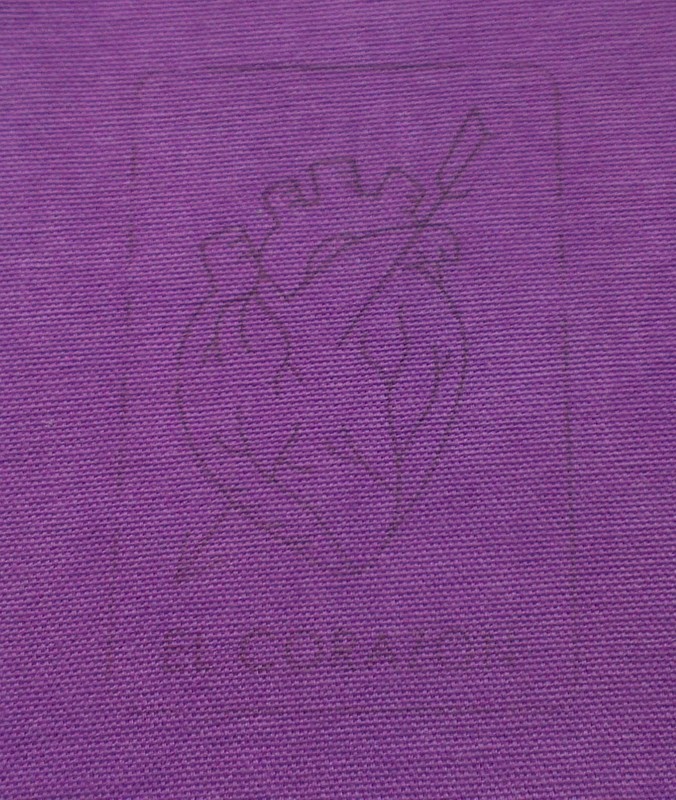
Then place the transfer ink side down on the material. Hold the transfer securely in place, and cover it all at once with the iron, pressing and passing over the design quickly and firmly - try not to move it!
-
 Step 10
When you are imprinting ensure to carefully lift a corner and check for darkness as you want to be able to see what you are stitching. The transfer can be reused several times so I repeated the image on the other corner too.
-
 Step 11
Next get your embroidery hoop and get ready to stitch. The instructions give suggestions on colours of embroidery threads but as this was a gift for my teenage daughter I decided to go for glow in the dark floss.
-
 Step 12
Part way through. I used a selection of stitches following the instructions on the Sublime Stitching website which were really easy to follow.
-
 Step 13
One of the finished transfers, I made a few mistakes on this but I am really pleased with my first ever attempt at embroidery.
-
 Step 14
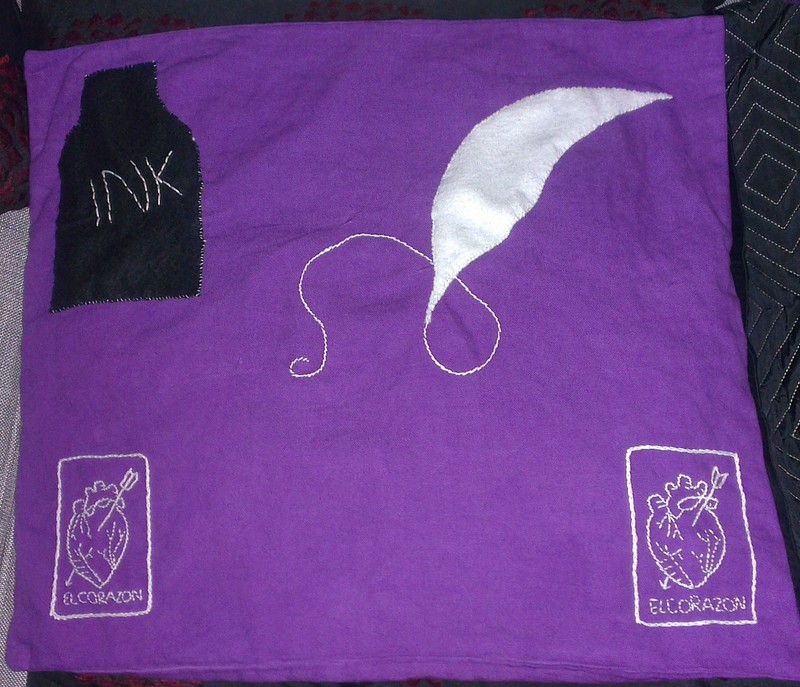
I decided to add some felt pieces as my daughter is a bit of a Poe fan and it gave it a tell tale heart feel.
-
 Step 15
Finally the finished cover. I loved using the Sublime Stitching products and found the instructions clear and straightforward. They made the whole process really fun and heartily recommend the products.