


About
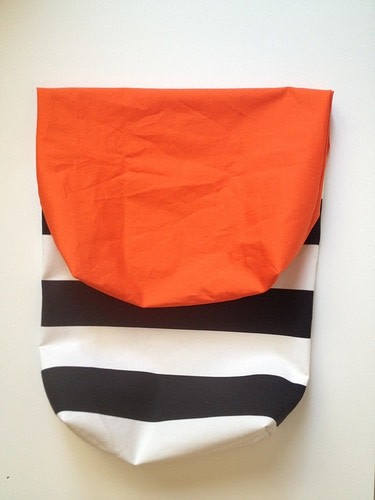
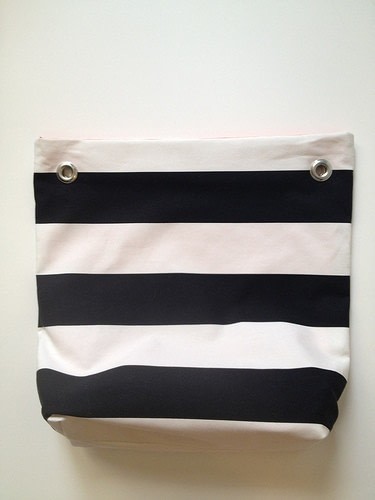
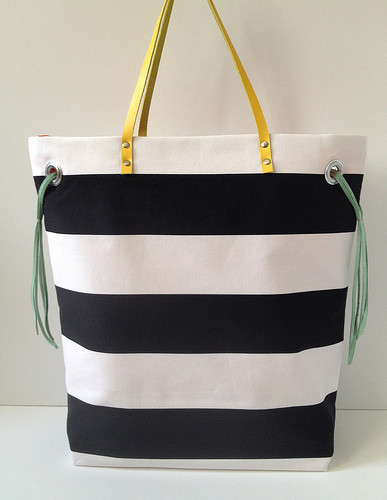
A bold, colorful tote bag perfect for totin' all your essentials!
I'm sort of in love with this project. It looks really advanced, but the sewing itself is absolutely basic. It does apply some techniques like rivets and grommet that I hadn't actually used before this project, and I can assure you that you shouldn't be intimidated by them. In fact, they were so easy that my head is sort of twirling with ideas of other projects on which I can put these bad boys to use.
Before you get started, I would also note that you don't have to use a striped fabric like this one, but using a big bold black and white pattern will give the colored details a special little pop that makes the bag unique.
-
 Erin B. added Stripes + Color Tote Bag to Zooey Deschanel
20 Jan 21:55
Erin B. added Stripes + Color Tote Bag to Zooey Deschanel
20 Jan 21:55
-
 Delf added Stripes + Color Tote Bag to Gwen Stefani
12 Mar 13:29
Delf added Stripes + Color Tote Bag to Gwen Stefani
12 Mar 13:29
-
 Phe S. added Stripes + Color Tote Bag to Bags
23 May 20:24
Phe S. added Stripes + Color Tote Bag to Bags
23 May 20:24
-
Shelby S. favorited Stripes + Color Tote Bag
15 Mar 06:01
-
Advitha K. favorited Stripes + Color Tote Bag
10 Mar 09:03
-
 Caaryn S. favorited Stripes + Color Tote Bag
09 Mar 05:38
Caaryn S. favorited Stripes + Color Tote Bag
09 Mar 05:38
- kesvn favorited Stripes + Color Tote Bag 01 Mar 06:00
-
 joansmithok favorited Stripes + Color Tote Bag
04 Feb 05:19
joansmithok favorited Stripes + Color Tote Bag
04 Feb 05:19
-
 Craffy added Stripes + Color Tote Bag to Para hacer <3
31 Jan 22:44
Craffy added Stripes + Color Tote Bag to Para hacer <3
31 Jan 22:44
-
Craffy favorited Stripes + Color Tote Bag
31 Jan 22:44
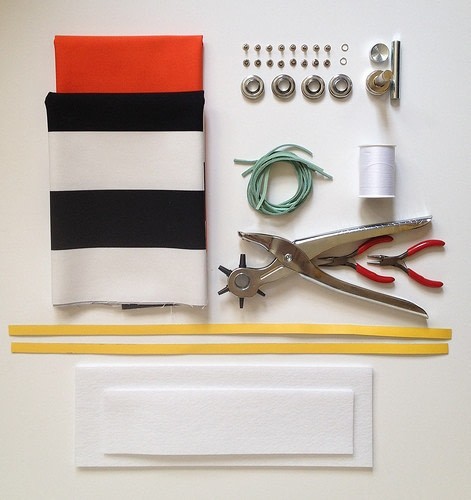
You Will Need
-
 Step 1
Materials:
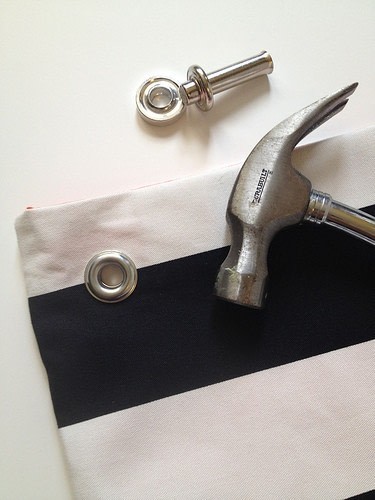
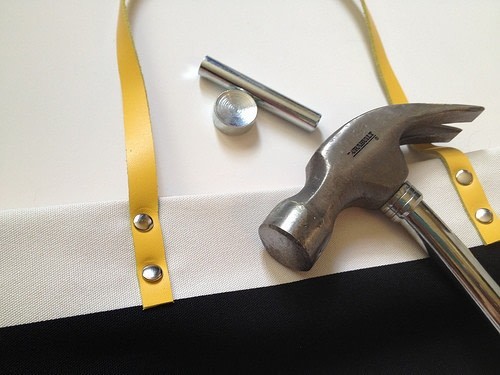
4 - Large Grommets (and installation tools)*
8 - Small Rivets (and installation tools)*
Hammer
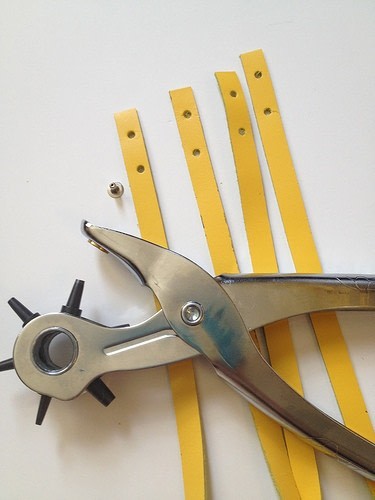
Hole Punch
4 - 18" Leather Laces
2 - 18" x 1/2" Leather Straps**
2 - Jewelry Jump Ring (or other small metal rings)
Pliers
Thread
Sewing Machine
2 - 16" x 17.5" cuts of a heavy canvas-like Bold Striped Fabric (with the stripes running parallel to the shorter side)
2 - 16" x 17.5" cuts of a Bright Solid Fabric for the lining
1 - 13" x 9.5" cut of the the Bright Solid Fabric
3 - 4" x 12" cuts of Super Heavy Interfacing
2 - 2.5" x 10" cuts of Super Heavy Interfacing*Most grommets come with the installation tools you'll need for them (except for a hammer). For the rivets, you can buy a starter kit that includes a variety of rivet sizes and the tools you'll need to set them (again, except for a hammer).
**Unfortunately, I don't have a home run source for brightly colored leather strapping. I ordered mine from Etsy seller all 4 handmade, but I wish they'd offered the bright colors in wider straps.
-
 Step 2
Center, pin, and stitch each of the 2.5" x 10" cuts of heavy interfacing to the top, back edge of each of the cuts of striped fabric.
-
 Step 3
Pin the two cuts of striped fabric together with the right sides facing one another. The top edge with the heavy interfacing will be the bag's opening. Sew around each of the bag's other three edges.
-
 Step 4
Box the corners to give the bag some shape by forming a triangle at the corner edge such that the bottom and side seams are touching. Mark a line perpendicular to the seams about 3" from the corner.
-
 Step 5
Stitch on this line and trim the excess fabric.
-
 Step 6
With the exception of the first step involving the heavy interfacing, repeat these steps with the lining fabric, but leave a hole about 3" wide in the bottom seam to pull the bag right-side-out once you've stitched everything together.
-
 Step 7
Place the lining inside of the outer bag. The right sides of both components should be facing one another. Pin.
-
 Step 8
Double stitch them together around the top.
-
 Step 9
Pull everything through the hole you left in the lining.
-
 Step 10
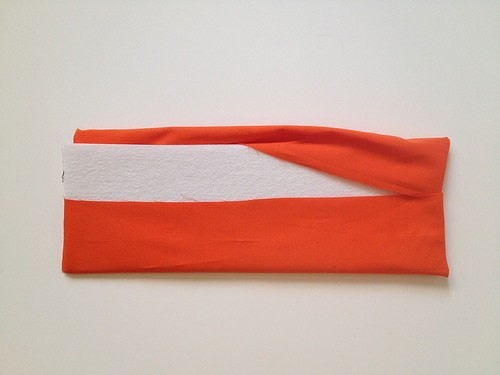
To give the bottom stability, create a panel to attach to the bag's lining. To do this, take the 13" x 9.5" cut of lining fabric and fold it into thirds such that it ends up being 4" wide like the remaining heavy interface pieces and the fabric overlap is centered (see photos). Stitch along the two outside edges.
-
 Step 11
Turn the piece right side out, and slip in the remaining 4" x 12" interface pieces.
-
 Step 12
Take the edges of the opening of this bottom piece and pin them to the bottom seam of the bag's lining.
-
 Step 13
Stitch together. I did this step by hand, but feel free to do it on the machine if you can maneuver it.
-
 Step 14
Now tuck the lining in the bag, and press.
-
 Step 15
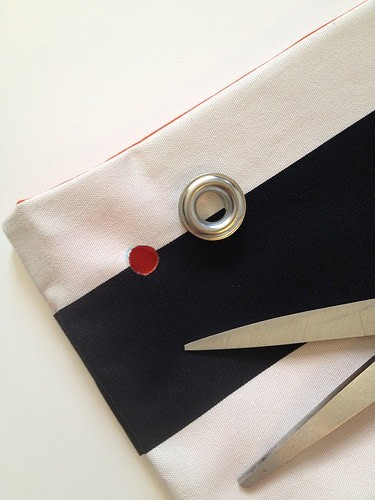
On one side of the bag, position one of the grommets about an 1.5" from the top and side. Trace the inside of the grommet onto the bag and cut out.
-
 Step 16
Install the grommet according to the directions on the packaging. You're doing this just for a single side. Do not combine the two sides of the purse with the grommet. Like I said, this was the first time I've worked with grommets, and at first, I thought I was doing it wrong because it didn't seem to be working. Just know that it took about 50 good whacks of the hammer for each grommet.
-
 Step 17
Repeat in the the other corner and on each corner on the opposite side.
-
 Step 18
On each end of the 1/2" wide leather straps, punch two holes just big enough for the rivet to slip through. The bottom hole on each end should be about a 1/2" from the edge with the next one about 1" from the edge.
-
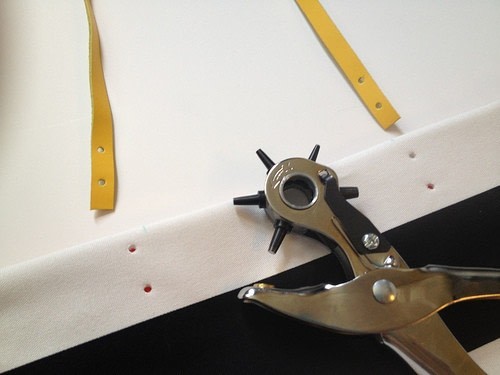
 Step 19
On each side of the bag, position the strap ends about 3" from the bag's center point, and place a mark where the holes in your strap ends are. You should be able to use your same hole punch to punch these holes in the fabric.
-
 Step 20
The rivets that you use should only be about as long as the thickness of the fabric + straps together. Install the rivets according to the directions with your installation kit. I also watched this video, which I found really helpful. These are super easy to install and only take about 2 to 3 whacks of the hammer. Repeat the strap/rivet installation process on the other side of the bag.
-
 Step 21
On each side of the bag, thread 2 of the leather laces through the grommets you installed earlier. Join them together using a small metal jewelry jump ring. Separate the ring with a set of pliers, install it around the two laces, and squeeze it tight around the leather. Repeat on the other side.
-
 Step 22
Now your bag is complete!