


About
great for decorating and marking party drinks
I was hoping to get this up sooner, but I haven't had time to take the pics til now...I hope this makes sense...it seems hard at first but once you get it, it's super easy.
Tags
-
 Philippe T. favorited Straw Phenix
26 Dec 09:00
Philippe T. favorited Straw Phenix
26 Dec 09:00
You Will Need
-
 Step 1
First, you want to cut the straw half way up the longest side
-
 Step 2
Set aside the piece with the bendy part. Now cut the smaller piece (without the bend) down the middle. This will give you a rectangular piece of plastic. (try to cut as straight as you can.)
-
 Step 3
I drew this out to make it a little simpler. 1.Fold the rectangular piece in half. 2.Cut an oval shape.Make sure that you don't completely cut the fold. 3.Unfold it and it should look like this.
Set this piece aside for now.
-
 Step 4
Get the side with the bend and flatten the longer side as best you can. The better the straw, the more it will cooperate. (Cheap straws don't flatten as well as the better made ones.)
-
 Step 5
Cut up the flattened side so that you end up with one thinner and one wider piece. (Don't cut straight up the middle)
-
 Step 6
Unfold the wider piece and cut up the fold all the way to the bend. (do not cut the bend.)
-
 Step 7
You should have a piece that looks like this.
-
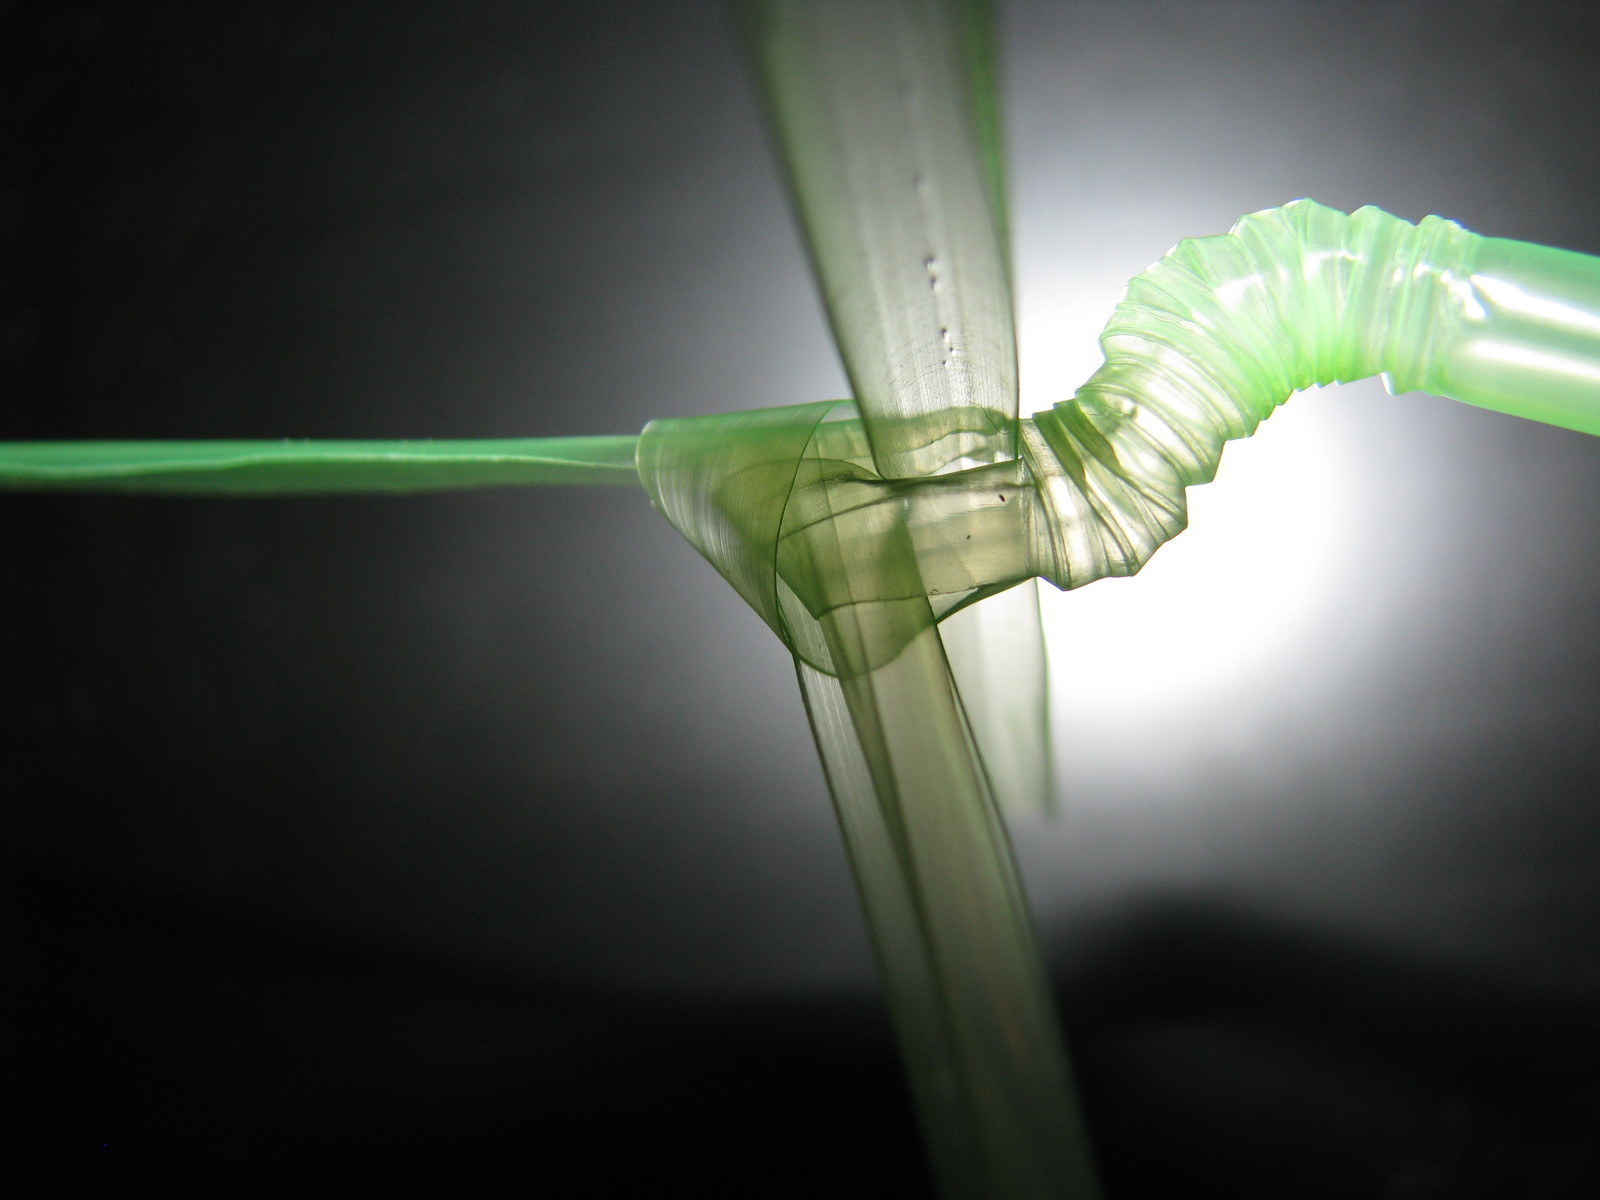
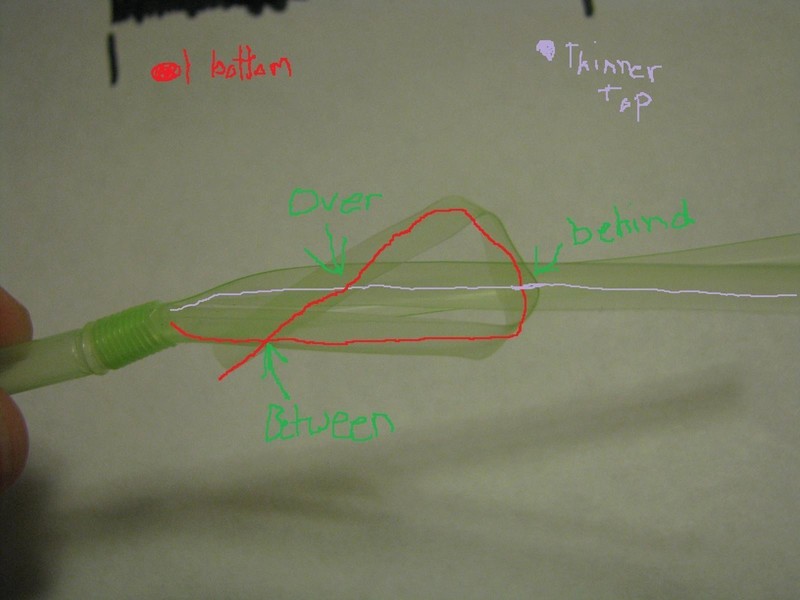
 Step 8
Holding the thin top piece, loop one bottom piece around it in a knot.
Repeat the opposite way for the other piece.
Make sure not to tighten knots for the next step.
-
 Step 9
Take the piece we set aside and slide it in between the bend and the knots.
-
 Step 10
Tighten knots to secure it.
-
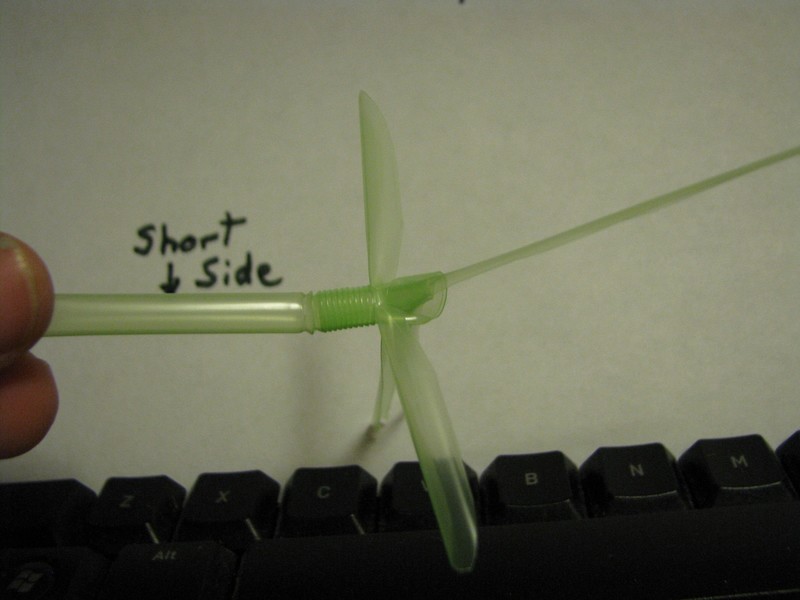
 Step 11
Shape the bend like a birds neck and cut the short end to look like a beak.
-
 Step 12
Cut slits in the wing for a feathery effect.
Optional: cut a thin triangle out of the tip of the tail for more effect.
-
 Step 13
Done!
Leave the legs long to slip it on the side of a cup. Make some out of many different colors to mark cups at a party or to just add decoration where ever you may want to put them.
Feel free to ask me any questions if you get stuck.


I've been waiting for a "how to" on this project since you first posted it.