About
Steampunk Earrings from White Out Tape gears
At my work, we have the knock-off version of white out tape. The stuff breaks constantly and there really isn't a way to fix them. After one incident where we had to throw out three at once, I realized that the little gears in them would be perfect for earrings!
YOU WILL NEED:
2-4 Gears (I got mine from the guts of white out tape)
Sanding block/paper
Hot Glue Gun
Paint brushes
Rub N Buff in your chosen colors
Earring hooks/studs
Sealant (Optional)
Tags
-
 Heather H. favorited Steam Punk Earings
26 May 00:49
Heather H. favorited Steam Punk Earings
26 May 00:49
-
 Kristina S. added Steam Punk Earings to Jewelry
21 Feb 02:11
Kristina S. added Steam Punk Earings to Jewelry
21 Feb 02:11
-
 MagicalCathyForever favorited Steam Punk Earings
23 Oct 02:42
MagicalCathyForever favorited Steam Punk Earings
23 Oct 02:42
-
Shantelle t. added Steam Punk Earings to something i'd like to try
02 Oct 00:19
-
 AlwaysForeverDreamer favorited Steam Punk Earings
02 Jul 02:25
AlwaysForeverDreamer favorited Steam Punk Earings
02 Jul 02:25
-
 Grimgirl101 favorited Steam Punk Earings
20 Jun 23:50
Grimgirl101 favorited Steam Punk Earings
20 Jun 23:50
-
 Sissi favorited Steam Punk Earings
31 May 20:05
Sissi favorited Steam Punk Earings
31 May 20:05
-
 Kenny the kitty favorited Steam Punk Earings
23 Mar 01:52
Kenny the kitty favorited Steam Punk Earings
23 Mar 01:52
-
 Kerri S. favorited Steam Punk Earings
02 Mar 03:10
Kerri S. favorited Steam Punk Earings
02 Mar 03:10
-
 Hikikomori H. favorited Steam Punk Earings
08 Oct 08:05
Hikikomori H. favorited Steam Punk Earings
08 Oct 08:05
You Will Need
-
 Step 1
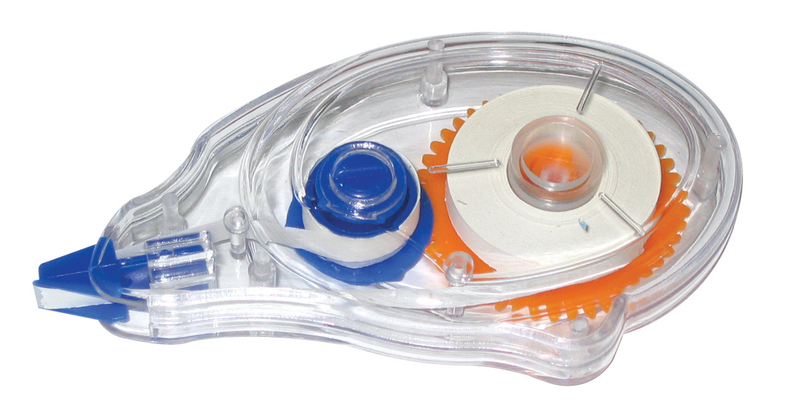
Obtain white out tape dispenser or something similar.
-
 Step 2
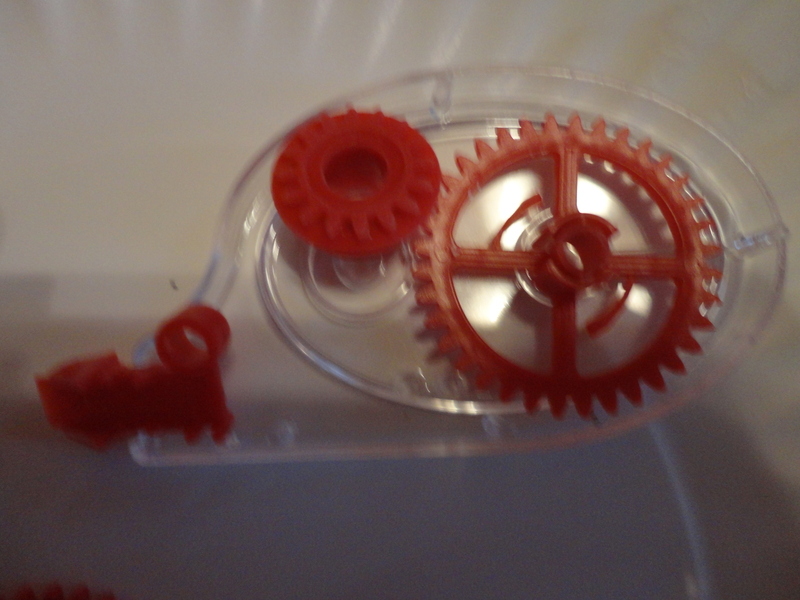
Remove front cover (it should just snap off) and gut it - you only need to two 'gear' parts
-
 Step 3
Get a paper plate or something to lay them on - this is going to be messy!
-
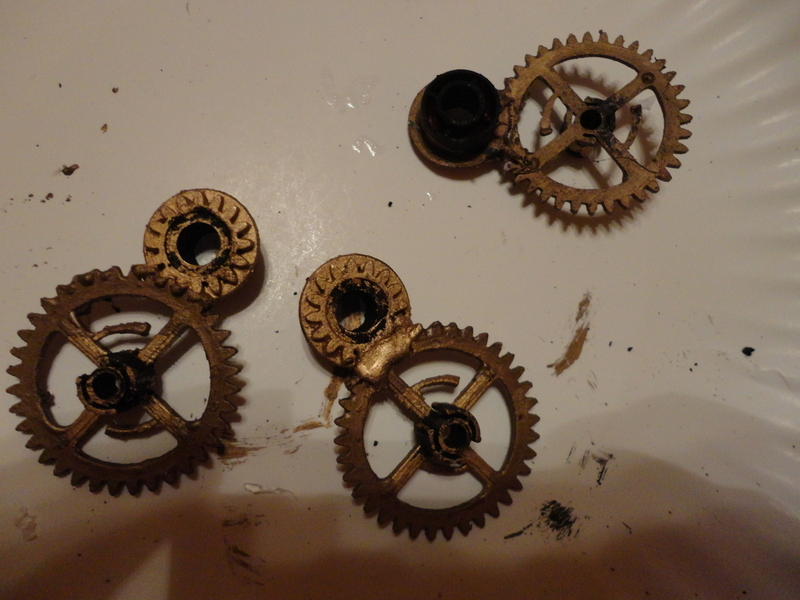
 Step 4
Sand them down to remove glossy finish. Shown is a sanding block I purchased from the dollar store, which worked perfect and doesn't leave grit like sand paper.
-
 Step 5
Glue the sanded down pieces together with a hot glue gun-SUPER GLUE DOESN'T WORK!
Remember they're suppose to be earrings - you can get creative with the placement, but I wouldn't get too crazy!
-
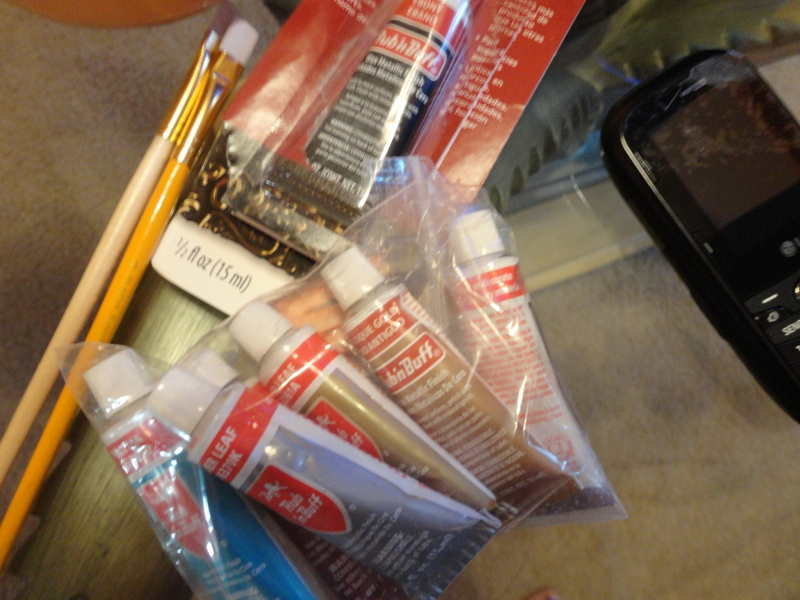
 Step 6
Coloring them: I used 2 small paint brushes and bought a sample pack of 'rube n buff' from amazon - the most expensive part of this project.
-
 Step 7
Paint using the rub n buff - the stuff sticks to porous surfaces so be careful. It will get all over you hands. Also, the more you 'buff' the more shiny the stuff gets.
It does have a matte finish
-
 Step 8
Wait for it to dry then hot glue the earring top to the gears. Remember that you want the earrings to face out so each arch should face away from each other (see finished project)
-
 Step 9
Let dry and you're done! You can spray with sealant, I did this later, as I found that without the sealant, the paint does rub off on your skin! It doesn't stain, but you end up looking like you have a bruise, so a finish is a plus!