


About
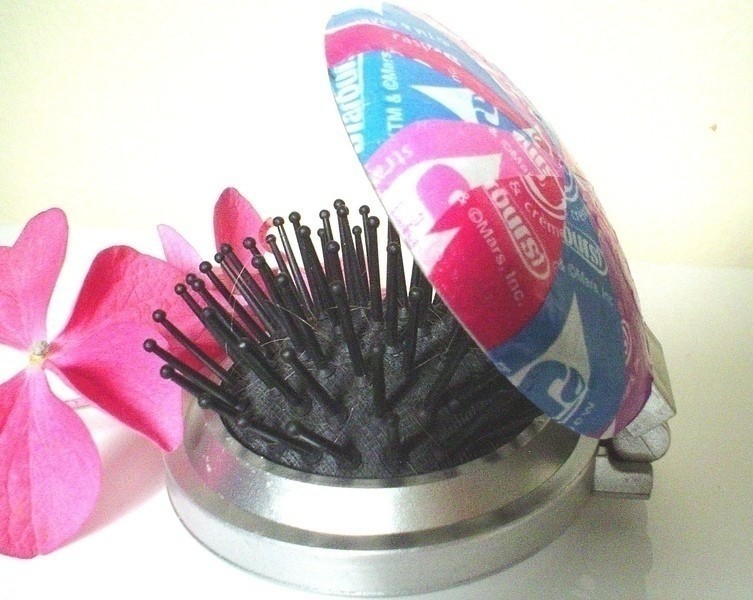
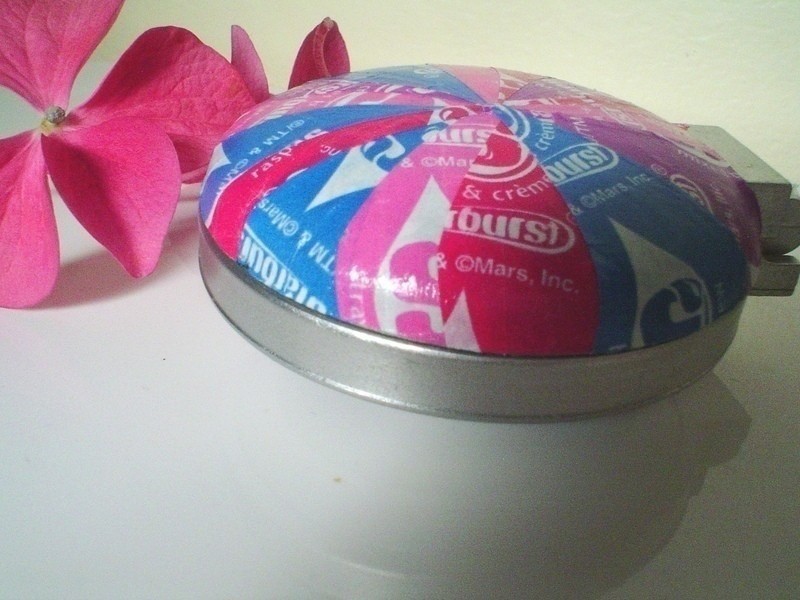
Cute, colorful hairbrush compact!
I have tons of wrappers from one of those huge bags of berries'n'creme Starbursts, and I didn't want to make another Starburst wrapper bracelet because I always break them. So....I started thinking of other things to do with them...like this compact.
:)
-
 Faith I. favorited Starbursting Compact
10 Aug 09:59
Faith I. favorited Starbursting Compact
10 Aug 09:59
-
 kathleen c. favorited Starbursting Compact
21 Aug 18:54
kathleen c. favorited Starbursting Compact
21 Aug 18:54
-
 Step 1
Gather up materials....You don't need as many wrappers as are in the picture, about 12-15 should be fine.
I used gloss-lustre finish Mod Podge. -
 Step 2
Use the permanent marker to make a dot where you want the center of your swirl of wrappers to be. I chose to set mine slightly off-center.
-
 Step 3
Line up the edge of the first wrapper with your center mark (white side up), then fold the other edge around the compact.
-
 Step 4
Mark where the edge of the compact lid is.
-
 Step 5
Cut out a semi-curved (or squiggly), tapered section of the wrapper, using the mark you made in step four as a guideline for the wide side.
-
 Step 6
Use a cotton swab to coat the white side of the wrapper in a thin layer of Mod Podge. (If there is too much Mod Podge, the wrapper will be slippery and hard to keep in place).
If the section of wrapper is wide like the one in the picture, you may need to cut a small slit in the wide side. This allows you to overlap the the bottom of the wrapper so that it doesn't buckle from the curve of the compact. -
 Step 7
Smooth out the wrapper with you fingers or another cotton swab. If the wrapper overlaps the edge of the compact lid you can trim it or tuck it under the compact lid and smooth with a little more Mod Podge. (I like to trim as I go).
-
 Step 8
Continue steps 4-7 with the rest of the wrappers. I just started adding sections randomly, but it would probably be easier to go around in one direction, starting with the first wrapper and then doing the one next to it, etc.
-
 Step 9
When you're satisfied with your wrapper design, use a cotton swab to smooth over the whole lid with one last (thin) coat of Mod Podge.
Let it dry, it doesn't take long, and you're done :)


Versions

Comments


