

About
"Tea, Earl Grey, hot."- Picard
Engage!
Tags
-
 Lisa B. favorited Star Trek Mug Rug
22 Jun 05:54
Lisa B. favorited Star Trek Mug Rug
22 Jun 05:54
-
 Roughwaters44 favorited Star Trek Mug Rug
06 Jul 08:53
Roughwaters44 favorited Star Trek Mug Rug
06 Jul 08:53
-
 Elizabeth P. favorited Star Trek Mug Rug
23 Mar 00:36
Elizabeth P. favorited Star Trek Mug Rug
23 Mar 00:36
-
Callie B. favorited Star Trek Mug Rug
14 Dec 15:07
-
 hello kitty * kitty chan* favorited Star Trek Mug Rug
13 Oct 03:28
hello kitty * kitty chan* favorited Star Trek Mug Rug
13 Oct 03:28
-
 Step 1
Gather your supplies.
You'll need two pieces of fabric for your rug that are approx. the same size. A piece for your pocket and some fusable interfacing.
-
 Step 2
Start by pressing your fabric and pressing down all your sides to your pocket.
-
 Step 3
Also press your fusable interfacing onto one of your pieces for your rug.
-
 Step 4
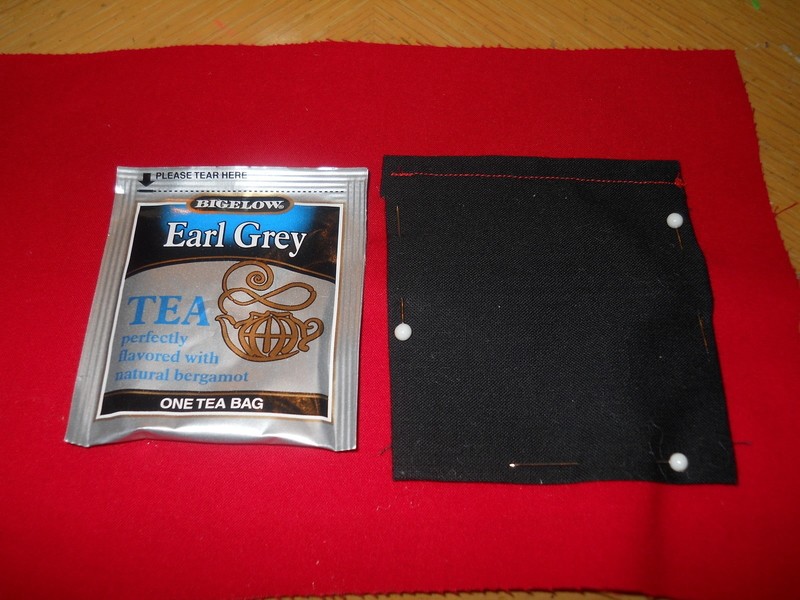
Top stitch the top of your pocket.
- Do yourself a favor and make sure your pocket is big enough to fit a package of Earl Grey first. I ended up re-making my pocket because I didn't the first time.
-
 Step 5
Once your pocket is the right size, pin and sew it down to one side of your rug.
-
 Step 6
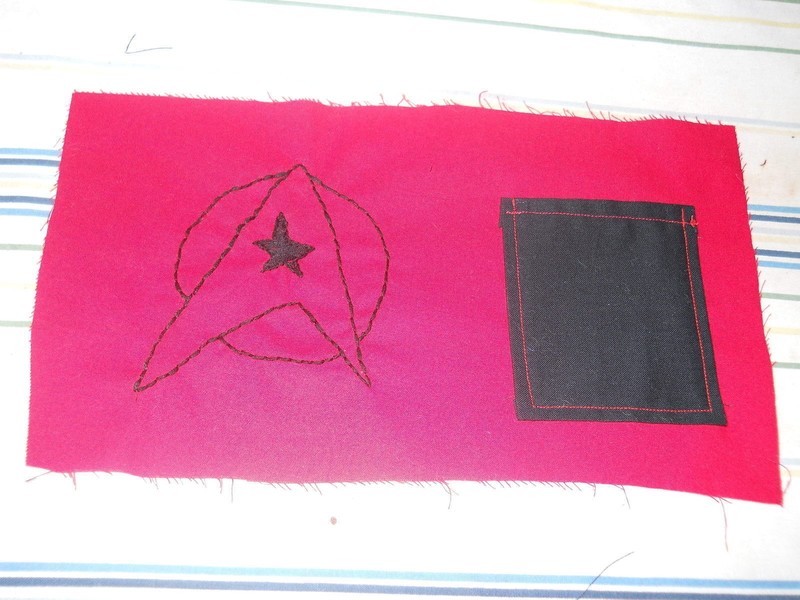
Ta-Da!
-
 Step 7
Next pull out your embroidery floss and use the back stitch and the satin stitch to embroider your emblem on to the opposite side of your rug.
-
 Step 8
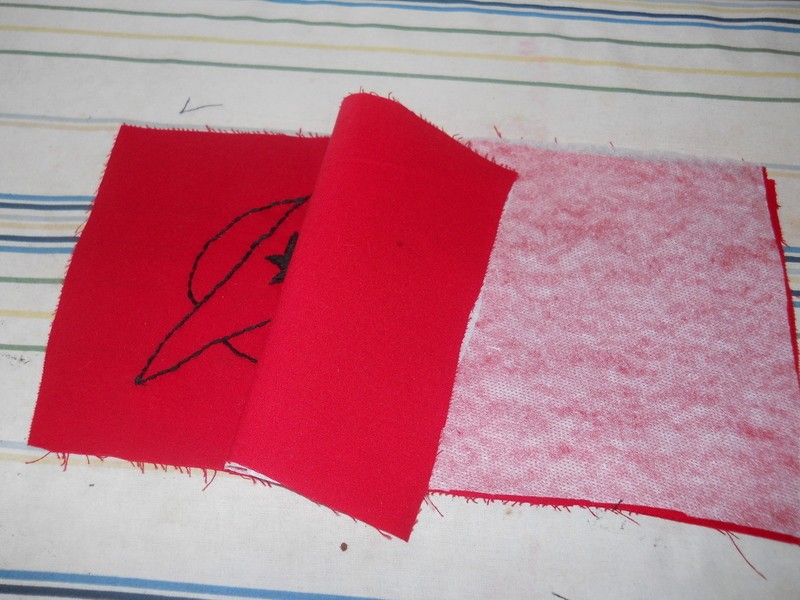
Next place the two sides of your rug right sides together and sew around leaving a 3 inch opening to turn right-side out later.
-
 Step 9
Trim your corners and turn right side out. Press flat and top stitch all the way around.
-
 Step 10
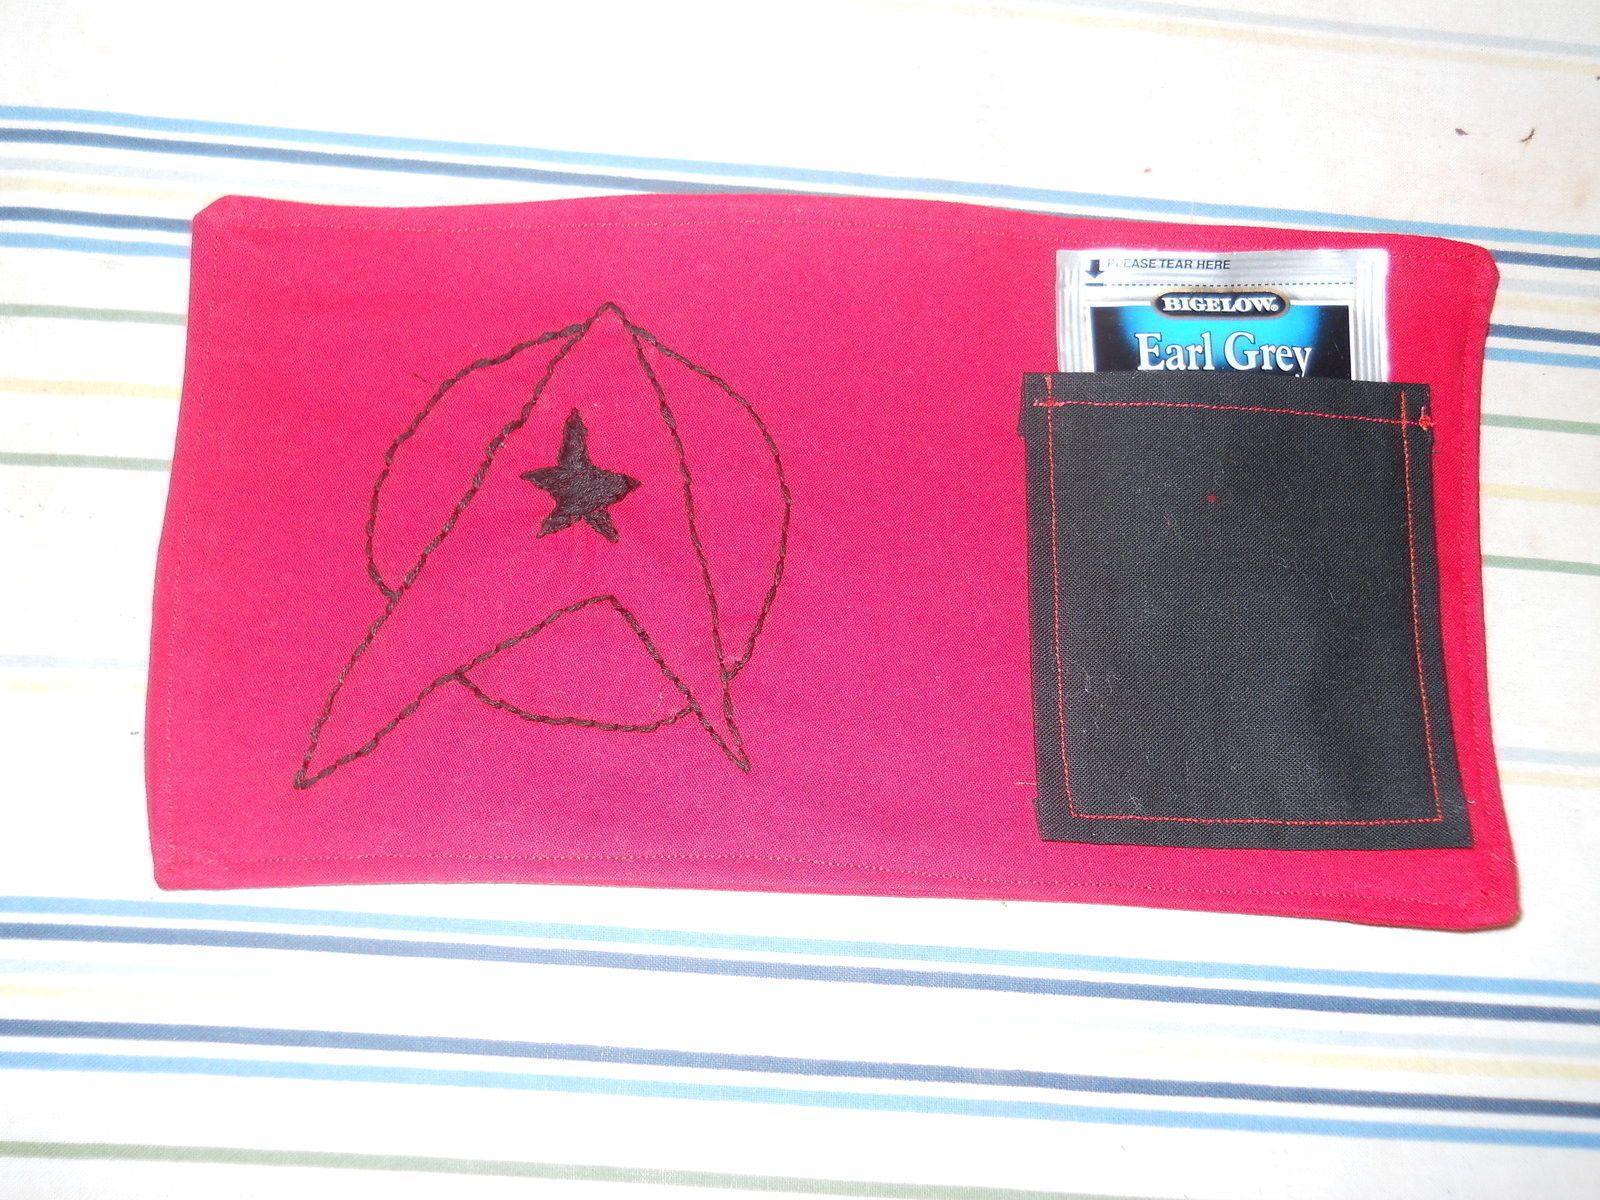
And you're done!