

About
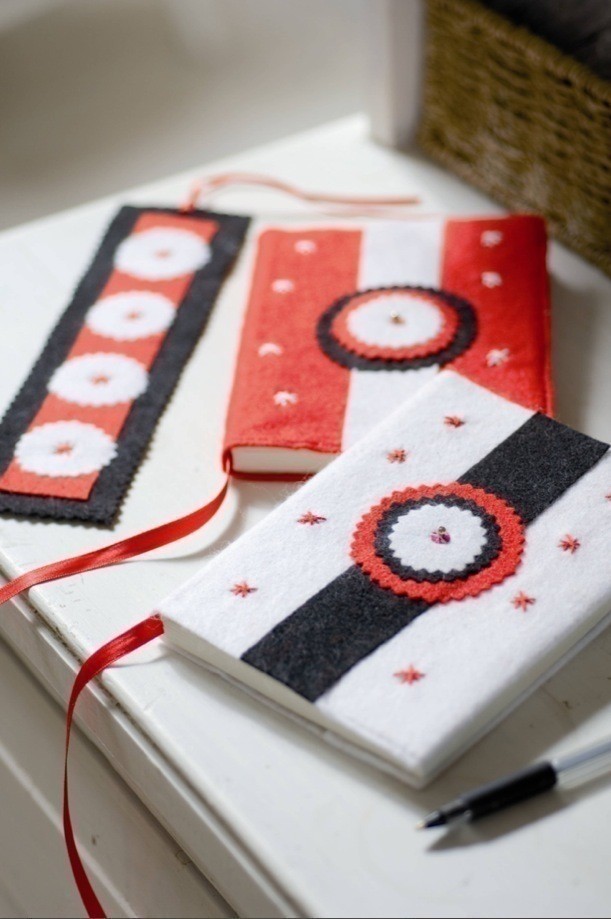
This handsome little jacket will bring a touch of distinction to any notebook.
The decorative felt rosette and band are easily constructed and attached with fusible webbing, while embroidered stars, a single sequin and bead detailing add a fun finishing touch.
From the book How To Sew. Read our review here.
-
 Anna L. favorited Star Notebook Cover
11 Nov 00:51
Anna L. favorited Star Notebook Cover
11 Nov 00:51
-
 Step 1
Open out the notebook you want to make the cover for and place it cover-side up on your work surface. Measure the height and length of the book and add 8cm (3¼in) to the length. Using a set square and a fade-away marker, measure and mark out a rectangle of those dimensions on the white felt.
-
Step 2
Using a hot iron, press the Bondaweb on to some white and red felt and the square of black felt. Using a compass, draw a 6cm (2½in), a 5cm (2in) and a 3.5cm (1½in) diameter circle on to paper to make templates.
-
 Step 3
Pin the smallest circle to the white felt and cut out with pinking shears. Use the middle-sized template to cut a black felt circle and the largest template to cut a red felt circle. Cut a 3cm (1¼in) strip of black felt the same length as the height of the white felt cover.
-
Step 4
Peel away the backing paper from the Bondaweb on the reverse of the black felt strip and iron it on to the front cover of the jacket, making sure that it is central – there is an extra 4cm (15⁄8in) fold-over allowance on the right-hand edge, so you need to take this into account.
-
 Step 5
Arrange the three circles for the rosette and iron them in place, making sure that they are sitting centrally on the black strip.
-
Step 6
Using the fade-away marker, draw a series of dots on either side of the central motif, keeping them evenly spaced. Thread a needle with three strands of red embroidery cotton (floss) and work neat little star stitches over each of the marks.
-
 Step 7
Thread a needle with a double length of white thread and knot the end. Sew a red sequin topped with a gold bead in the centre of the rosette and then knot the thread on the back to finish.
-
 Step 8
Fold 4cm (15⁄8in) to the inside of the back of the cover and pin the top and bottom edges together; machine stitch in place. Repeat for the front of the cover.


