


About
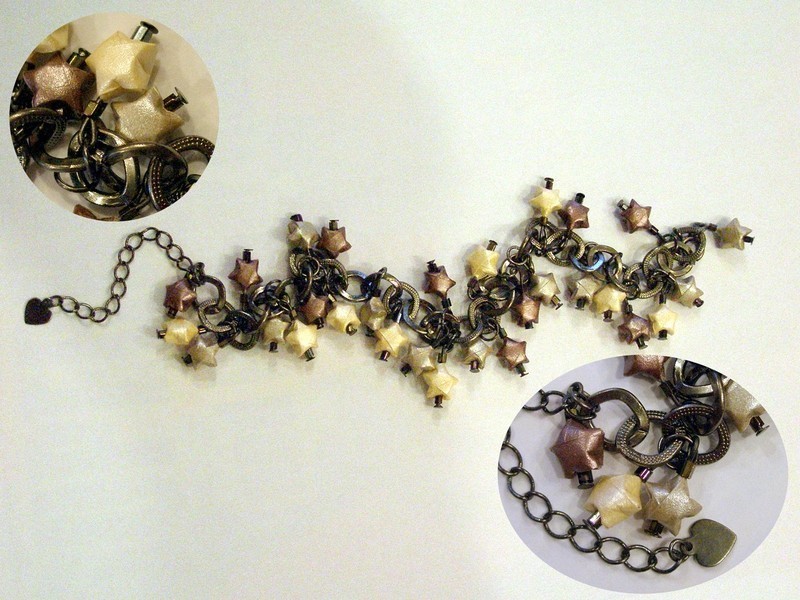
Dinky and delicate!
I've made sooo many versions of this bracelet! (maybe because people keep asking me to make them as gifts, so have sold a few)
The most time consuming part is folding the stars. But once these are done it's just like putting together an easy bracelet
The folding technique for the stars is available below
-
 Key West Witch favorited Star Charm Bracelet
21 Aug 08:25
Key West Witch favorited Star Charm Bracelet
21 Aug 08:25
-
 Diane H. favorited Star Charm Bracelet
27 Jan 22:16
Diane H. favorited Star Charm Bracelet
27 Jan 22:16
-
 Heather S. favorited Star Charm Bracelet
06 Nov 23:44
Heather S. favorited Star Charm Bracelet
06 Nov 23:44
-
 Kinhime Dragon favorited Star Charm Bracelet
02 Aug 00:29
Kinhime Dragon favorited Star Charm Bracelet
02 Aug 00:29
-
 Leeni S. favorited Star Charm Bracelet
25 Jan 06:50
Leeni S. favorited Star Charm Bracelet
25 Jan 06:50
-
Kinhime Dragon added Star Charm Bracelet to things to make
10 Jan 23:40
-
Kinhime Dragon commented on Star Charm Bracelet
10 Jan 23:40
-
 Dona Monstra favorited Star Charm Bracelet
01 Jul 03:59
Dona Monstra favorited Star Charm Bracelet
01 Jul 03:59
-
 jaclyn.jk favorited Star Charm Bracelet
20 Jun 19:15
jaclyn.jk favorited Star Charm Bracelet
20 Jun 19:15
- Abnormal Abby added Star Charm Bracelet to Jewellry 10 Jun 22:10
-
 Step 1
First - fold your stars! You can buy pre cut "lucky star" paper strips. Mine are cut from Japanese note paper. They are roughly 5 mm wide and 16 cm long.
It might be easier to learn to fold them on bigger strips first
Use a good quality paper - newspaper is too flimpy. Notepaper or origami paper is ideal -
 Step 2
The pattern on the paper should be on the outside. Tie a knot in the paper...as close to the end as possible
-
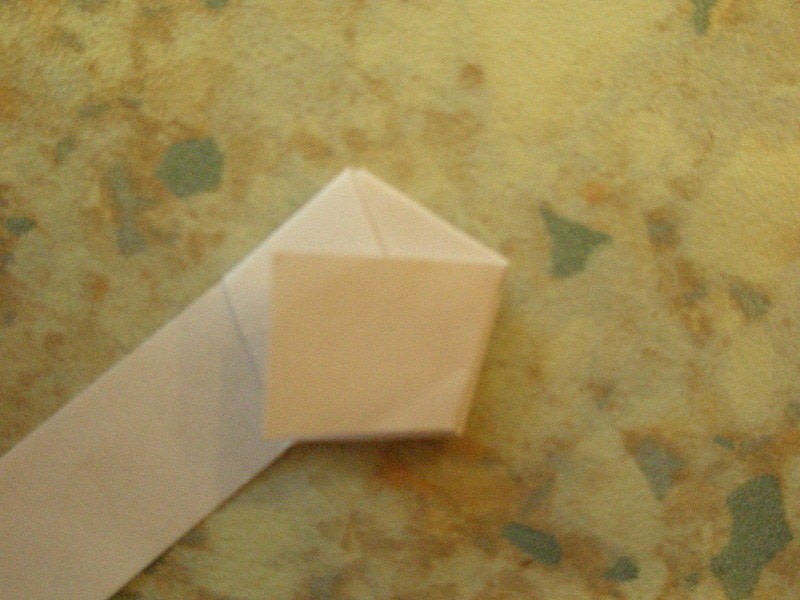
 Step 3
Pull the knot and flatten it out. This should create a pentagon with equal sides.
-
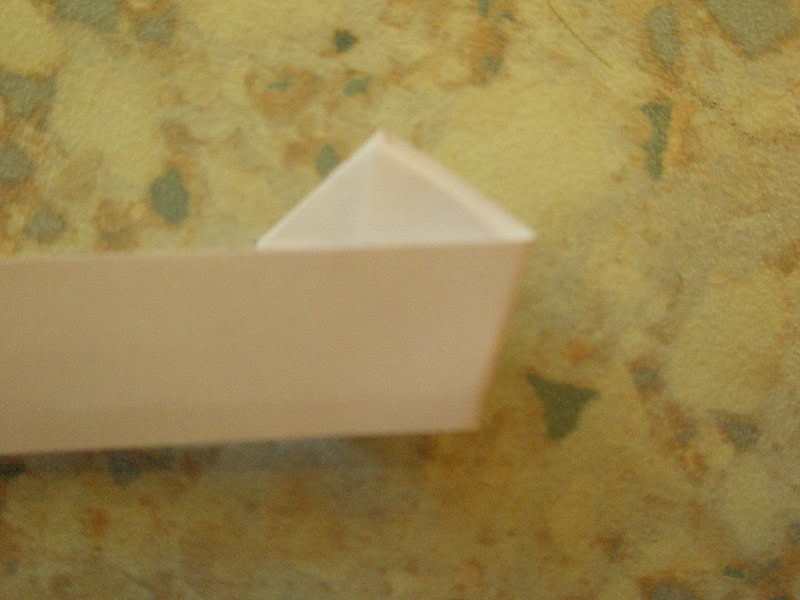
 Step 4
Fold the shortest end in
-
 Step 5
The paper is then folded and the star turned till all the paper is folded in. Please look at the website I referenced as it explains it far better than I can!
-
 Step 6
Use fingertips to squidge in the sides of the penatgon to form the points of the star
-
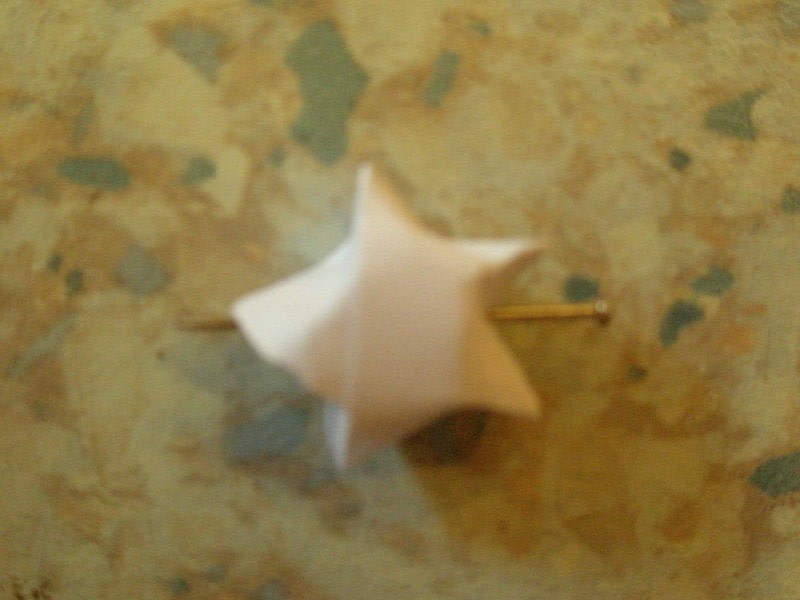
 Step 7
Once your star is complete use a pin to create a hole THROUGH the star. I start between two points and poke out the otherside through the opposite point. Use a thick needle or kilt pin to get a decent sized hole
-
Step 8
Now you can use these stars as beads! They do need spraying with an enamel or acrylic spray to toughen them up. I usually give them two coats with 12 hours drying time between coats. (I use Plasticote clear finishing spray)
The easiest way to spray them is to wait till your jewellery item is finished then spray the whole thing -
Step 9
Pick a length chain that fits/feels comfortable on your wrist and cut with pliers or cutters. Attach the clasp. I like to add an extension chain because they look pretty on charm braclets and can be useful if you're giving as a gift
-
 Step 10
To make the star a usable bead - put onto a headpin. I like to sandwich them between two seed beads because it makes it easier to put a loop on the end of the headpin without crushing the star. Now you have a cute handmade charm!
-
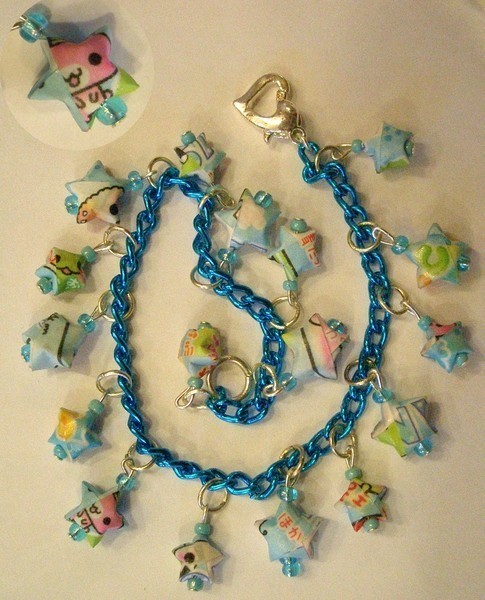
 Step 11
Now simply assemble your bracelet. You could stick to stars or use other beads/charms too, depending on how chunky you want your bracelet! Use jump rings to attach the charms to the chain - I always count the links in my bracelet and use this to work out how many charms I will need
-
 Step 12
Hope this project makes sense! (it's my first one)


Versions

Comments


