


About
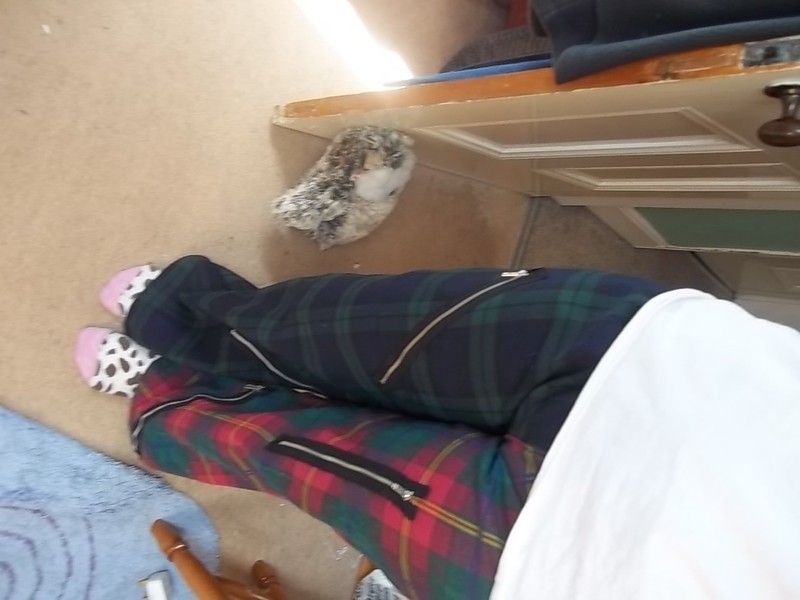
Split leg tartan trousers.
I don't have pictures of the steps because I started making them months ago and have only just finished them, but I hope it all makes sense, if you have any questions just ask and I apologise for how rubbish my diagrams are. The timing was just a guess because like I said I've been working on them on and off for months.
(Clicking on the diagrams will make them bigger if you can't see the detail.)
-
 Ievars favorited Split Leg Tartan Trousers.
16 Oct 18:27
Ievars favorited Split Leg Tartan Trousers.
16 Oct 18:27
-
 Tierra T. favorited Split Leg Tartan Trousers.
26 Oct 17:19
Tierra T. favorited Split Leg Tartan Trousers.
26 Oct 17:19
-
 Laouen favorited Split Leg Tartan Trousers.
09 Dec 20:56
Laouen favorited Split Leg Tartan Trousers.
09 Dec 20:56
-
 Eleanor entered her project Split Leg Tartan Trousers. to Secret Santa
09 Dec 19:13
Eleanor entered her project Split Leg Tartan Trousers. to Secret Santa
09 Dec 19:13
-
 leah.moss.526 added Split Leg Tartan Trousers. to Things I want to do
21 Jul 01:43
leah.moss.526 added Split Leg Tartan Trousers. to Things I want to do
21 Jul 01:43
-
leah.moss.526 favorited Split Leg Tartan Trousers.
21 Jul 01:43
-
 Lee Rose favorited Split Leg Tartan Trousers.
24 Apr 23:57
Lee Rose favorited Split Leg Tartan Trousers.
24 Apr 23:57
-
Eleanor entered her project Split Leg Tartan Trousers. to SINGER Dress Form Contest
07 Apr 20:41
-
 Evelyn C. favorited Split Leg Tartan Trousers.
16 Feb 04:53
Evelyn C. favorited Split Leg Tartan Trousers.
16 Feb 04:53
-
Jessica D. added Split Leg Tartan Trousers. to Bottom
04 Jan 06:28
-
 Step 1
Take one of your materials, and spread it out, then take a pair of trousers that already fit well, in the style you want to make, and trace the outline.
-
 Step 2
Then cut out the pieces leaving a couple of inches of seam allowence.
-
 Step 3
Repeat steps 1 and 2, for the opposite leg using a different fabric.
-
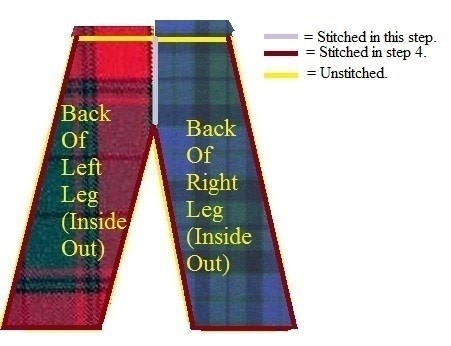
 Step 4
Then stitch the sides of each leg together, leaving the croth open. And hem the bottom. Stitch the parts with a brown line in the diagram, leave the poarts with a yellow line.
-
 Step 5
Turn the legs inside out, and have the backs facing upwards. Stitch the crotch together at the back, but leave it at the front.
-
 Step 6
Then put in a zip at the front of the crotch and sew up the gap between the zip and the stiches you did in step 5.
-
 Step 7
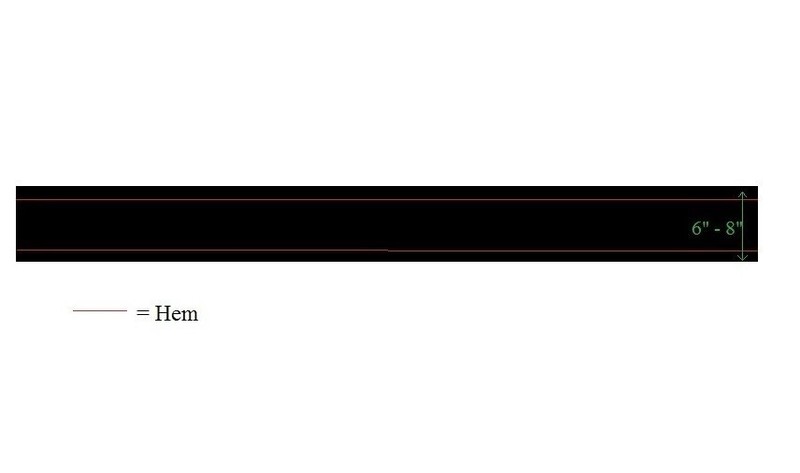
Take a strip of material long enough to fit around your waist comfortably, about 6"-8" in width. Then hem the edges of it.
-
 Step 8
Then hem the top of the trousers.
-
 Step 9
Then fold the strip of material in half and sew it over the top of the trousers (so you can see about 3" on each side).
-
 Step 10
Then make two button holes and attach two buttons as fastenings.
-
Step 11
All the essentials are now done, and the next few steps are mostly decorative. I then stitched on a few zips randomly.
-
 Step 12
I then added some belt loops. Which I made by taking small rectangles of fabric, (about 2.5" by about 6") and folding the edges into the middle, and then folding it in half and stitching along the edge. Then folding over the top and bottom and stitching them onto the waistband.
-
 Step 13
I then added a couple of back pockets.
-
 Step 14
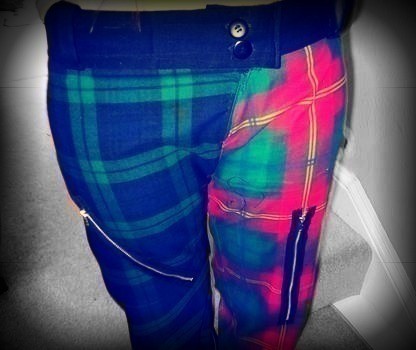
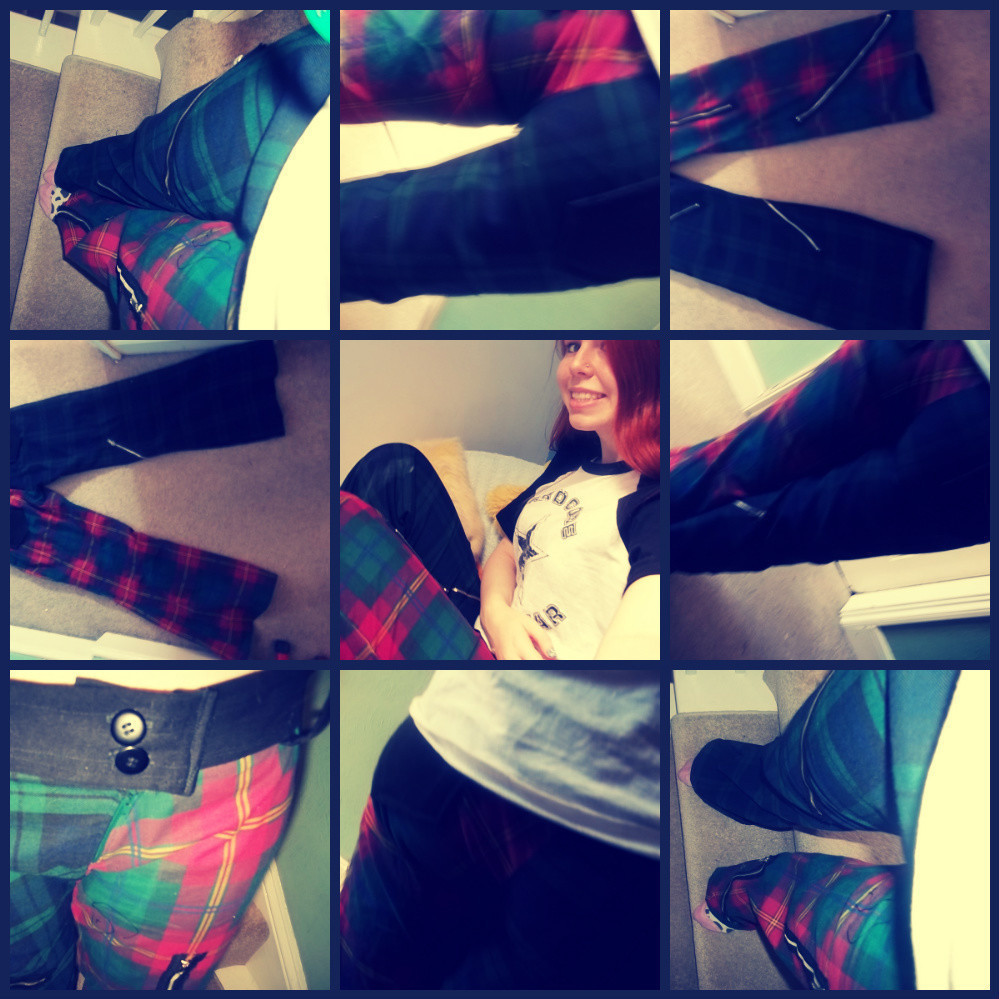
And this was the finished result.


CO + K User
Do you remember where you got your fabric? :o