


About
A sparkle ball valentine
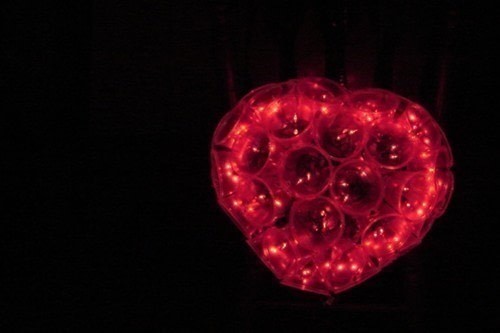
Mastered sparkleballs? Here's a new twist. It's a heart-shaped sparkleball (approx 14 x 11 inches) perfect for surprising your sweet on St Val's Day!
Tags
-
 Craft_manic 2016 favorited Sparkleheart
21 Aug 21:50
Craft_manic 2016 favorited Sparkleheart
21 Aug 21:50
-
Step 1
Before you begin, look over the steps and photo tutorial for a sparkleball. The materials and method are much the same.
With a hot soldering iron, poke a 1/2" hole in the bottom of all 50 cups. Divide cups into two groups of 25.
-
 Step 2
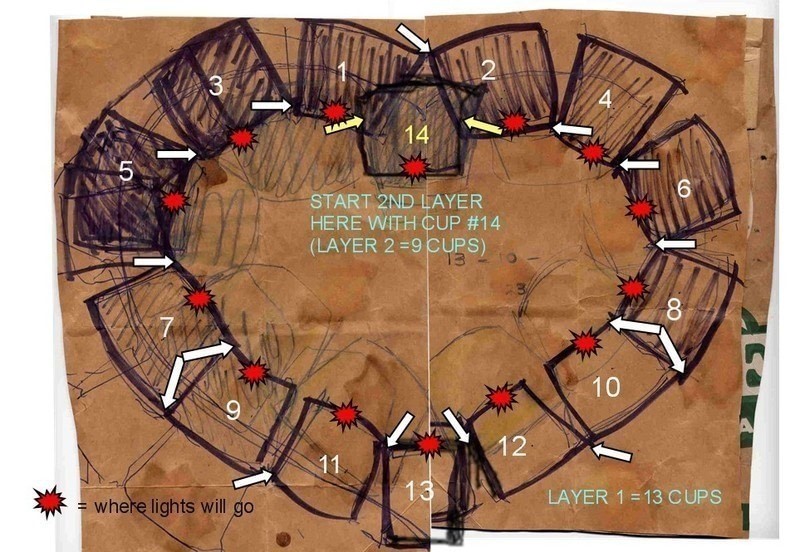
Arrange 13 cups in a circle. How these cups are joined together will turn them into a heart-shape, so the next steps are crucial.
At left is a diagram I made of the first layer, with arrows showing where cups will be joined. The red dots are where lights will go. To see a larger diagram, go to my sparkleball website. (Google sparkleball.)Be patient and let each solder joint cool completely before moving on.
Join the 2 top cups, #1 and #2 at top rims only. This forms the top of the heart. Join the next 6 cups-- adding 3 on each side-- at cup bottoms only.
-
 Step 3
Cups #9 and #10 are different. They're joined top and bottom to #7 and #8. Join #11 and #12 at tops only. The final cup, #13, is the heart's point. It's joined at its bottom to #11 and #12.
-
 Step 4
The first layer should now resemble a heart. The joints must be strong enough to keep the shape as you add the 2nd layer.
The 2nd layer has 9 cups. Add #14 at the top, first. Nestle it into the space between #1 and #2. It may almost point upward. This forms the heart's center dip. Now place the other 8 cups around the 1st layer, continuing the heart shape. These 9 cups probably won't touch each other but will attach to the layer below.
-
Step 5
Fit the last 3 cups into the open space before you solder them. When you're happy with the fit, then join them in. It should now look like a fat, smashed heart.
-
Step 6
Thread 50 of the red fairy lights into the this half. Each cup will have 2 lights inserted into the one hole. Start threading at Cup #13, the bottom one.
-
Step 7
Build the second half exactly like the first. NOTE that on a heart-shaped sparkleball, you must begin and finish threading lights on Half #2 exactly as you did Half #1-- at Cup #13. (This is different than a sparkleball, where it doesn't matter since it's round, all round.) You want to be able to join the heart halves perfectly, and the lights must match up.
-
Step 8
Join the two halves securely, taking great care not to burn the wires or lights.
-
 Step 9
The finished sparkleheart will be 2-dimensional (not 3 like a sparkleball) and looks best hung against something so you can really see the heart shape. It doesn't work as well if it's free-hanging.
Happy St Val's!


Comments


