


About
What you do with too much time and a lot of soda tabs.
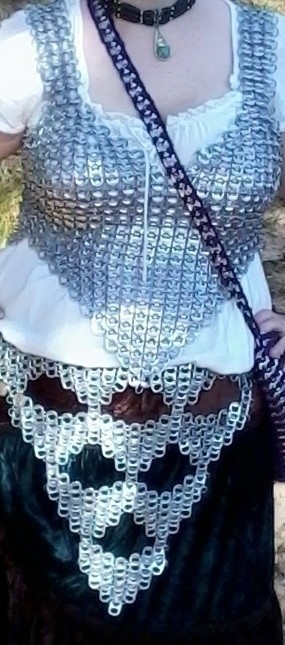
This is going to be a belly dancing top for myself. When I have the belt done and the ribbon to lace the back I will post a picture of myself wearing it.
Not exactly sure how long it took me. When I sat down and actually worked on it, a lot got done.
Hopefully my how-to is clear. And don't be afraid of the number of steps! When cinching this be sure to use something strong.
7/21/2011 Update: I do have the other part of this finished, but have yet to get pictures. Will post when I get them :)
11/26/2012 UPDATE: Almost forgot to post a pic!! Also, wore this ALL day for a festival. Crazy comfy for me.
Tags
-
 VictimOfSanity favorited Soda Tab Top
23 Aug 18:24
VictimOfSanity favorited Soda Tab Top
23 Aug 18:24
-
 Jennifer R. favorited Soda Tab Top
19 Sep 02:32
Jennifer R. favorited Soda Tab Top
19 Sep 02:32
-
 Key West Witch added Soda Tab Top to Pop Tab Everything
19 Mar 08:05
Key West Witch added Soda Tab Top to Pop Tab Everything
19 Mar 08:05
-
Key West Witch favorited Soda Tab Top
19 Mar 08:05
-
 mickeyiscrafty favorited Soda Tab Top
16 Jan 01:53
mickeyiscrafty favorited Soda Tab Top
16 Jan 01:53
-
 Chris B. favorited Soda Tab Top
21 Aug 14:34
Chris B. favorited Soda Tab Top
21 Aug 14:34
-
 Lisa C. added Soda Tab Top to Soda tabs
31 Aug 02:50
Lisa C. added Soda Tab Top to Soda tabs
31 Aug 02:50
-
 Natalia N. added Soda Tab Top to diy fashion
25 Jan 06:47
Natalia N. added Soda Tab Top to diy fashion
25 Jan 06:47
-
veronica f. favorited Soda Tab Top
20 Dec 14:00
-
 Susan K. added Soda Tab Top to To-make list
18 Apr 11:50
Susan K. added Soda Tab Top to To-make list
18 Apr 11:50
You Will Need
-
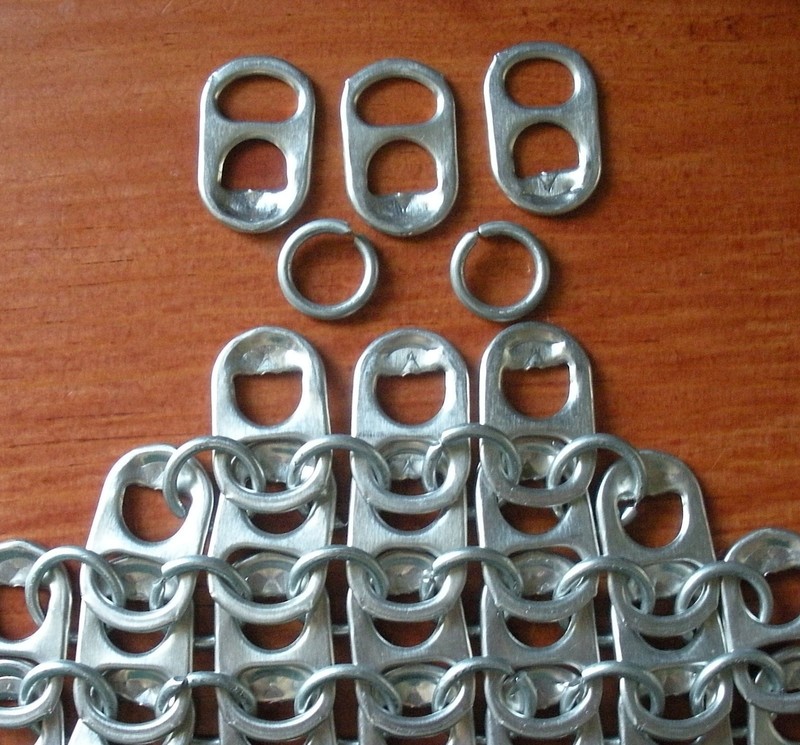
 Step 1
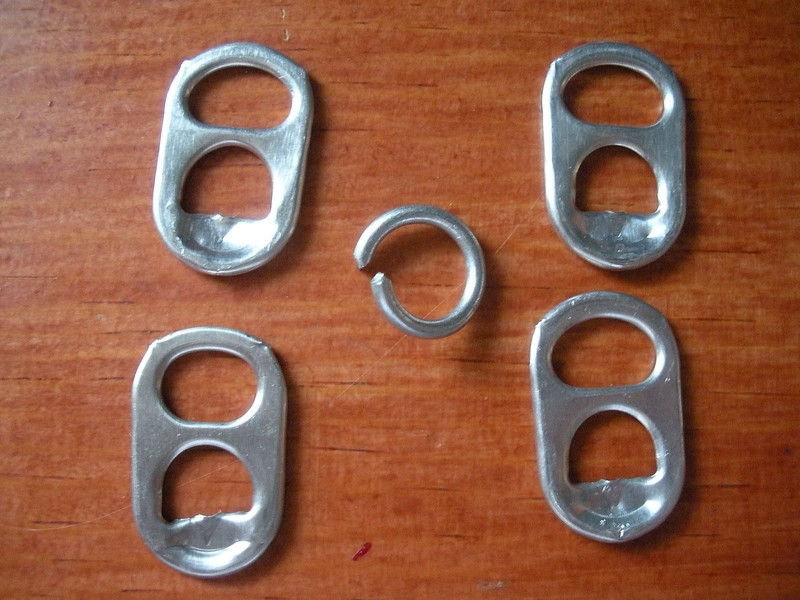
First, gather your materials together. Two pairs of pliers, lots of pop tabs, metal rings.
-
 Step 2
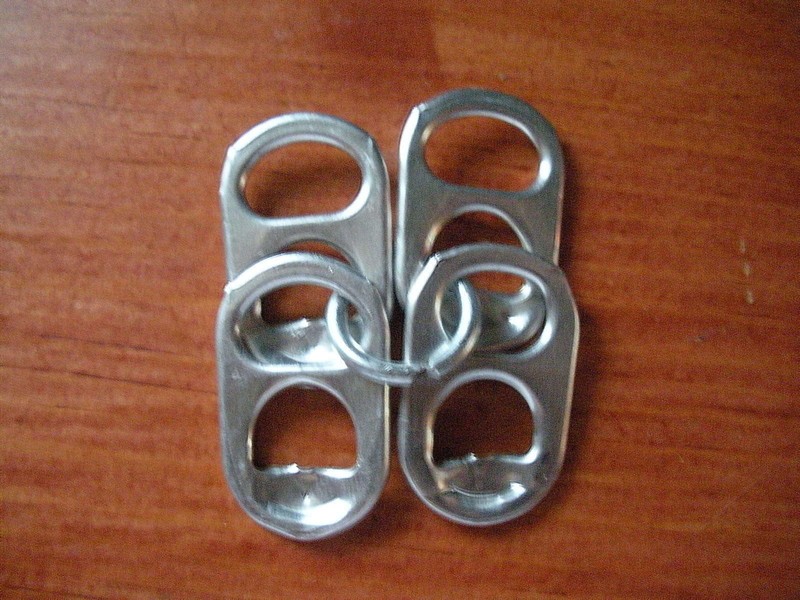
Grab 4 pop tops and one ring.
-
 Step 3
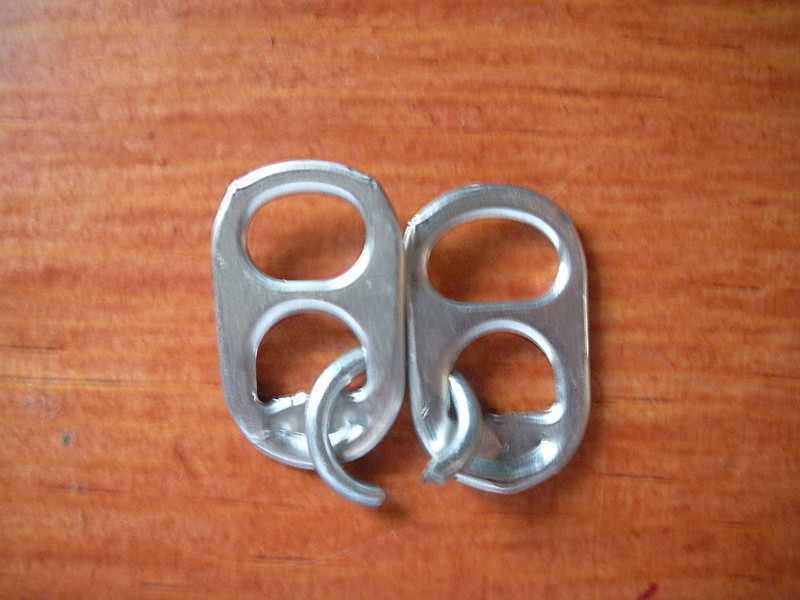
Take two of the pop tops and place the ring through them.
<~should look something like that.
Just make sure you keep them all going the same way. -
 Step 4
Take the other two tabs you had out, and place them on the ring as well.
-
 Step 5
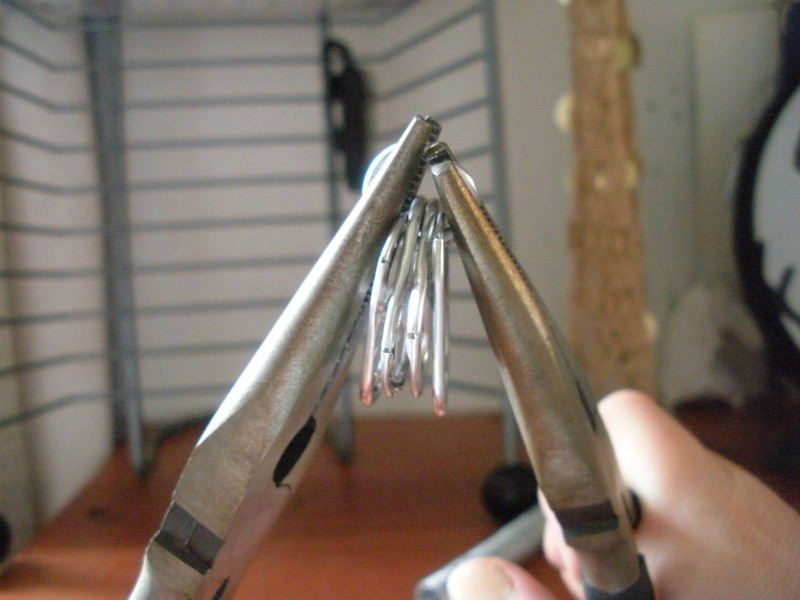
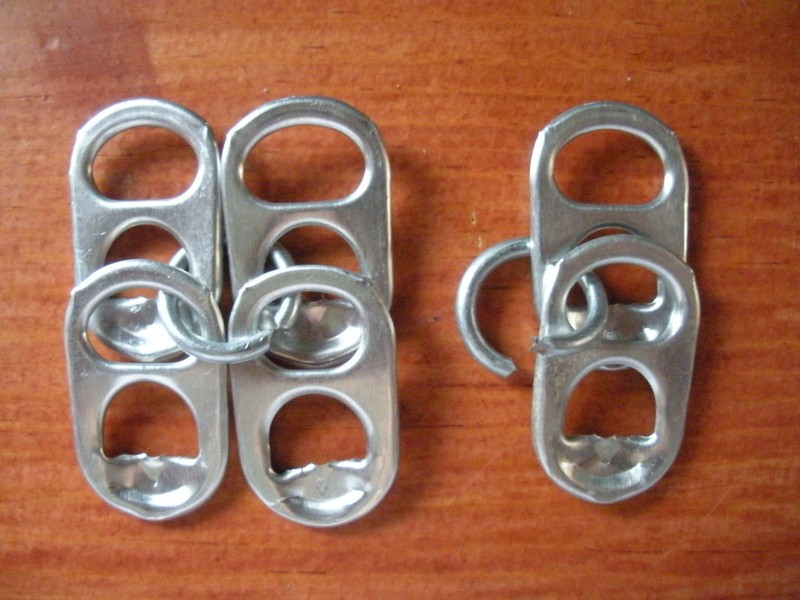
Pick up one side of the ring, taking care to not let the tabs come off, put the ring into one pair of the pliers.
-
 Step 6
Then, with the second pair, grab the other side of the ring and using a twisting motion close the ring.
-
 Step 7
Got something that resembles this? Good. Grab two more tabs and another ring.
-
 Step 8
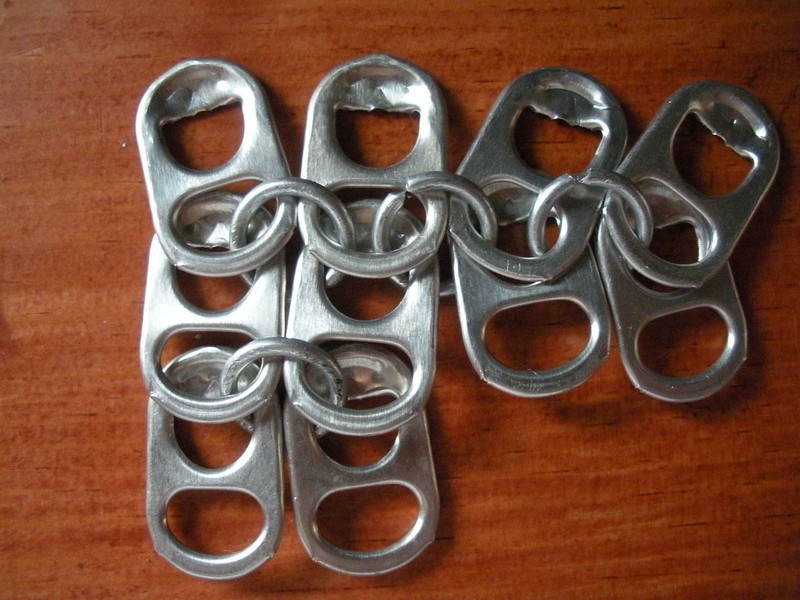
Attach them using steps 5 and 6. If you want, you can just keep attaching them in this way until you get it to the length that is required. *random info* for measurement, I just held it where I wanted the main part of the garment to start. The front where the bottom of the "V" is, the underarm and the back are all the same height. I guess you could just measure that, but where's the fun in that?
-
 Step 9
Now we'll show how to width. Grab some more tabs and rings.
-
 Step 10
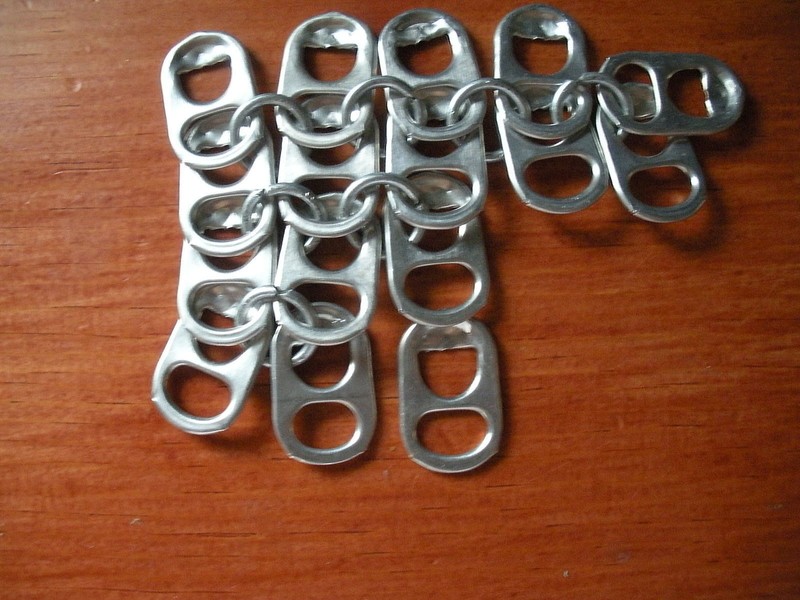
And attach! (aaand attach, and attach...)
The top I made is 11 tabs down the back and at least 50 across (I think!) for the rectangle alone. I'm 5' with 36D chest.
-
 Step 11
Now you might have something that looks like this:) YaY!!
-
 Step 12
And this! w00t! (not hard is it?)
-
 Step 13
Continue until you have your big ol' rectangle and rejoice when that part is done and over with. That part takes the longest. Make sure it goes all the way around you and you have about an inch to inch and a half to cinch up. Attach rings (no extra tabs) to the end of the rows so that you have something to put your ribbon/shoelace/leather through to cinch it.
-
 Step 14
Find the middle of the rectangle. Mark it with a bread tie or something on the top side. This next part you may need help with. I used some strings to where One breast began and ended. Put soda tabs on according to those marks.
-
 Step 15
You'll to want to have a pyramid effect so each row should have a difference of two.
The topmost part this will be the beginning of your straps. Two or three across depending on if they were odd or even going across on your pyramid. -
 Step 16
Make the strap from the the front stop just before the top of your shoulder
-
 Step 17
Do this with the other side as well.
-
 Step 18
Figure out where you want your straps to start and then build them. Make sure you put rings all along the outside of the straps or they will do wonky things.
-
 Step 19
This is how I attached the front and back parts of the straps. The tabs are placed so they are just connected on the bottom side. I hope that makes sense. Do the same with the other side.
-
 Step 20
Now for the girls that need more shaping in the bust area. This part was tricky for me. Alot of trial and error. I apologize if it isn't clear.
What you'll need to do is try it on and figure the spot(s) that need more room. Take apart along columns. -
 Step 21
I put a colored tab in so you would know kind of what you would be doing. You may have to try different places and amounts of tabs to figure out where the additions would look best on your own bust.
-
 Step 22
It's not terribly noticeable unless someone is staring at your chest.
This tutorial will just make a basic short tank top. -
 Step 23
Decorate any way you like. Colored tabs would be cool. Let me see what you make!


Thank you all for the positive comments!
Pretty much! And thanks!