


About
Get Snazzy with this simple collar to make any outfit steller!
This is a great way to snazzy up any outfit and make a plain shirt, unique.
Tags
Downloads
-
 Key West Witch added Simple Peter Pan Collar to Sewing
30 Jun 03:27
Key West Witch added Simple Peter Pan Collar to Sewing
30 Jun 03:27
-
Key West Witch added Simple Peter Pan Collar to Flowers - Real and not so...
30 Jun 03:27
-
 Zoe F. added Simple Peter Pan Collar to Alexa Chung
03 Feb 16:39
Zoe F. added Simple Peter Pan Collar to Alexa Chung
03 Feb 16:39
-
 bigrthanlasagna favorited Simple Peter Pan Collar
24 Aug 10:01
bigrthanlasagna favorited Simple Peter Pan Collar
24 Aug 10:01
-
Nichole V. favorited Simple Peter Pan Collar
01 Mar 21:03
-
 ShoujoMadness favorited Simple Peter Pan Collar
17 May 02:22
ShoujoMadness favorited Simple Peter Pan Collar
17 May 02:22
-
 Millie H. added Simple Peter Pan Collar to Make
22 Mar 21:20
Millie H. added Simple Peter Pan Collar to Make
22 Mar 21:20
-
 KelliDroze added Simple Peter Pan Collar to Accesories
08 Jan 00:30
KelliDroze added Simple Peter Pan Collar to Accesories
08 Jan 00:30
-
KelliDroze added Simple Peter Pan Collar to Accesories
08 Jan 00:30
-
KelliDroze added Simple Peter Pan Collar to Accesories
08 Jan 00:30
You Will Need
-
 Step 1
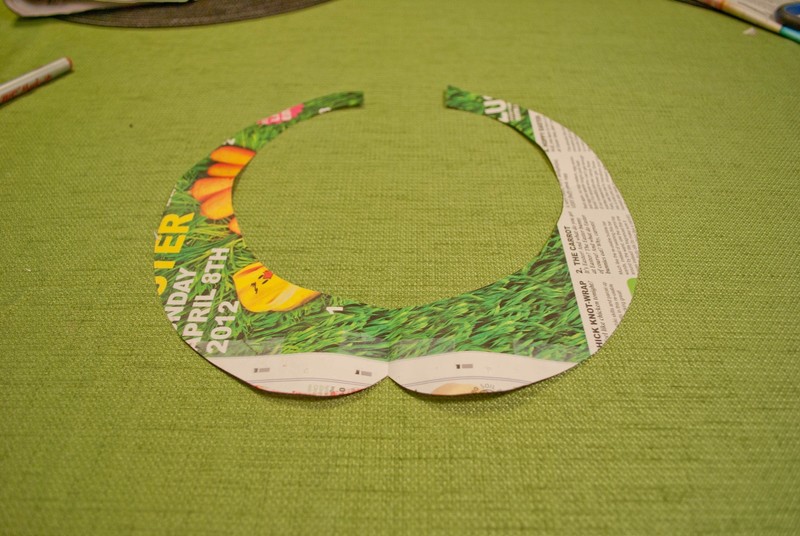
Start out by folding a piece of newspaper in half and drawing a template on the fold. This will ensure a super symmetrical pattern. If you like you can also print this picture us as your template. To do so, save the image and then when printing increase the size to be wearable!
-
 Step 2
Choose your fabric and cut out your fabric, leaving room for the seem. cut two pieces out, you will need a front and a back!
-
 Step 3
Using your fabric (not the pattern), cut out your interfacing. You want the interfacing to have seem allowance too, that is why you are using the fabric instead of the pattern piece you made. If you have fusible interfacing then iron the interface to the wrong side(back) of your fabric.
-
 Step 4
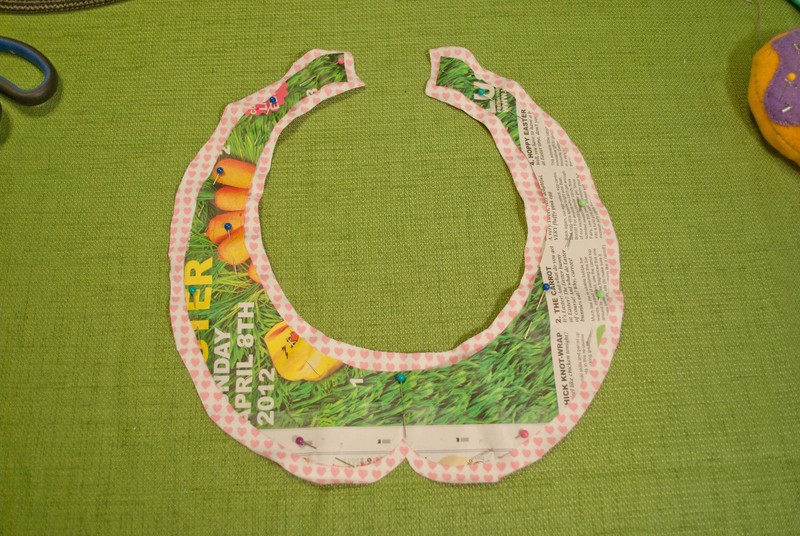
Sandwich the pieces together wrong side facing out. Your collar sandwich should go... interfacing, collar, collar, interfacing. Then pin together. As a guide I outlined the original pattern on my sandwich, this made things much easier for sewing.
-
 Step 5
It's time to sew!!! Sew all the way around your pattern, except the two ends. Also make sure that you leave a 2-3 inch gap on one side to turn right side out after sewing.
Tip: I went over the scallop point a few times, to ensure that my point was crisp and super secure.
-
 Step 6
Once you finish sewing, turn right side out. This single handedly was the longest part of the who process for me. I did not leave a large enough gap and it took forever to pull the whole thing through. Once it's right side out, you may need to iron it to flatten it out and get the wrinkles out. This is optional though.
-
 Step 7
Hand sew the gap and ends shut.
-
 Step 8
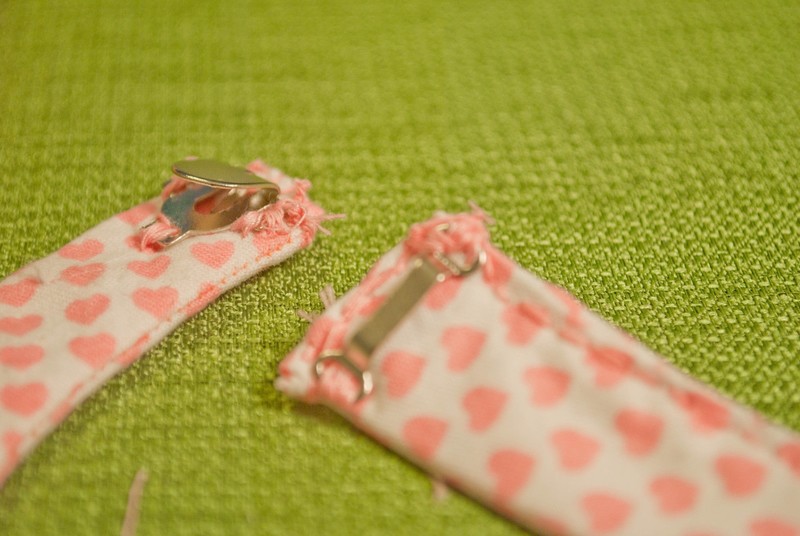
Add a hook and eye and your finished!!! I only had a pants closer, so that's what I used, but a hook and eye would be better.
Option: you can also sew a ribbon onto the ends and tie it. That would cute too!
Now rock you collar!


Comments

