About
Simple retro style chevron pattern friendship bracelet
Tags
-
 Amirah T. added Simple Chevron Friendship Bracelet to Bracelet I need to learn how to make
18 Nov 12:07
Amirah T. added Simple Chevron Friendship Bracelet to Bracelet I need to learn how to make
18 Nov 12:07
-
 Chudames favorited Simple Chevron Friendship Bracelet
05 Feb 23:41
Chudames favorited Simple Chevron Friendship Bracelet
05 Feb 23:41
-
 lagrimasDmimo favorited Simple Chevron Friendship Bracelet
04 Jul 02:17
lagrimasDmimo favorited Simple Chevron Friendship Bracelet
04 Jul 02:17
-
 Miss_Fit favorited Simple Chevron Friendship Bracelet
08 Jun 21:36
Miss_Fit favorited Simple Chevron Friendship Bracelet
08 Jun 21:36
-
 cheryl.palmquist.7 favorited Simple Chevron Friendship Bracelet
09 Oct 19:18
cheryl.palmquist.7 favorited Simple Chevron Friendship Bracelet
09 Oct 19:18
-
 Marietta S. favorited Simple Chevron Friendship Bracelet
18 Sep 01:11
Marietta S. favorited Simple Chevron Friendship Bracelet
18 Sep 01:11
-
 Millie P. favorited Simple Chevron Friendship Bracelet
20 Aug 16:32
Millie P. favorited Simple Chevron Friendship Bracelet
20 Aug 16:32
-
 alxd8296 favorited Simple Chevron Friendship Bracelet
03 Aug 09:53
alxd8296 favorited Simple Chevron Friendship Bracelet
03 Aug 09:53
-
 Amy S. favorited Simple Chevron Friendship Bracelet
29 Jun 07:53
Amy S. favorited Simple Chevron Friendship Bracelet
29 Jun 07:53
-
Julia v. favorited Simple Chevron Friendship Bracelet
21 Jun 19:24
-
 Step 1
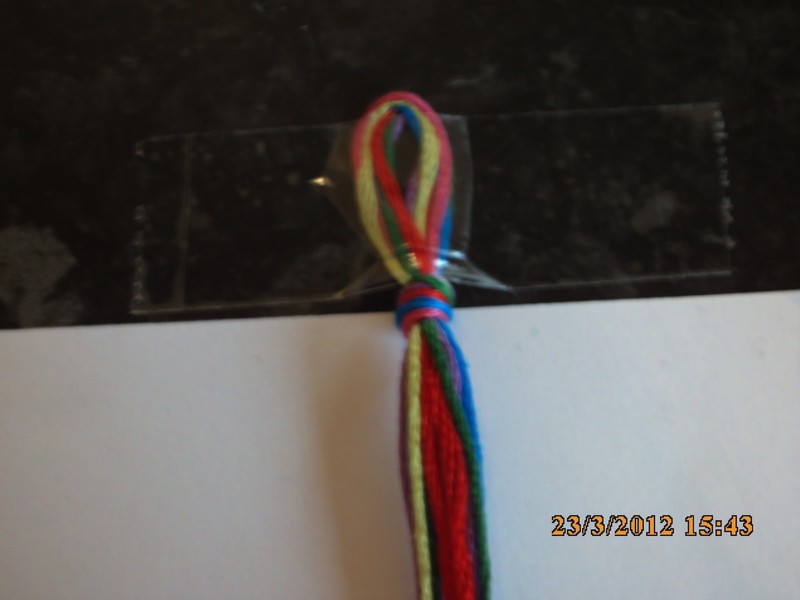
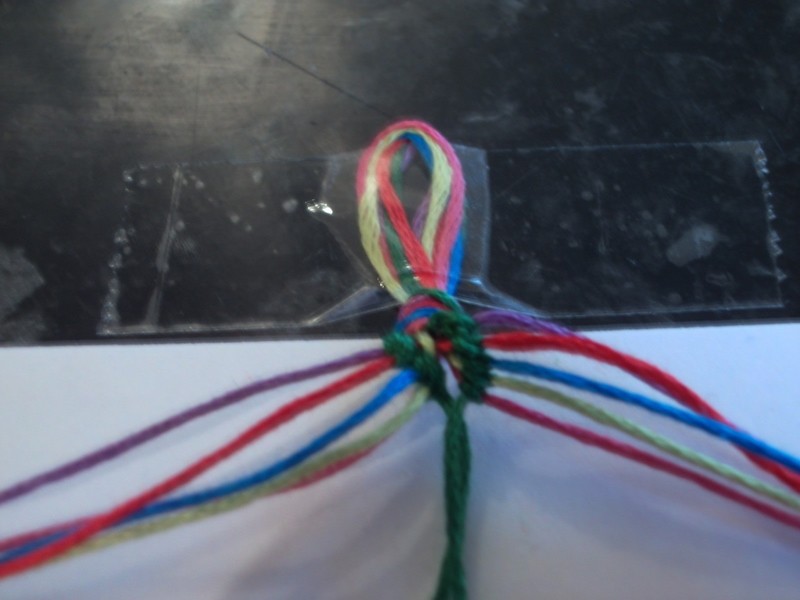
1: To start you need to cut your thread to 60 inches and holding them all together fold in half. Then tie knot leaving about an inch loop so now you have double the amount of strands of each colour.
-
 Step 2
2: I find it best to tape down the loop to my work surface so I can get a good tight knot when Im working the pattern.
-
 Step 3
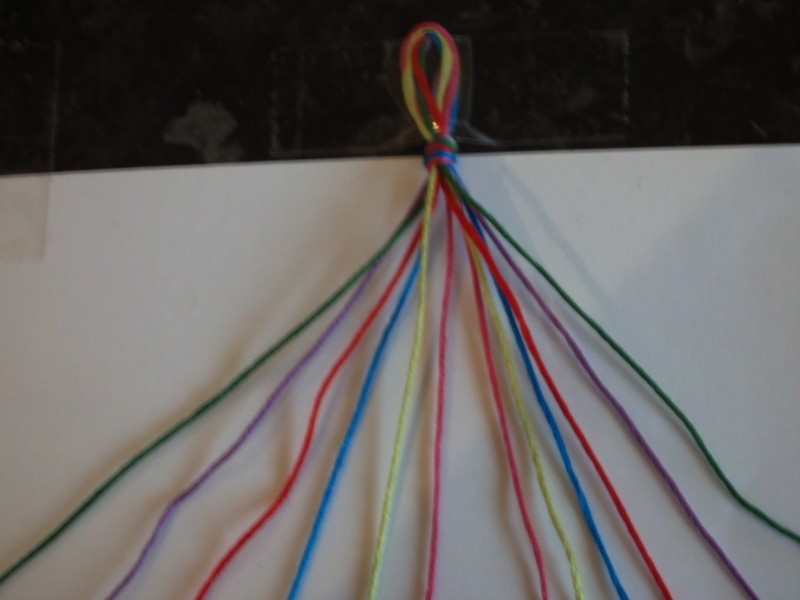
3: Next you need to sort out the threads so that you have one of each colour on each side and also get them in order of how you want your colours to appear on the bracelet. You will have six threads on the left and a mirror image of the same six colours on the right. So from the left my pattern is Green, Purple, Red, Blue, Yellow and Pink. You can see below how this is exactly the same coming in from the right.
-
 Step 4
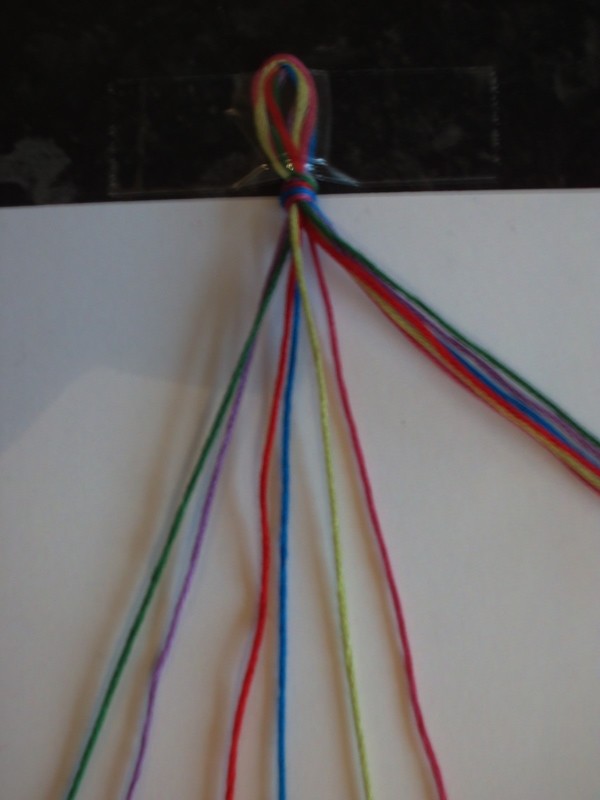
4: So we are starting with the left side and I find it easier at the start to push the right side strings away so as not to mix any into the pattern. After the first row or two the strings sit in place so this wont be necessary.
-
 Step 5
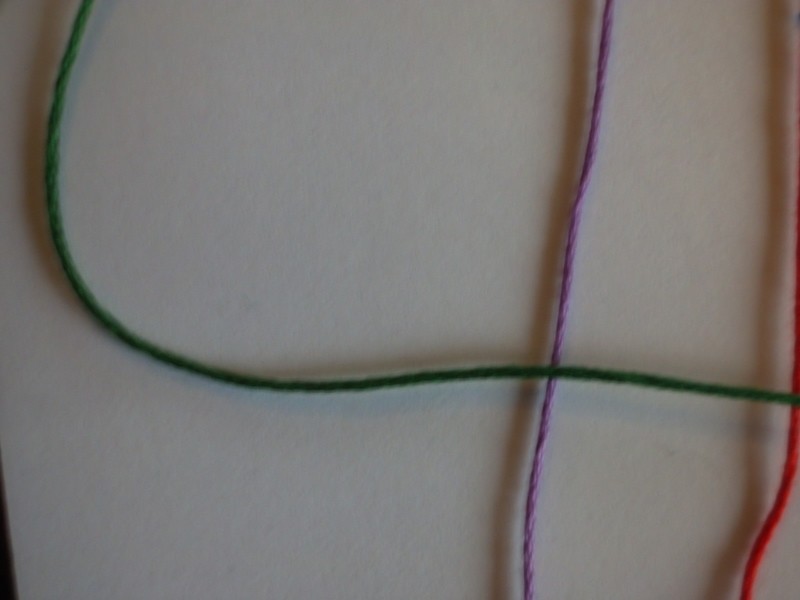
5: So taking the green string bring it across the purple like a number 4.
-
 Step 6
6: You then bring the green behind the purple and back out in front of the purple.
-
 Step 7
7: Repeat the knot so you have two green knots on the purple string. And then do this across until you have done two knots on the pink string. The green string will now be last.
-
 Step 8
8: Now push the 6 left colours aside and we are working on the right six starting out on the right with the green string. Bring the green string over the purple in a backwards looking number 4.
-
 Step 9
9: Like before bring the green around the purple and back out over the purple string.
-
 Step 10
10: Again do a double knot and work all the way out towards the pink until you now have the two green strings beside each other in the middle.
-
 Step 11
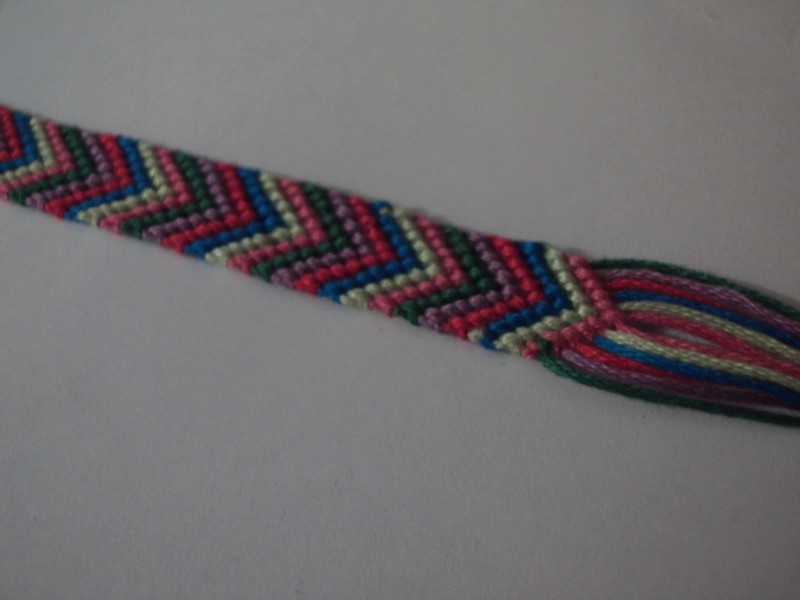
11: To join the two sides do a backwards number 4 style knot bringing the right hand string over the left. This is your first row done. The bracelet is continued starting back on the left only now using the purple string and so on until you have reached the length you are happy with. At the end you can just braid the loose string and it can be tied through the loop onto your wrist.
-
 Step 12
well Done Your Finished visit me on www.vovsjewellery.blogspot.ie