

About
Making your own silver chain allows you to have so much more control over how your jewellery looks.
This technique uses 1.2-mm gauge wire to make a silver chain that is particularly suitable in terms of both scale and strength for holding heavy beach finds, such as pebbles and larger pieces of driftwood. You can also use 1.0, 1.5 and 2.0-mm gauge wire. Making your own silver chain allows you to have so much more control over how your jewellery looks. You can give pieces a much more original, lasting design, tailor-made to your ideas and vision.
Quick size guide
The amount of silver wire you need varies according to the size of your links, and the number of links you wish to use. It is sensible to make a good number of links at a time, so that you always have some to hand. The links in this demonstration use approximately 1cm of wire each.
Preparing the links
-
 BloodyRose favorited Silver Chain Making
12 Apr 15:56
BloodyRose favorited Silver Chain Making
12 Apr 15:56
-
 angelvaliant favorited Silver Chain Making
08 Jan 03:34
angelvaliant favorited Silver Chain Making
08 Jan 03:34
-
 cristinakilljoyway favorited Silver Chain Making
22 Nov 19:43
cristinakilljoyway favorited Silver Chain Making
22 Nov 19:43
-
 sophie.shipstone added Silver Chain Making to jewelry
10 Sep 09:23
sophie.shipstone added Silver Chain Making to jewelry
10 Sep 09:23
-
 Phoebe D. favorited Silver Chain Making
01 Sep 13:18
Phoebe D. favorited Silver Chain Making
01 Sep 13:18
-
 Kelly G. favorited Silver Chain Making
01 Aug 21:12
Kelly G. favorited Silver Chain Making
01 Aug 21:12
-
Alissa B. favorited Silver Chain Making
26 Jul 19:55
-
 Andrea B. favorited Silver Chain Making
26 Jul 18:45
Andrea B. favorited Silver Chain Making
26 Jul 18:45
-
 Step 1
Start by wrapping a length of1.2-mm gauge silver wire firmly around the piece of dowelling to make a tight coil. The length of the wire depends on how many links you intend to make, but 10–15cm is easily workable.
-
 Step 2
Carefully slip the coil off the piece of dowelling and wrap the entire length of it with masking tape. Place the wrapped coil in the ‘V’ of a wooden bench peg so that you have something firm to lean against when sawing.
-
 Step 3
Saw through the coil of wire gently, working in a vertical motion. Take your time so that you don’t bend the circular coil out of shape. Saw blades break quite easily so make sure you have plenty of spares (they’re not expensive).
-
 Step 4
Once you have sawn through the coil of silver wire, you need to peel off the masking tape. Go slowly and carefully. The sticky tape will pull the cut rings out of shape a little, and you want to avoid too much distortion.
-
 Step 5
Remove each silver link from the masking tape, one at a time, and place it on a fireproof brick ready for soldering. You can see here how each one has lost its circular shape just a little during the removal of the masking tape.
-
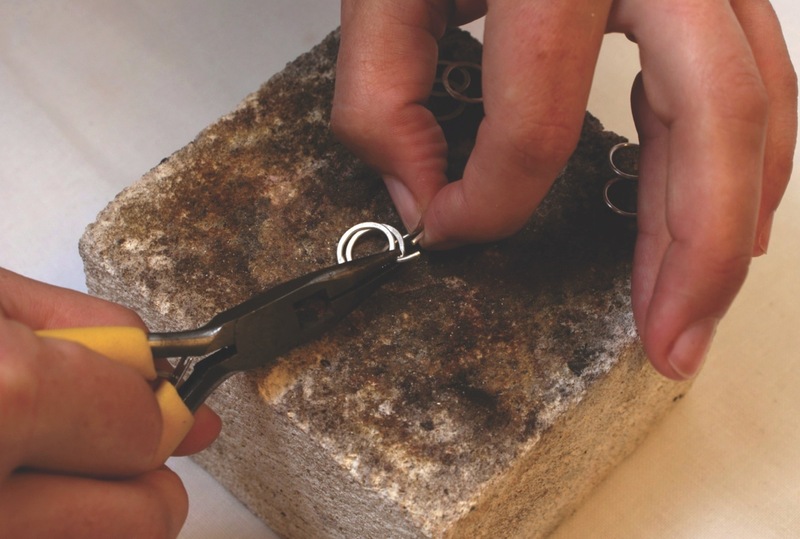
Step 6
To make a length of silver chain, you need one unsoldered ring for every two soldered rings. Use flat-nosed pliers to make sure that the cut ends of each link are aligned as closely as possible with each other.
-
 Step 7
Before soldering the links, make sure you have all the equipment to hand. It is useful to have the borax cone standing in a small amount of water. This means that there is always a little borax solution in the dish, ready for use.
-
 Step 8
Soldering the links
Soldering the links strengthens the chain. Place the solder on a metal plate and hammer the end a little. This makes it easier to cut off small pieces.
-
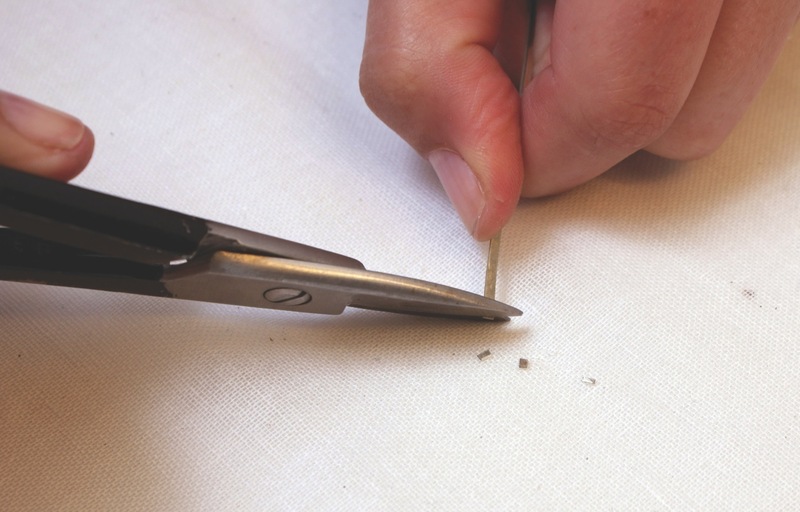
 Step 9
Use snips to cut several 1-mm pieces of solder from the hammered end of the strip. You will need one piece of solder for each silver link.
-
 Step 10
Paint a little borax solution over the join of each ring. Still using the paintbrush, pick up a small piece of the solder and place it on top of the join.
-
 Step 11
Wear goggles as you heat up each ring (for the solder to melt and seal the join). Move the top of the blue flame over the ring in a circular movement. Both cut ends of the ring need to heat up at the same rate so that the solder melts and stretches between them.
-
 Step 12
When the solder has melted, use pliers to pick up each ring, cool under a tap or in a bowl of cold water then drop it in the pickle to remove the black fire stain. Don’t let your pliers go into the pickle as they’ll contaminate it and make all the silver turn pink.
-
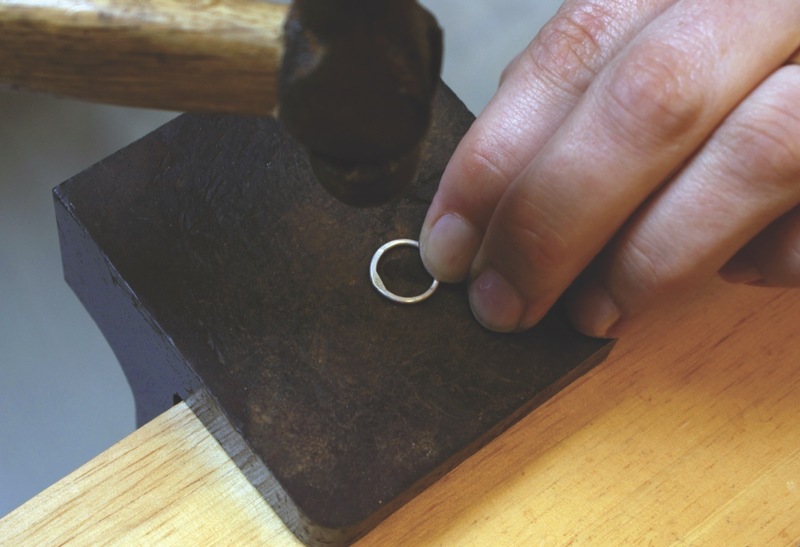
 Step 13
Once shiny again, use tweezers to remove the soldered links from the pickle and wash and dry thoroughly. Place each on a metal plate and flatten with a hammer, giving it a slightly textured finish. (Do not hammer the unsoldered links yet.)
-
 Step 14
Now thread one of the unsoldered rings through two soldered rings to join the three together. The new, unsoldered ring will become the middle link of the three once soldered.
-
 Step 15
Follow steps 1 to 4 to solder this link. Cool the whole piece in water and then place it in the pickle. You can keep adding unsoldered links in this way until you have your desired length of chain.
-
 Step 16
Each time you solder a new link to the existing chain, remember to give it a hammered finish to match it with the others. This is best done as you add each new link, rather than at the end.
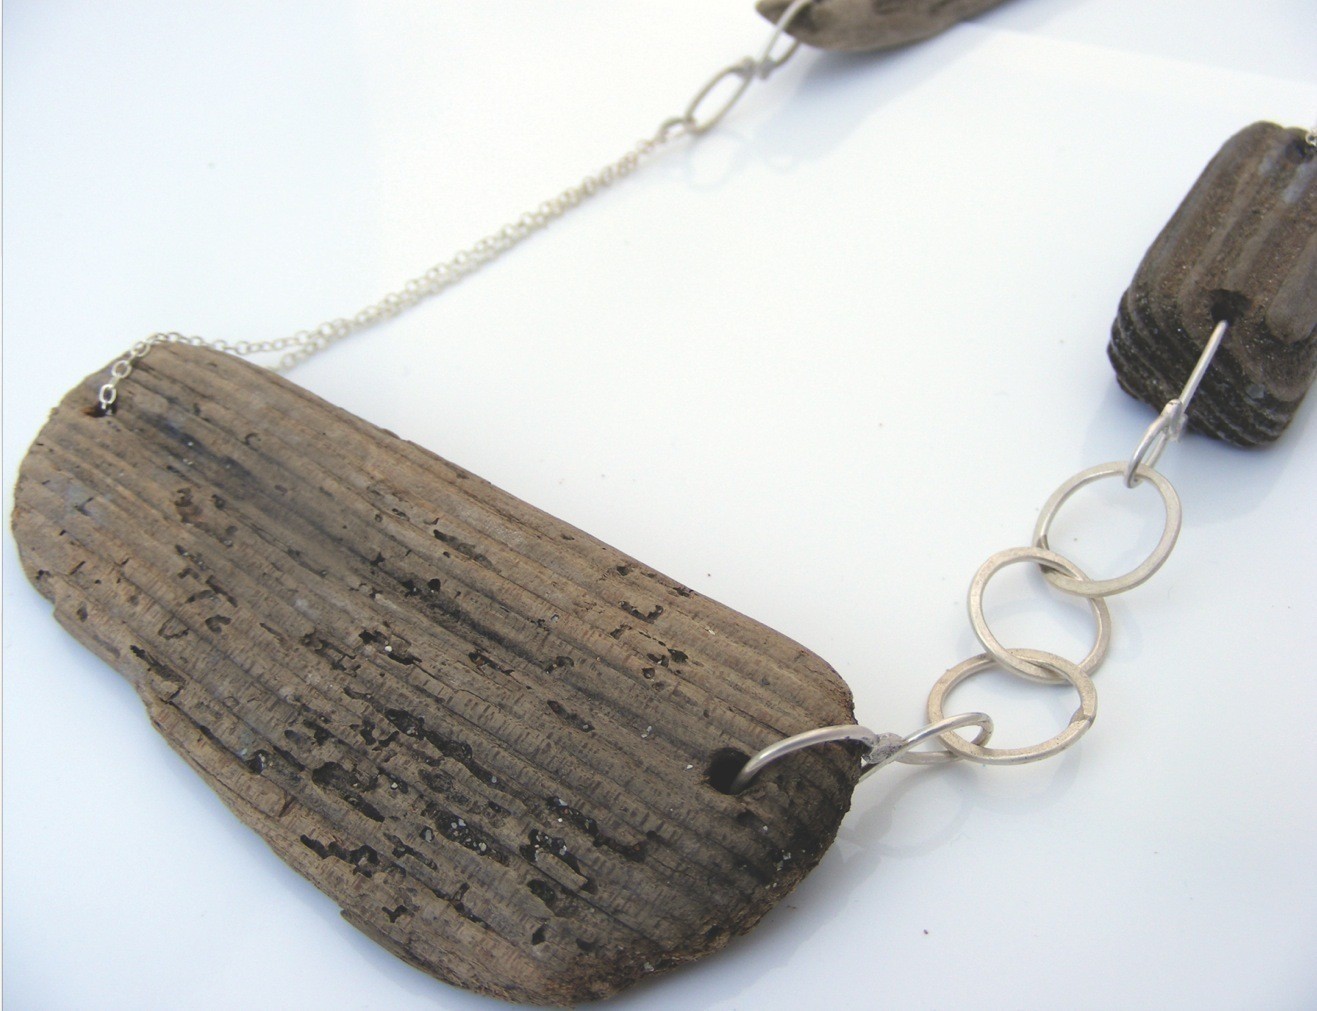
Finishing tipsSilver links of two different sizes have been used to connect the quirky, misshapen pebbles in this robust-looking necklace.
-
 Step 17
A lucky charm bracelet with a twist, where each link of the silver chain has a colourful bead or quirky beach find attached to it.
This asymmetrical piece uses just three links of silver chain. They are attached to a piece of driftwood using an S-link (see page 52).