


About
Cool Shrinky rings
I had seen somewhere rings made from shrinky plastic that were stamped. I wanted to do something a little more elaborate. So this is what I came up with. I especially love the skull rings. Cool!!
-
 Key West Witch added Shrinky Dink Rings to Rings
30 Jun 07:45
Key West Witch added Shrinky Dink Rings to Rings
30 Jun 07:45
-
 Kinhime Dragon favorited Shrinky Dink Rings
06 Aug 00:39
Kinhime Dragon favorited Shrinky Dink Rings
06 Aug 00:39
-
 Susie M. added Shrinky Dink Rings to Shrink Plastic
22 Jan 23:10
Susie M. added Shrinky Dink Rings to Shrink Plastic
22 Jan 23:10
-
 Anja R. favorited Shrinky Dink Rings
23 Jul 14:27
Anja R. favorited Shrinky Dink Rings
23 Jul 14:27
-
 Conner W. added Shrinky Dink Rings to fashion
13 Jul 19:35
Conner W. added Shrinky Dink Rings to fashion
13 Jul 19:35
-
Ede O. favorited Shrinky Dink Rings
03 May 21:34
-
 DocDoolittle added Shrinky Dink Rings to Rings
23 Feb 14:45
DocDoolittle added Shrinky Dink Rings to Rings
23 Feb 14:45
-
 sjjames57 favorited Shrinky Dink Rings
21 Feb 21:36
sjjames57 favorited Shrinky Dink Rings
21 Feb 21:36
-
 Veronica B. favorited Shrinky Dink Rings
31 Aug 14:58
Veronica B. favorited Shrinky Dink Rings
31 Aug 14:58
-
 Elizabeth Y. favorited Shrinky Dink Rings
12 May 16:09
Elizabeth Y. favorited Shrinky Dink Rings
12 May 16:09
You Will Need
-
 Step 1
First cut a piece that is about 7 inches long with either regular scissors for a straight edge or the decorative cut. The width you can size to whatever you like. I cut mine about an inch or so wide. Then using a hole punch, put a hole right in the center.
-
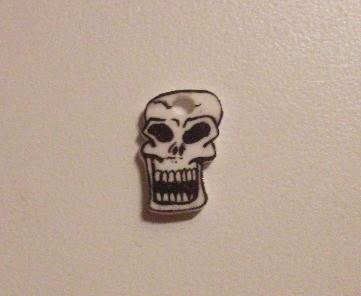
 Step 2
With your sharpie, draw a skull or any picture of your choice about 1 1/2 x 1 inch and cut out either directly on the edge of the image or a little beyond and then punch hole in top center.
-
 Step 3
When the band has been in oven the appropriate amount of time, you have about 10 seconds to work with before it cools. Quickly wrap around dowel (or whatever you found to use the approximate the size you want your ring to be) and hold in place for a few seconds. The piece will be hot so you may want to use oven mitts or something. If you at first or second or fifth try to get the perfect round shape to your object, just put the piece back in the oven until it lies flat and try it again. Note: the more times you do this it will get smaller and smaller, so it may not completely wrap around your dowel by the time you get it right.
-
 Step 4
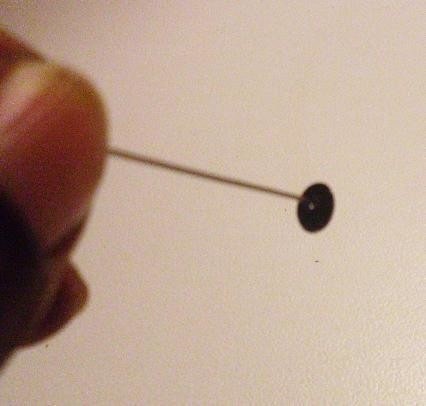
With the hole punch confetti left over from when you put the hole into the ring base, use X-acto knife to put a little hole through it. First lay the piece on a protected surface and make hole with the knife then twist around to make it big enough for the flat head pin to fit through.
-
 Step 5
It's better to use gel super glue because it's not runny, apply glue on inside of confetti on opposite side of head pin and put through back side of ring base.
-
 Step 6
Put the ring back on your form (dowel) to hold in place until it dries.
-
 Step 7
Bake skull while other piece is drying.
-
 Step 8
Add metal spacers and use pliers to bend pen at a right angle. Cut to about an 1/4 or so. It is easier to do this with it still on your form.
-
 Step 9
Bend pen to curve at base of spacer to hold tightly into place.
-
 Step 10
You can either add a jump ring to add skull, or reopen pin to attach it as I did.


Comments


