

About
Shortening bootcut jeans with an "invisible seam".
How many times have you left a great looking, worn down pair of denim in to the shop because the legs are too long? They just don´t lok the same if you just cut them shorter...
Denim pants with an abraded hem need to be shortened with a seam. Bootcut jeans cannot be shortened with a straight seam because the sewing lines are not the same length. In this tutorial you´ll see how to shorten jeans with a curved seam - no matter how flare legged your bootcut jeas are!
-
 Denise M. favorited Shortening Bootcut Jeans Or Pants
04 Jun 01:51
Denise M. favorited Shortening Bootcut Jeans Or Pants
04 Jun 01:51
-
 VillainousNinja added Shortening Bootcut Jeans Or Pants to Sewing
09 Jun 19:20
VillainousNinja added Shortening Bootcut Jeans Or Pants to Sewing
09 Jun 19:20
-
 Blair A. favorited Shortening Bootcut Jeans Or Pants
14 Apr 00:12
Blair A. favorited Shortening Bootcut Jeans Or Pants
14 Apr 00:12
-
 Taba__tina favorited Shortening Bootcut Jeans Or Pants
05 Oct 13:33
Taba__tina favorited Shortening Bootcut Jeans Or Pants
05 Oct 13:33
-
Crystal M. favorited Shortening Bootcut Jeans Or Pants
28 Jun 15:37
-
 ruua.love favorited Shortening Bootcut Jeans Or Pants
02 Jan 01:33
ruua.love favorited Shortening Bootcut Jeans Or Pants
02 Jan 01:33
-
 cristinakilljoyway favorited Shortening Bootcut Jeans Or Pants
01 Jan 17:52
cristinakilljoyway favorited Shortening Bootcut Jeans Or Pants
01 Jan 17:52
-
 Anita N. favorited Shortening Bootcut Jeans Or Pants
26 Jun 18:09
Anita N. favorited Shortening Bootcut Jeans Or Pants
26 Jun 18:09
-
 viridianag0 favorited Shortening Bootcut Jeans Or Pants
25 Jun 21:31
viridianag0 favorited Shortening Bootcut Jeans Or Pants
25 Jun 21:31
You Will Need
-
 Step 1
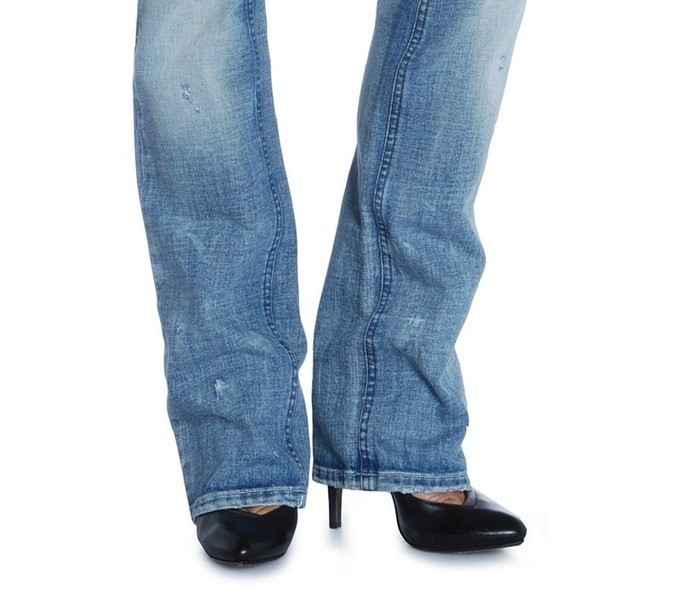
Try the denim on with both flat and hig heeled shoes. I usually mark the denim about hanf an inch (2cm) longer than my heel. If the denim is a regular bootcut the front will be about 3/4 inches (3cm)longer. If the denim is a bell-bottom it will be even longer from the front.
The heel measurement is the important one! After I know how much must be taken off, I draw (usually with a ballpoint pen) a straight line 0,5cm above the hem turn. Measure how wide your leg is on this line. This will be your bottom sewing line.
Then measure the shortening-measurement up from here (in picture: left legpiece). Now draw a curvy line towards the front.
-
 Step 2
This curvy line is your top sewing line has to be exactly the same length as your bottom sewing line, otherwise the two sewing lines will not match. All that is between the two lines will be gone when the denim is done.
In this example I will take 11cm from the back and 9cm from the front.
-
 Step 3
To make sewing thick denim easier, cut away extra allowences from seams. See that you do not cut the seam open.
-
 Step 4
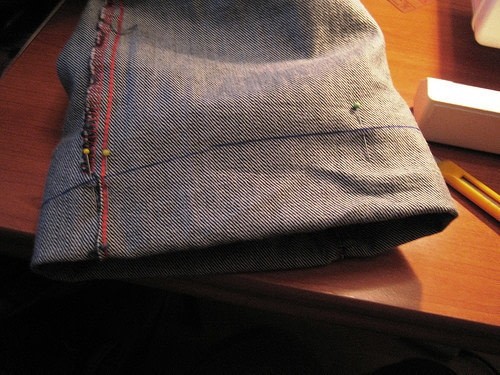
Now you can start pinning the two sewing lines together. Always start from the sideseams, then pin the front-middle, then back-middle, and then the space between.
-
 Step 5
To get your sewing lines exactly in place, puch the needle straight down. See that it comes out the other side on the sewing line. If it doesn´t, you have to adjust the fabric so it does.
-
 Step 6
Check that especially the sideseams are exactly in-line.
-
 Step 7
Sew TWICE around the leg following your sewing line using regular thread. This will make the seam stronger.
-
 Step 8
Now try your denim on to make sure the legs are the right length (try both flats and high heels on). You can still open the seam and make adjustments if necessary, because nothing has been cut out yet.
If the denim fits, you can cut open the allowances. Do not make them narrow yet! Iron the seam open. Sew a top stitch a few millimeters from your seam on both sides of the seam to hold allowances in place better.
-
 Step 9
Sew a top stitch a few millimeters from your seam on both sides of the seam to hold allowances in place better.
-
 Step 10
Cut away extra fabric from the allowances.
-
 Step 11
The finished seam should look like this from underneath. I never bother to finish the edges with overlock... Call me lazy. Nobody can see them anyway.
-
 Step 12
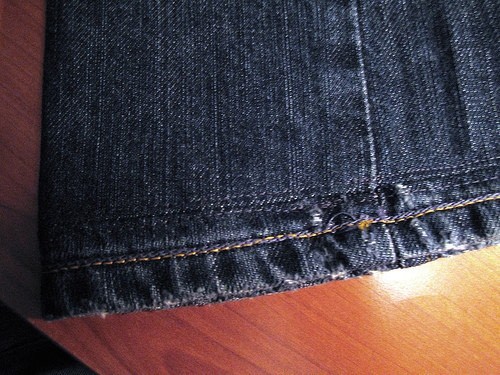
And it looks like this from the top. You are able to see the stitching when looked up-close but nobody will see it when you´re wearing the denim.
-
 Step 13
DONE!
The jeans are now about 3 cm shorter from the heel than in front, but they seem to be the same lentgh when you have the denims on. Except that the heel won´t slip under your foot all the time. :) Finally you have bootcut jeans that can be worn with flats and high heels.And nobody notices the extra seam in the bottom...


I'm a beginner in sewing, so that it was a bit tricky for me, but hey, it worked! Thank you for this great idea.