About
Lindsey Vigurs' DIY hand carved, hand printed Save-the-Date cards
Tags
-
 Shop Showcase published her project Save The Date Cards
12 Dec 23:47
Shop Showcase published her project Save The Date Cards
12 Dec 23:47
You Will Need
-
 Step 1
Decide on your design
I chose simple SAVE THE DATE lettering with a heart motif and the date.I used a biro to mark out my designs on the surface of the lino, so I could see where to cut. If you're hand carving lettering and numbers then it's important to remember to carve them back to front. The print that you take from your stamp will be a mirror image of your block. I have fallen foul of this so many times and it is VERY frustrating!
It's also worth noting that the lino cutting tools are very sharp and it's easy to slip. Set yourself up so that you are cutting at a comfortable height on an even surface, and ALWAYS cut away from the hand or fingers that are steadying the lino. And even then, probably best to have some plasters at the ready. This is crafting at its dangerous best!
-
 Step 2
Inking and printing
When you have your prints carved and ready you can crack open the stamp pads. Press the stamp onto the pad a number of times until you can see that the surface of your print is evenly covered with ink. Then place your stamp face up on a cutting mat, or clean flat surface, and carefully place your card over the top in the required position. You don't want to smear the ink on the card at this point, so take your time. I used a spoon to 'hand burnish' over the top of the print with even pressure in small circular movements. Do this all over the print block (to take a nice even print) and then peel the card off and stand back to bask in your own awesomeness. If the print isn't that awesome then ink up again and take another print. Sometimes the ink needs to build up a bit on the surface of the stamp before it'll take a decent opaque print.
-
 Step 3
If you want to use ink from a tube, you’ll need a flat surface that you can roll ink out on with a roller. I used a Perspex sheet. When the ink is rolled out and is making a gentle hissing noise (rather than a sticky crackle) then you can use the roller to transfer the ink from the sheet onto the printing block.Roll in all directions to build up a good layer of ink. Then take your print as before, using the spoon to apply even pressure though the back of the card.
If you'd rather stamp your prints (and not bother with all this weird spooning) then you'd be better off using these very nice stamp blocks from Yellow Owl Workshop. They are more expensive but it will probably save you a bit of time. I went for the budget option: I'd rather spend the saved pennies on extra booze for the wedding.
-
 Step 4
Patience is a virtue
I printed all the 'SAVE the DATE' lettering first with white ink. And waited for those to dry while I carved the heart.
-
 Step 5
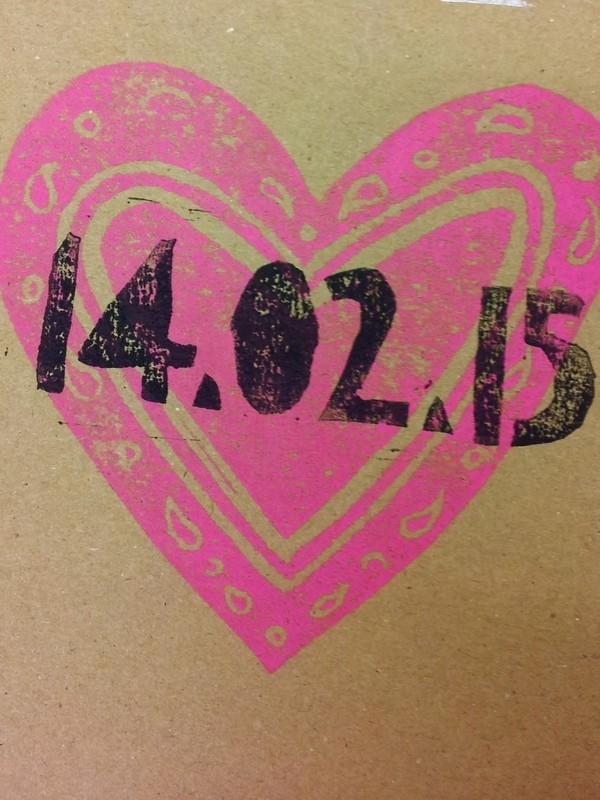
I then printed the hearts in neon pink.
-
 Step 6
I then waited for those to dry while I carved the date stamp.
-
 Step 7
I then overprinted the hearts with the date stamp. If I hadn't waited for the hearts to dry it would have resulted in a mucky mess. So patience is a virtue here, but the inks are pretty quick drying so it's not a big deal. Just fix yourself a cuppa, or have a gin if it's past noon.
I'm really pleased with my DIY card. It's personal, fun and completely bespoke. Plus I saved £££ which I can splurge on extra wedding fizz. Or a DJ. Or a vintage photo-booth. Or karaoke!