
About
Turn 'junk' into an awesome jewelry, key or scarf organizer in a jiffy
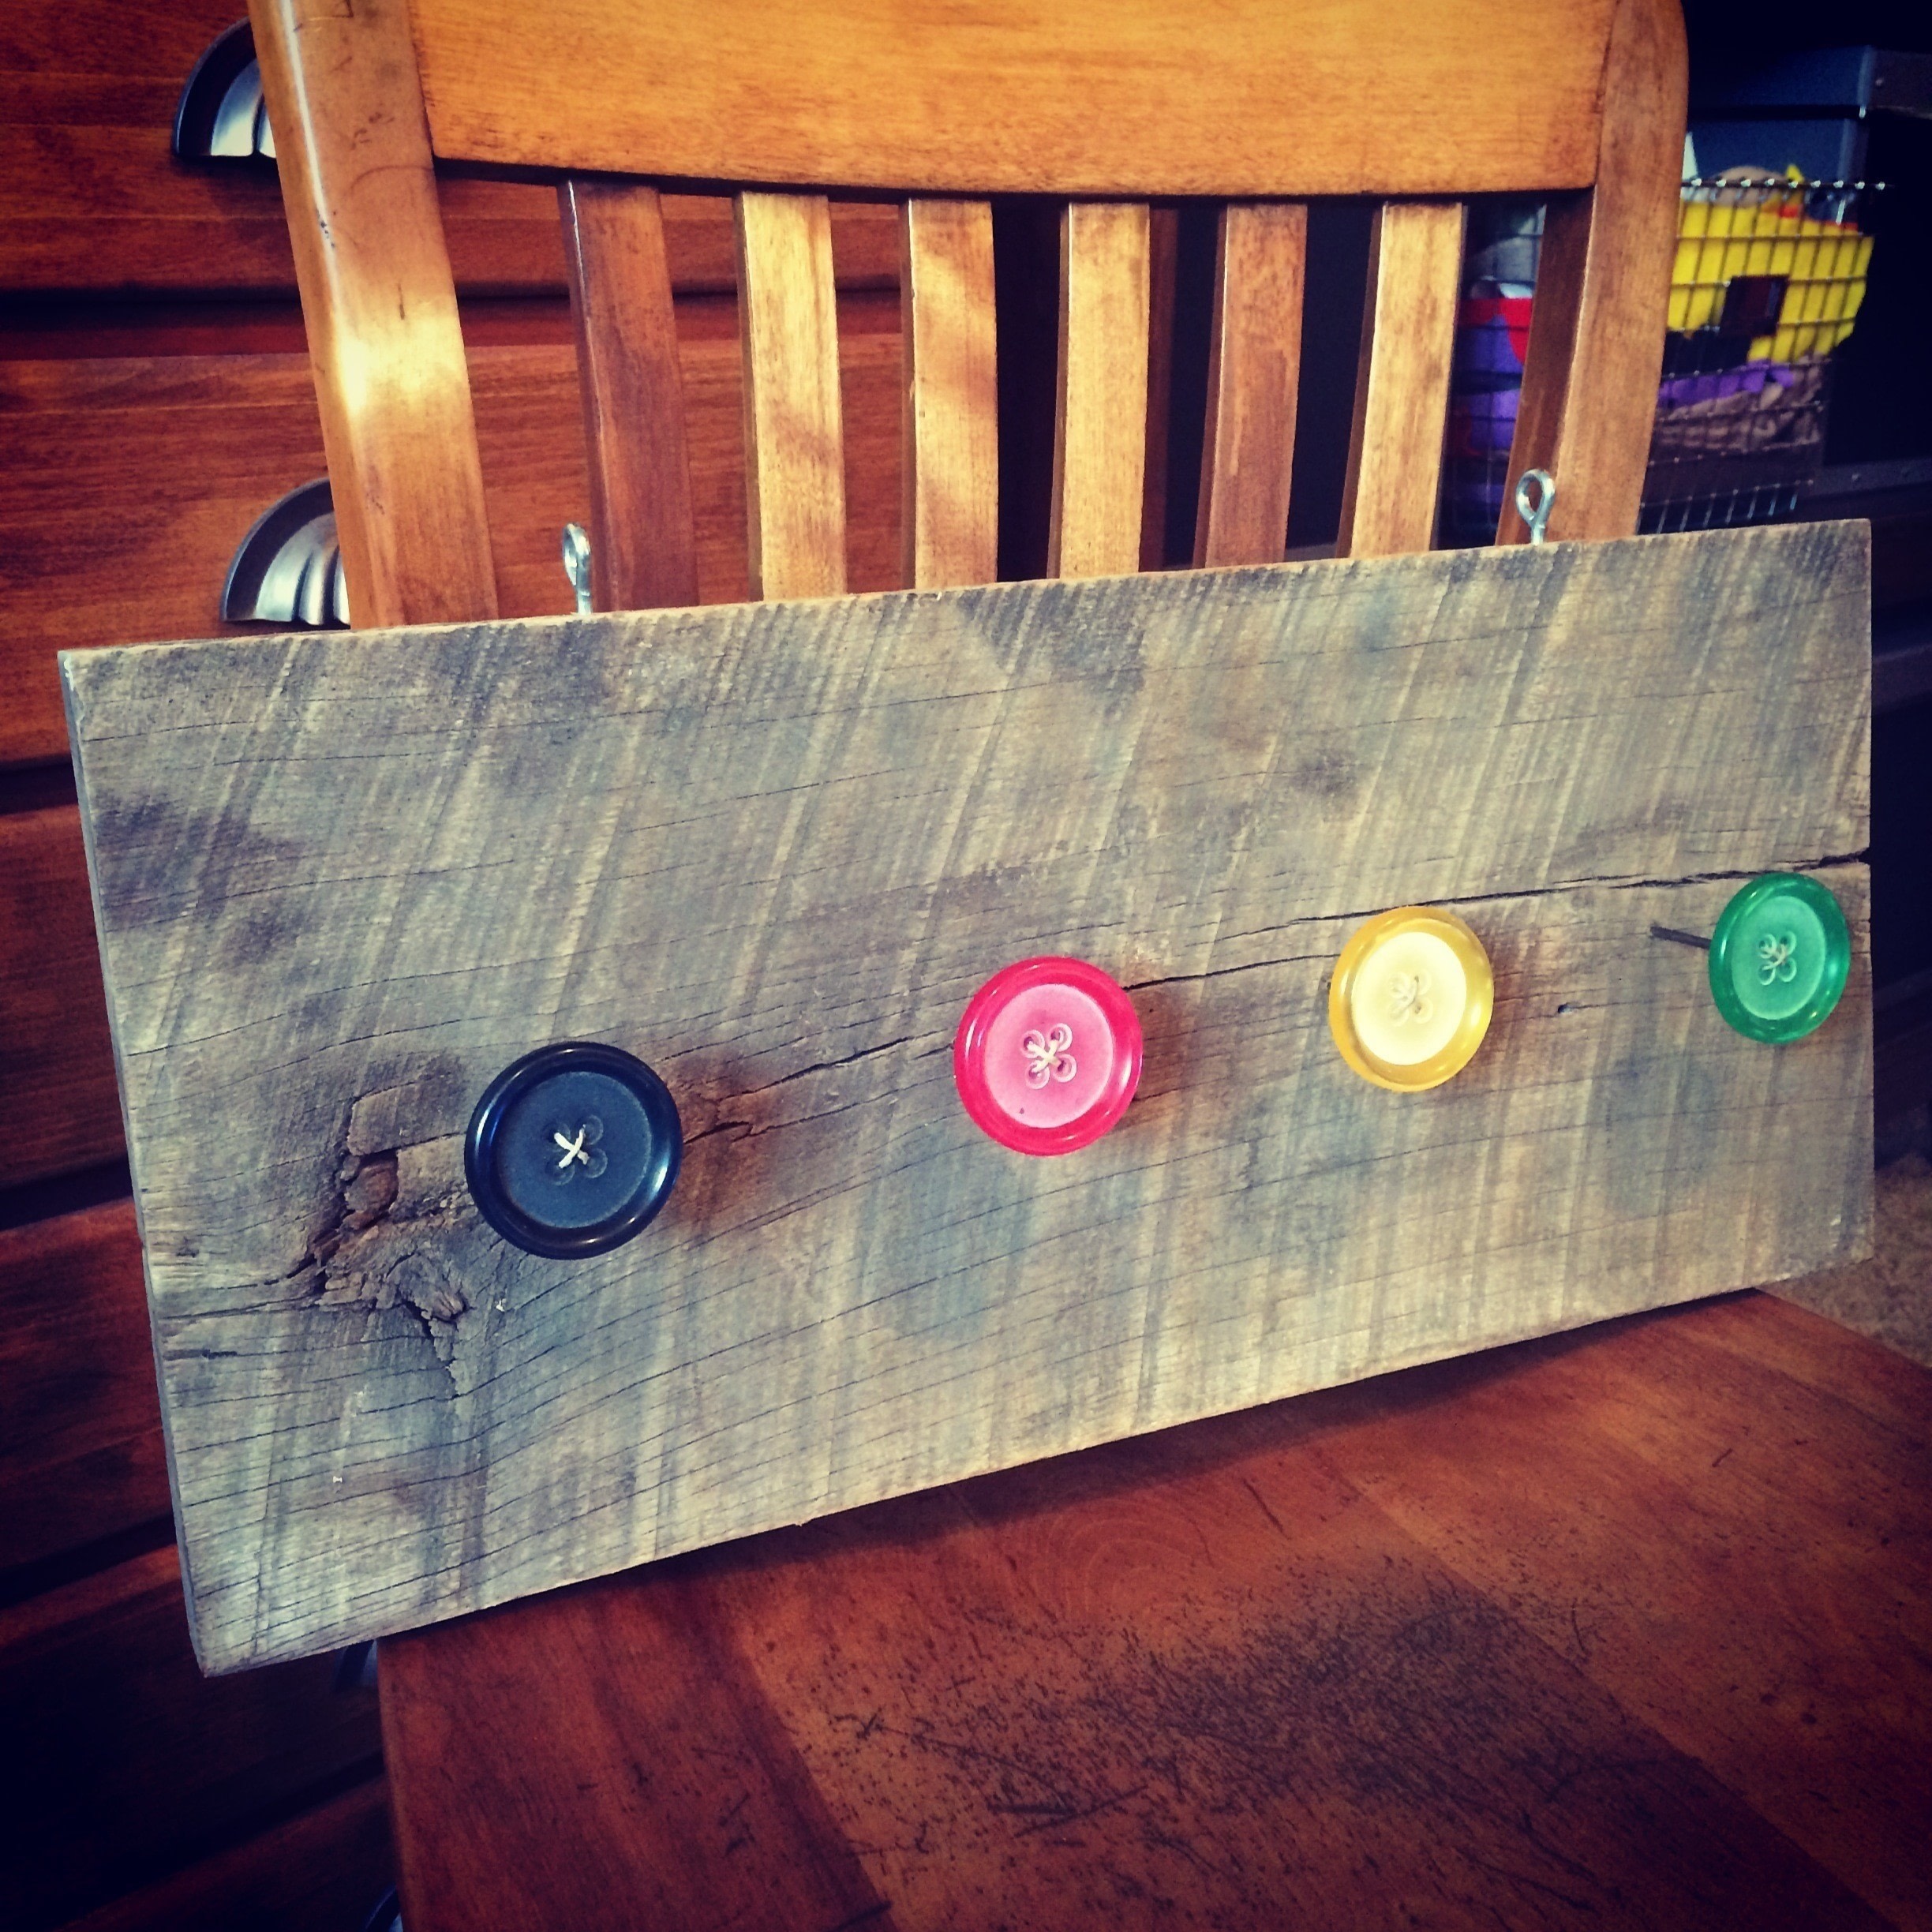
Looking to get organized on a budget? This is the DIY for you! Use either salvaged wood or a wood pallet for this project. Add bling with miscellaneous drawer pulls, old buttons, jewelry, etc.
-
 alp.zoey added Salvaged Wood Organizer to Crafty/diy
18 Aug 03:47
alp.zoey added Salvaged Wood Organizer to Crafty/diy
18 Aug 03:47
-
 Nalani R. favorited Salvaged Wood Organizer
25 Jun 17:34
Nalani R. favorited Salvaged Wood Organizer
25 Jun 17:34
-
 Ninni Ninímél Nalíná ♦ ♏ ♦ favorited Salvaged Wood Organizer
02 Aug 16:25
Ninni Ninímél Nalíná ♦ ♏ ♦ favorited Salvaged Wood Organizer
02 Aug 16:25
-
 Beth E. favorited Salvaged Wood Organizer
30 Jun 22:05
Beth E. favorited Salvaged Wood Organizer
30 Jun 22:05
-
 Denise published her project Salvaged Wood Organizer
27 Jun 16:25
Denise published her project Salvaged Wood Organizer
27 Jun 16:25
-
 Step 1
For this DIY feel free to either use either salvaged wood or wood pallets. Salvaged wood has a ton of character versus pallet wood.
-
 Step 2
First it to source your wood then trim it to size. Depending on the wood you can either use a hand saw or table saw. Sand the edges.
-
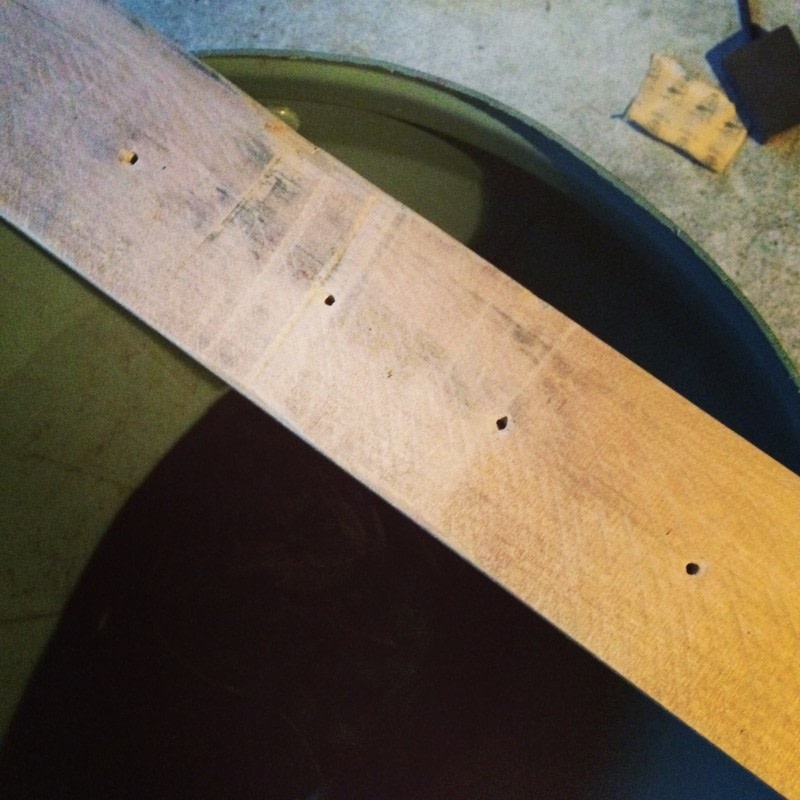
 Step 3
Measure your holes. This depends on the length of the wood and how many drawer pulls your adding. Measure the space in-between the holes equally.
Note: the measurements may also depend on the types of drawer pulls you're using. Or maybe you're including other items like hooks. The diameter of the items might vary and this may affect the spacing of the holes.
-
 Step 4
Hold wood in place and drill the holes. Be careful as pallet wood may be super dense and require some good biceps.
-
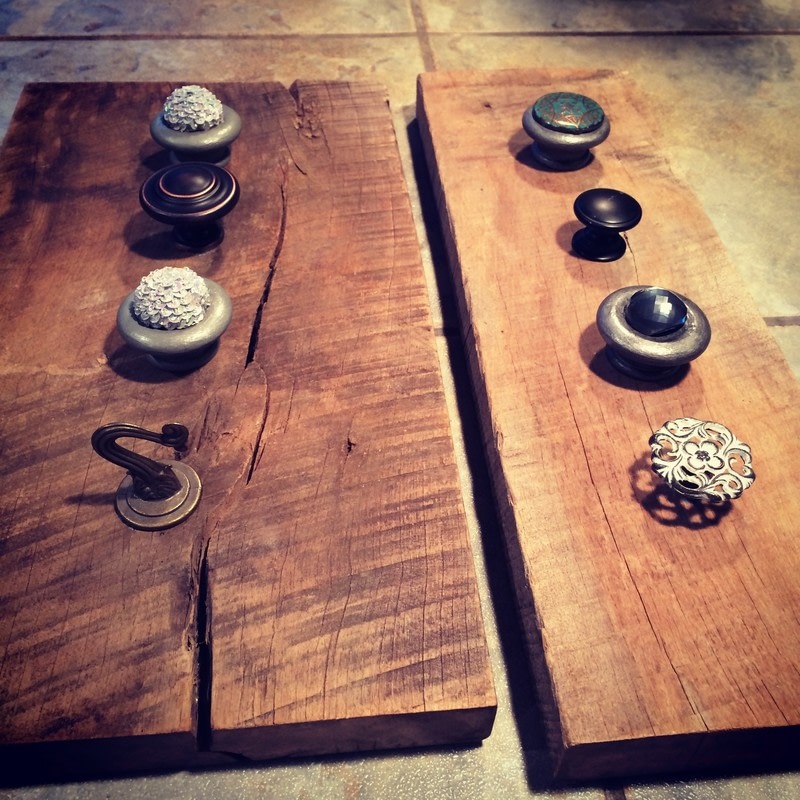
 Step 5
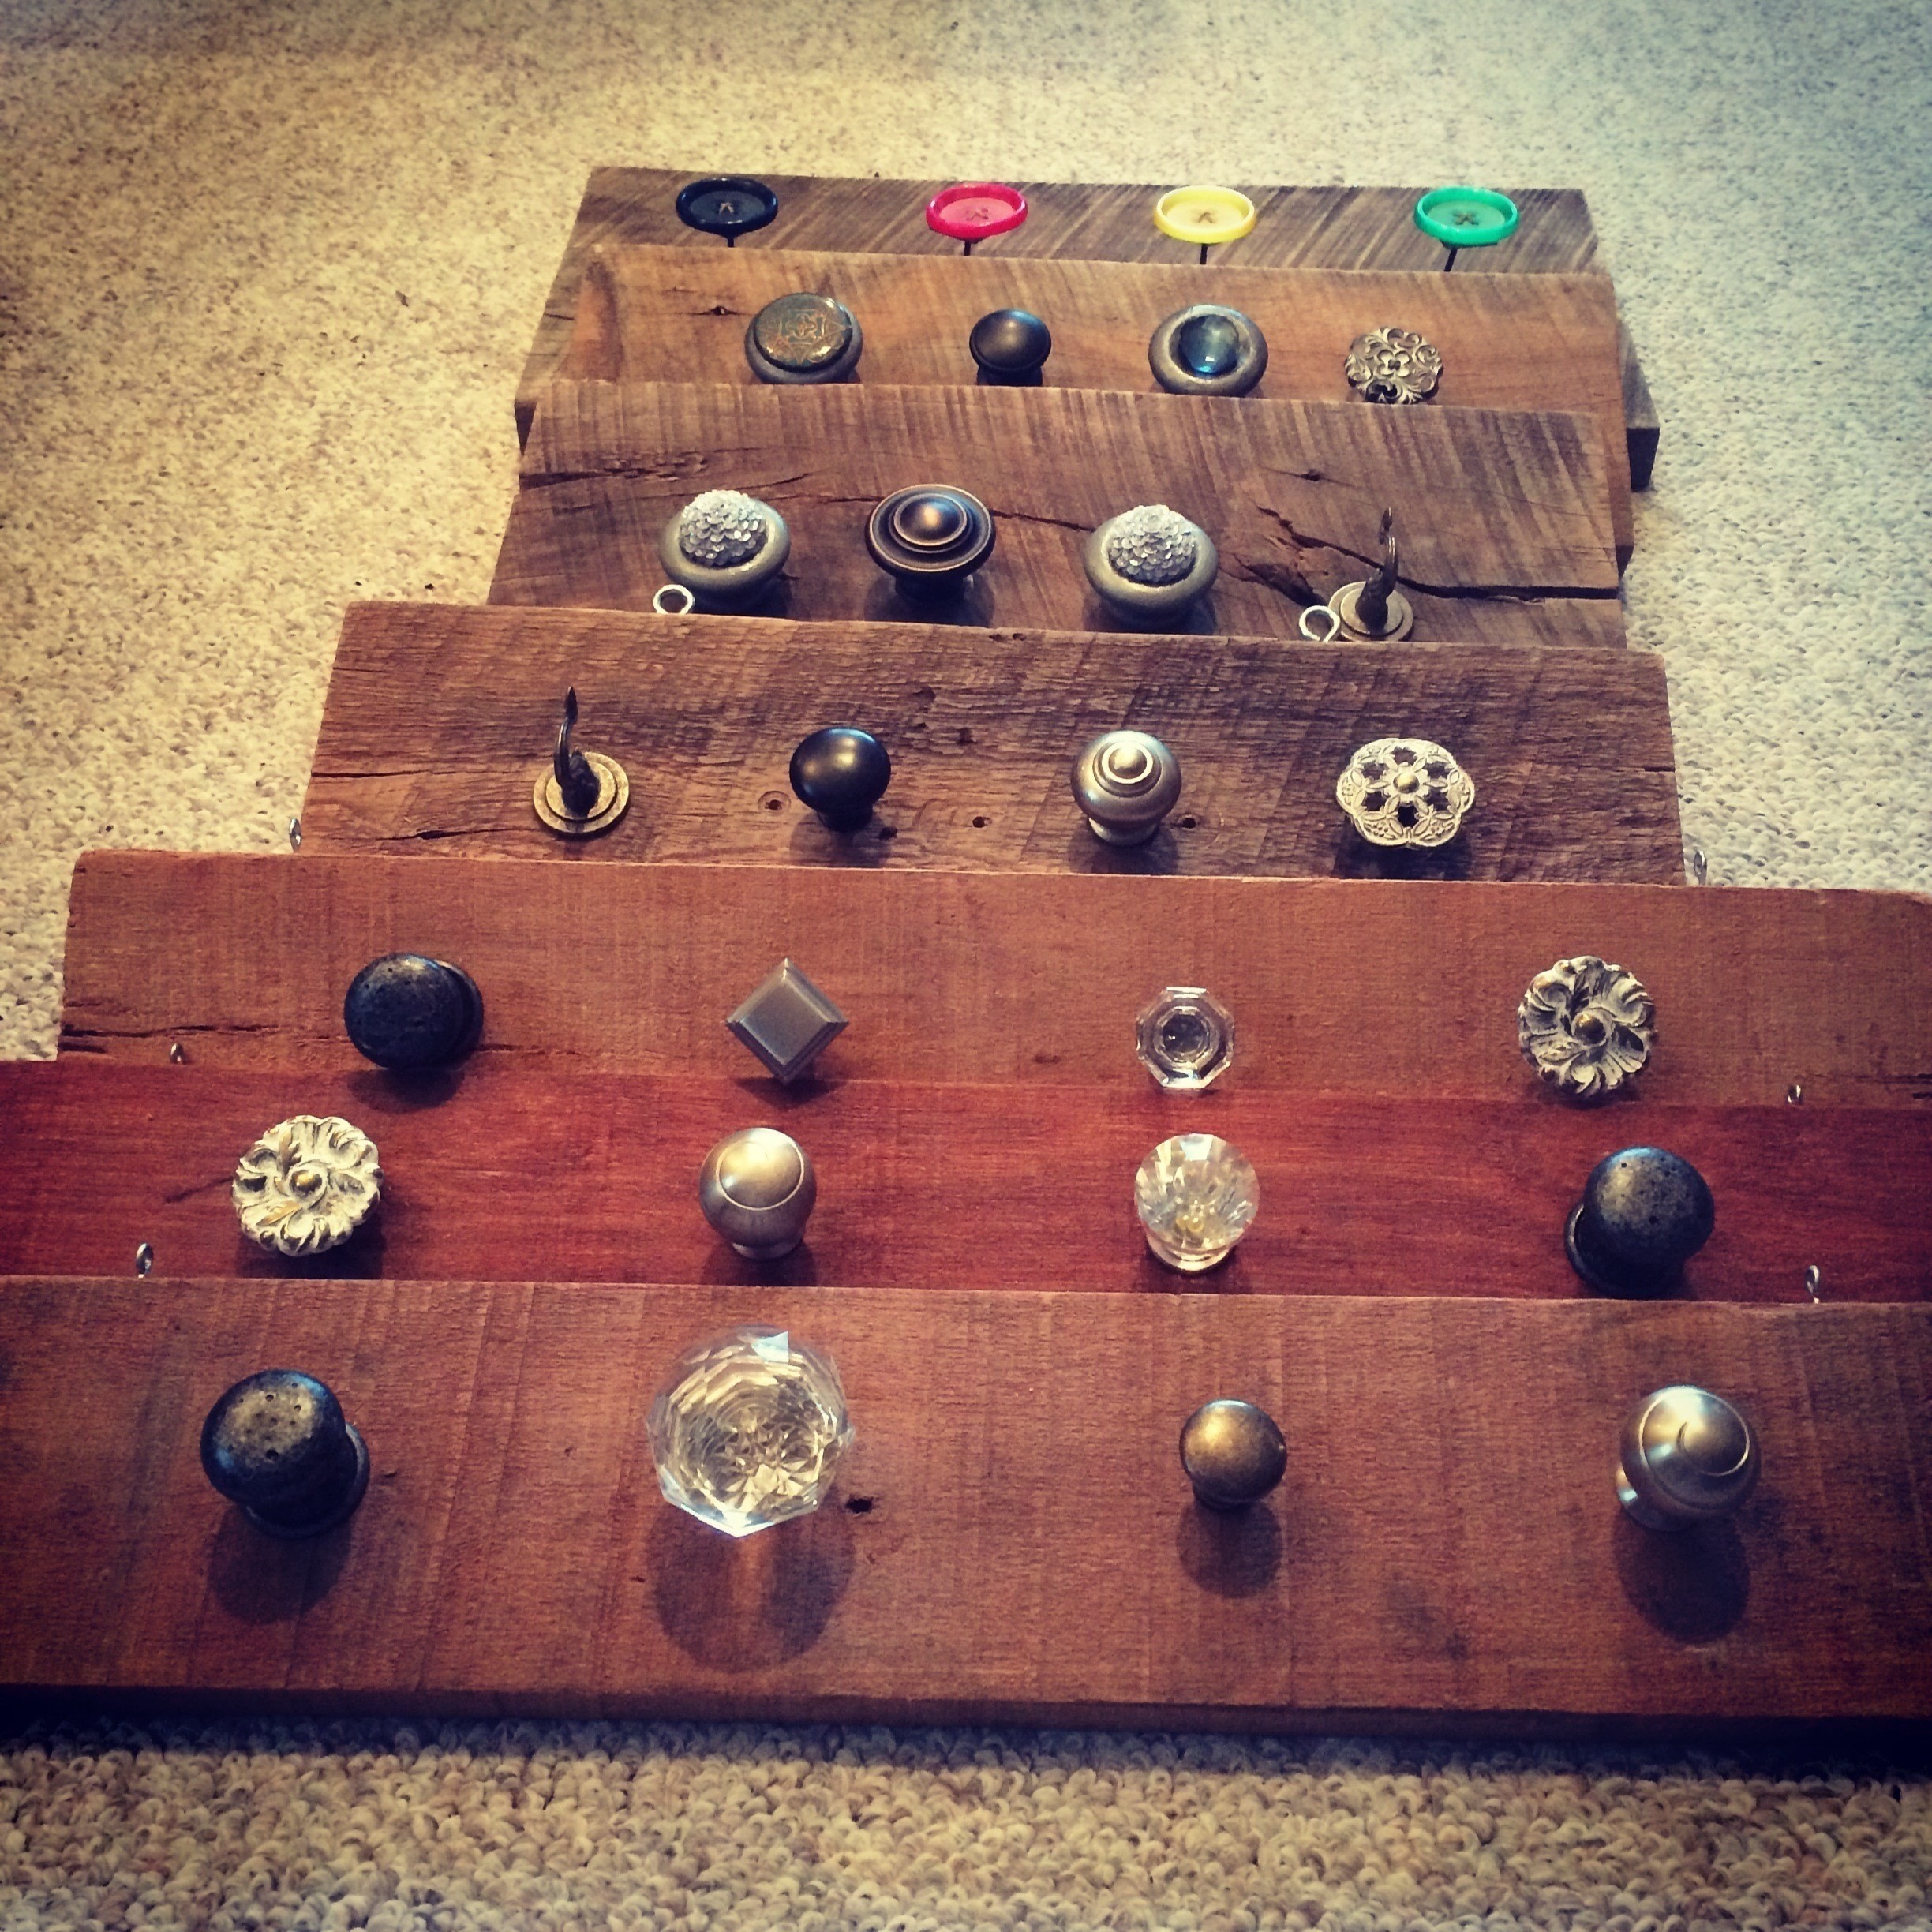
Now you can add your drawer pulls. Use a variety of pulls. You can source these from a hardware store, garage sales, thrift stores, old furniture, etc.
-
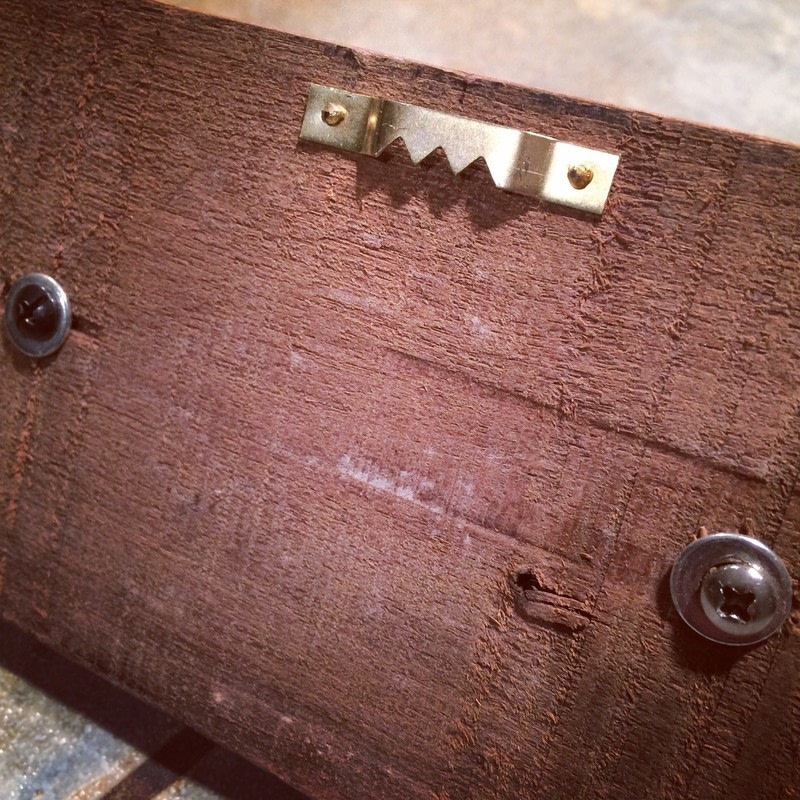
 Step 6
For hanging you have two options. You can add a bracket to the back. Keep in mind the weight of your organizer and what you're hanging on it.
-
 Step 7
You can also use larger screw-in eyelets. Drill a small hole then screw these in - either along the top of your organizer or in the back. You can then use wire, rope or a chain to hang it from the eyelets.
-
 Step 8
If you want to create one-of-a-kind drawer pulls you can take boring Ikea pulls and restyle them. You can do this by painting them, gluing pieces of old jewelry to the top, etc.
-
 Step 9
Or you can use buttons. I glued funky thrift store buttons to cap nails for this organizer. So much fun and the perfect gift for a fellow crafter/maker.